MCP Server
Connect NocoDB to Large Language Models (LLMs) via the Model Context Protocol (MCP).
The Model Context Protocol (MCP) Server lets you connect NocoDB with LLMs that support MCP, such as Claude, Cursor, or Windsurf. With this integration, LLMs can interact directly with your NocoDB base to create, query, update, and manage records.
Desktop LLM Clients
Each MCP endpoint in NocoDB provides a secure URL that can be linked to an MCP-compatible client. Once configured, the LLM can execute database operations in your workspace through natural language prompts.
MCP server exposes standard CRUD operations. These can be triggered conversationally, without writing SQL or scripts.
| Action | Purpose | Sample Prompt |
|---|---|---|
| Create | Add new records | Create a task named ‘Review Documentation’ |
| Read | Look up information | Show me all projects with deadlines this week |
| Update | Change existing data | Mark the status of Project X as completed & re-assign to John |
| Delete | Remove records | Remove all tasks assigned to John |
Server Configuration (NocoDB)
- Click on the Overview button in the left sidebar.
- Select the Settings tab.
- Select the Model Context Protocol
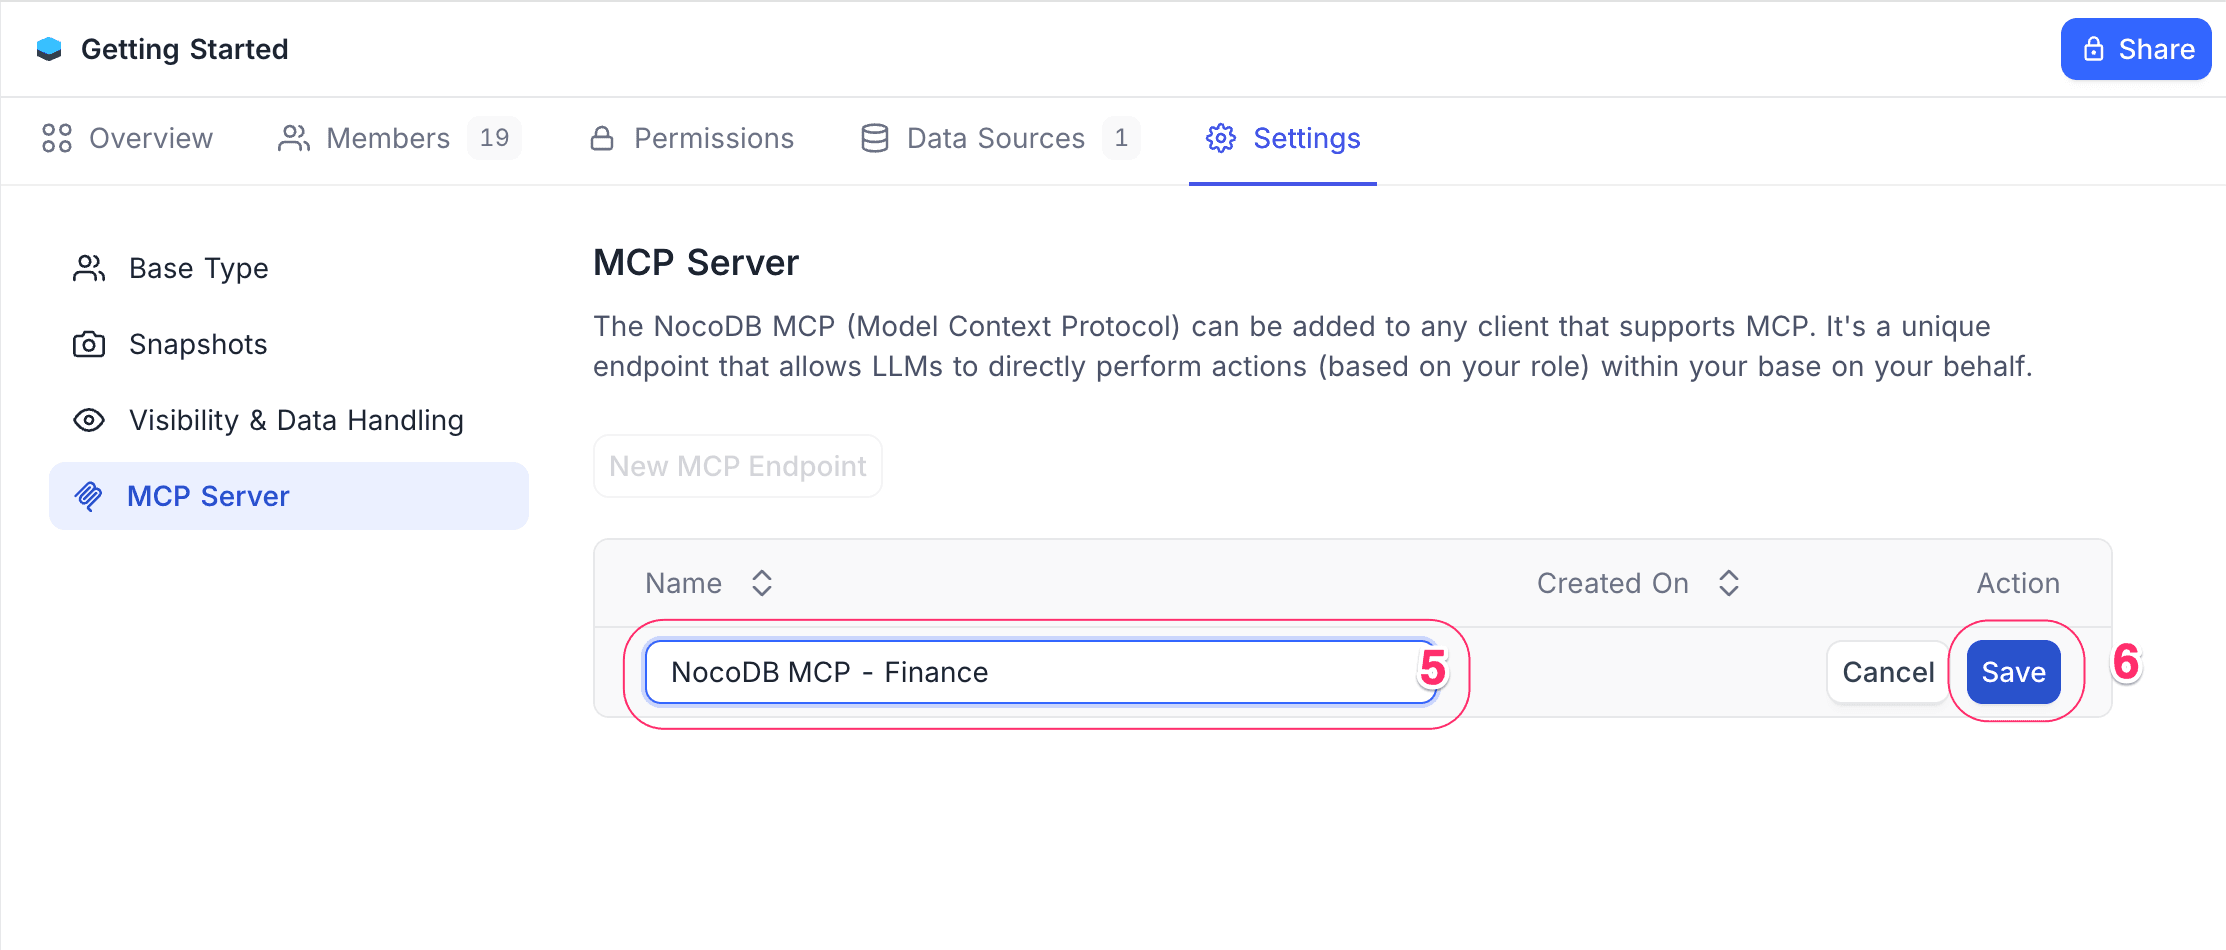
- Click on the New MCP Endpoint to create a new MCP config JSON for your base.
- Provide a name for the MCP endpoint
- Click Create to generate the MCP Config JSON.
- Copy the generated JSON configuration. This will be used in your LLM client configuration.

Client Configuration
Claude
- Open Claude Desktop Preferences (
⌘+,). - Under Develop, click Edit Config.
- Insert the JSON block copied here as
claude_desktop_config.json. - Save the file and restart Claude Desktop.
Cursor
- Go to Cursor Settings (
⇧+⌘+J). - Open the MCP tab and select Add Custom MCP.
- Paste the JSON block copied here. Save.
11 tools enabled below the MCP Server just installed. If you see an error, double-check the JSON configuration. 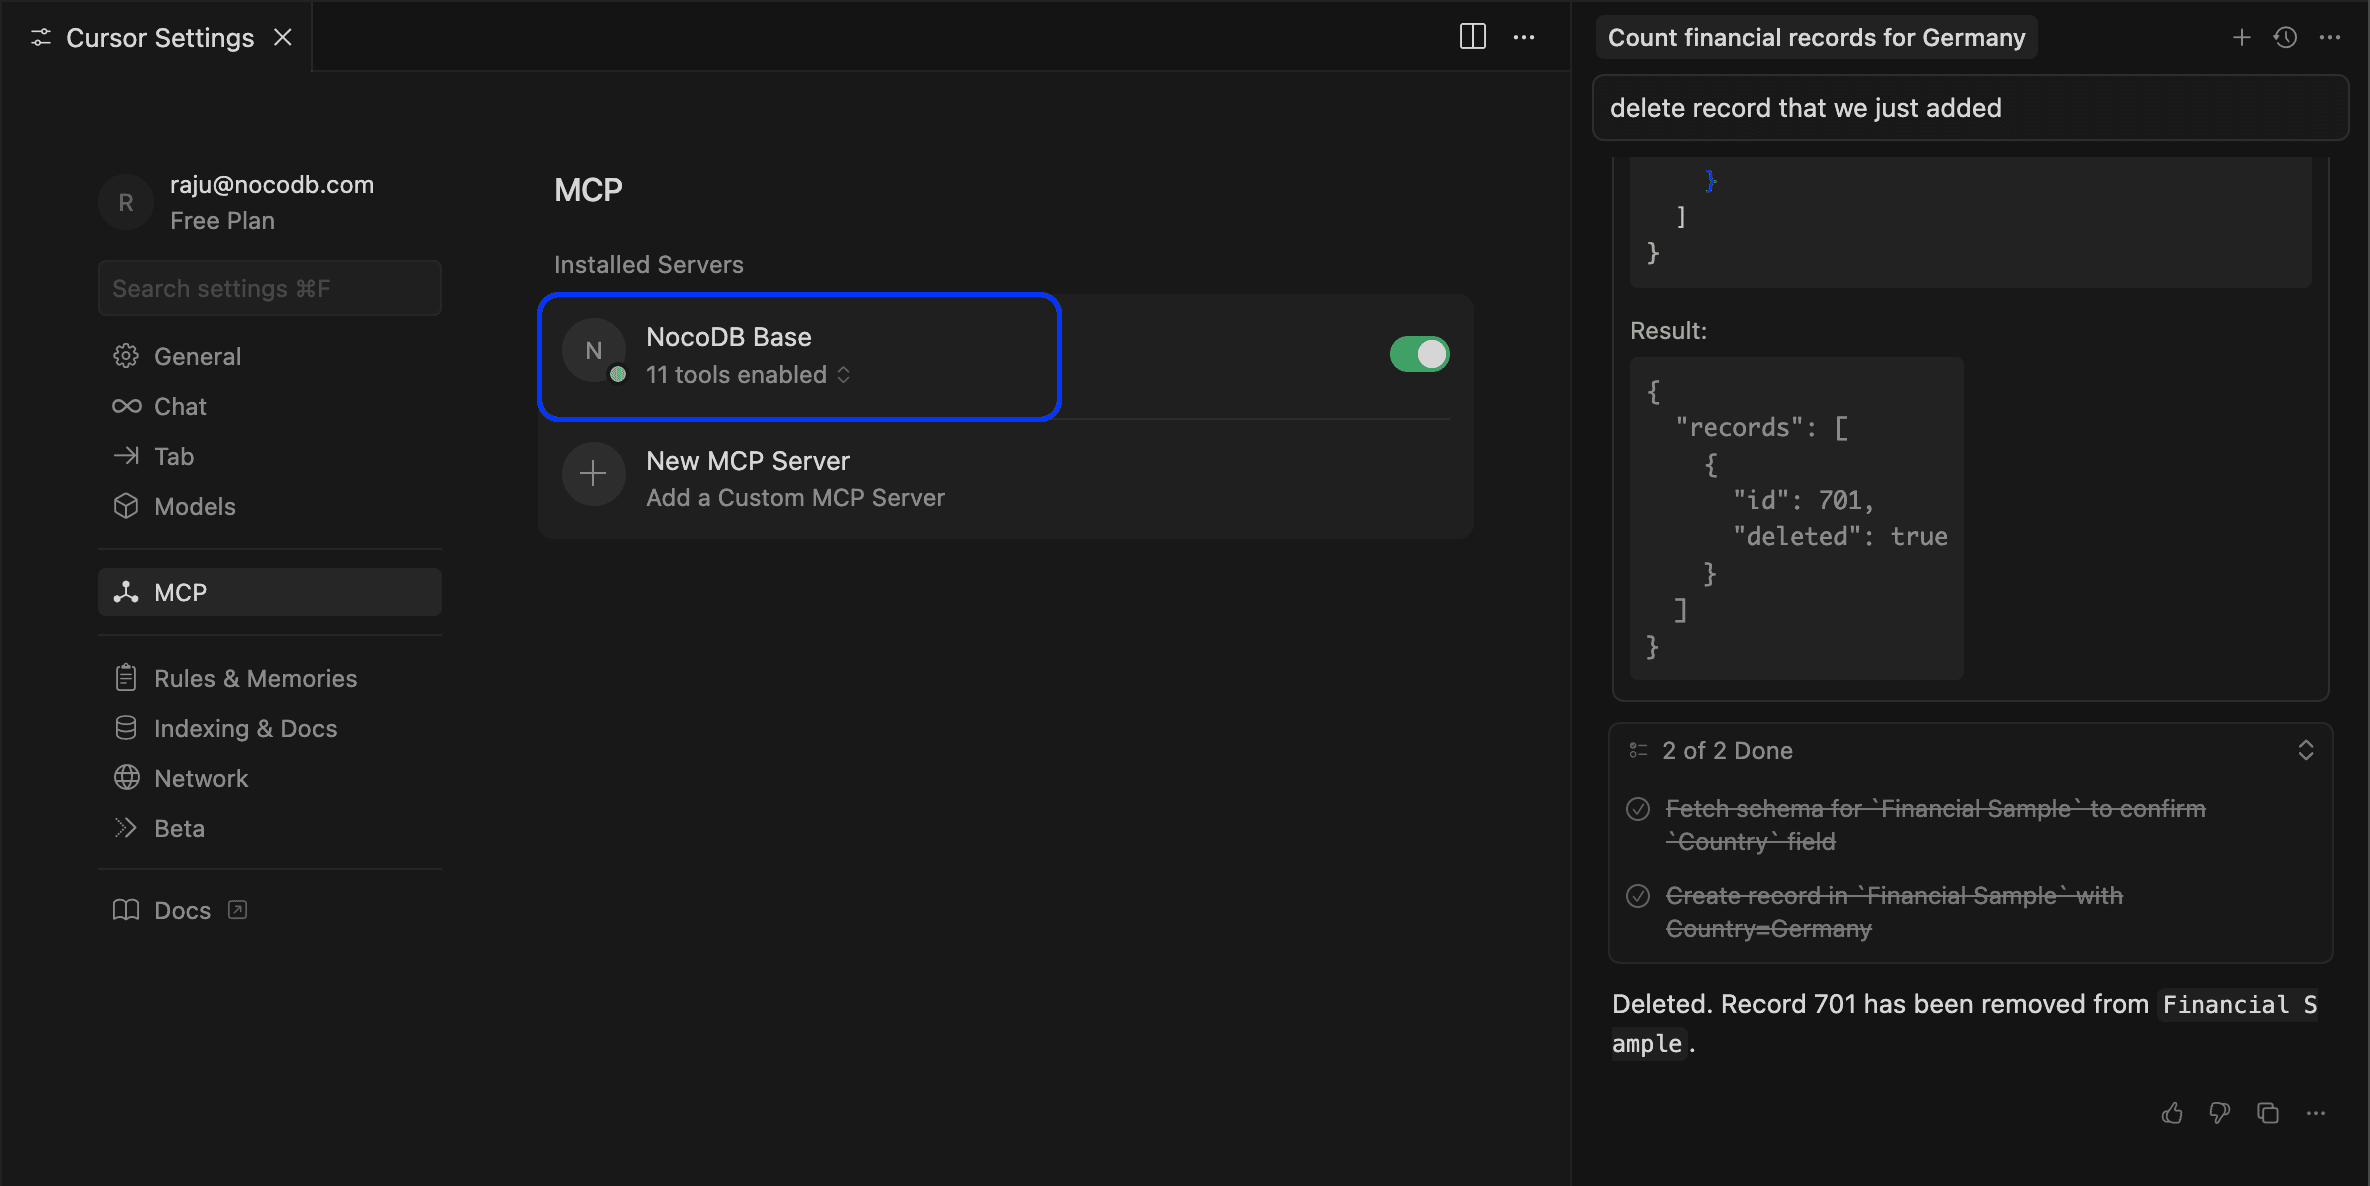
Windsurf
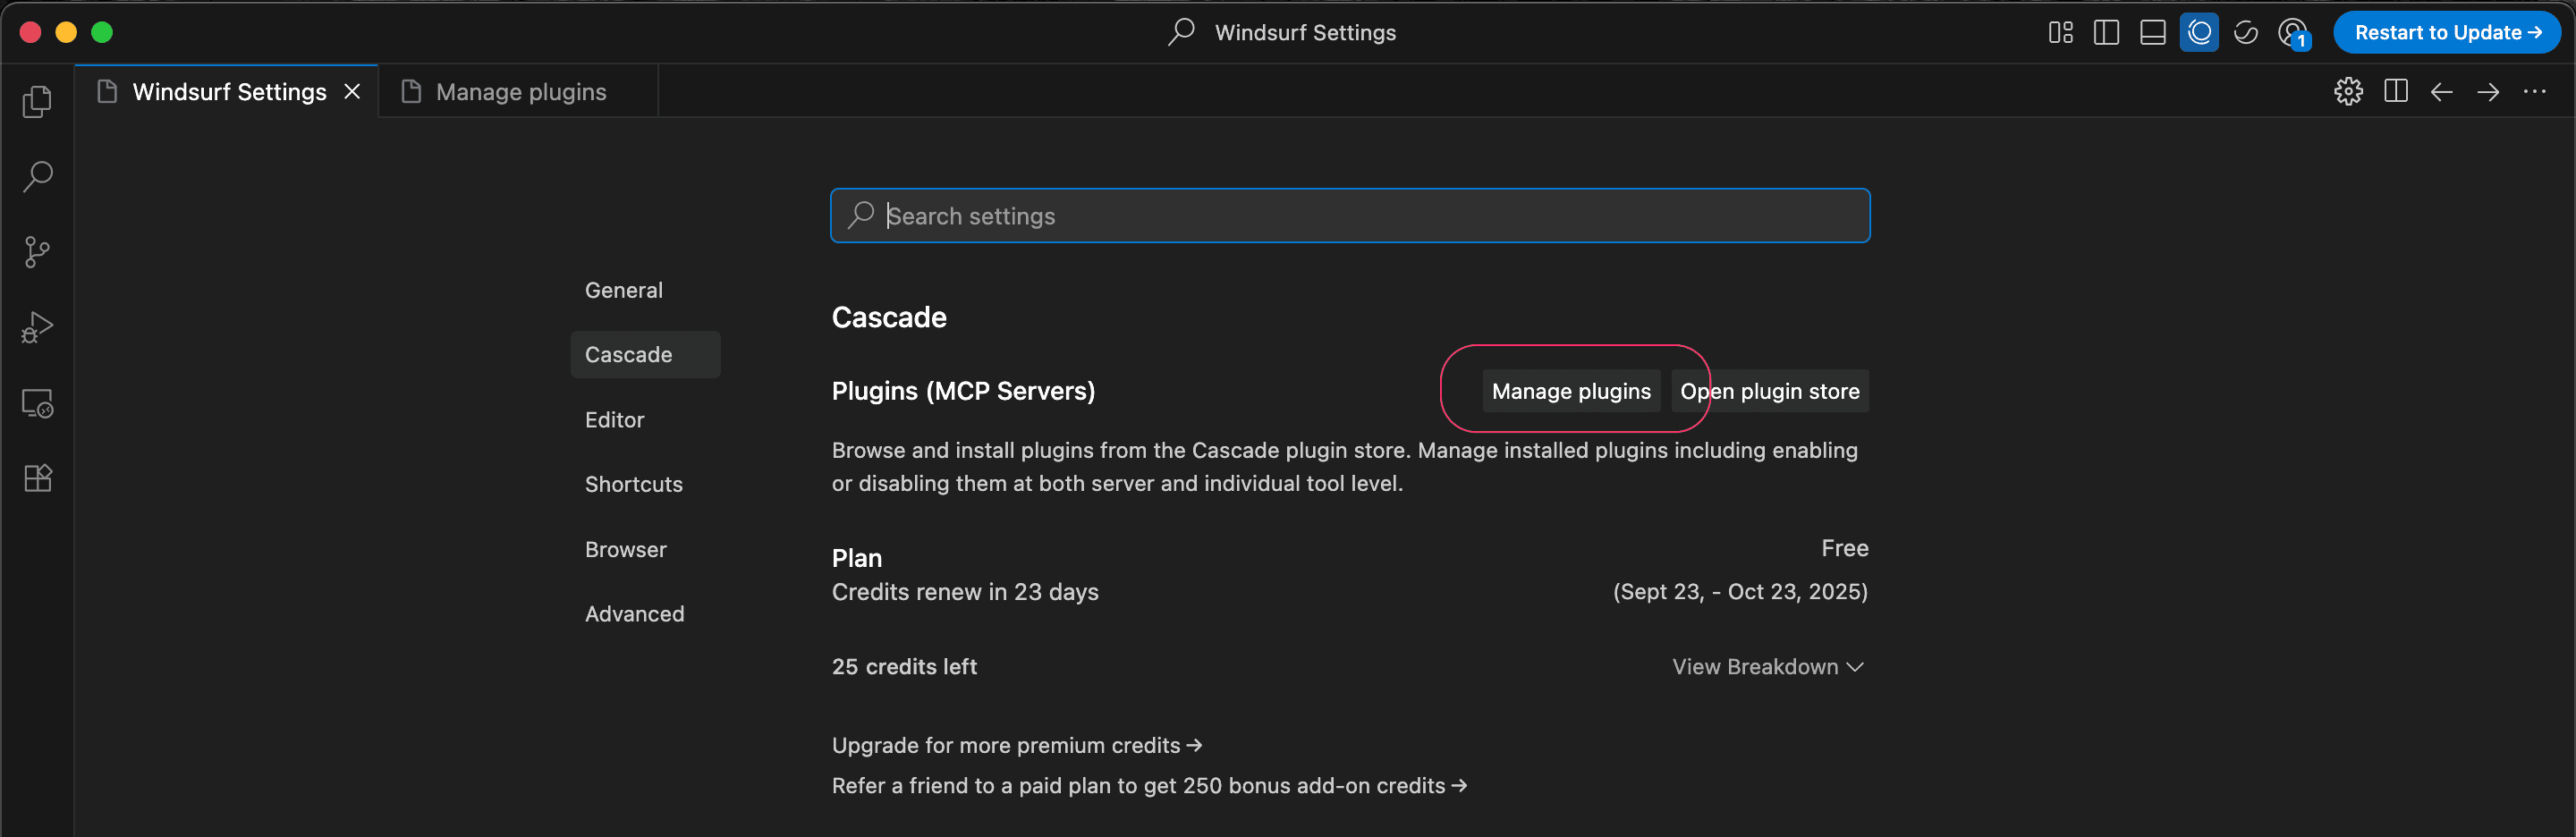
- Open Windsurf Settings (
⌘+,). - In the Cascade section >
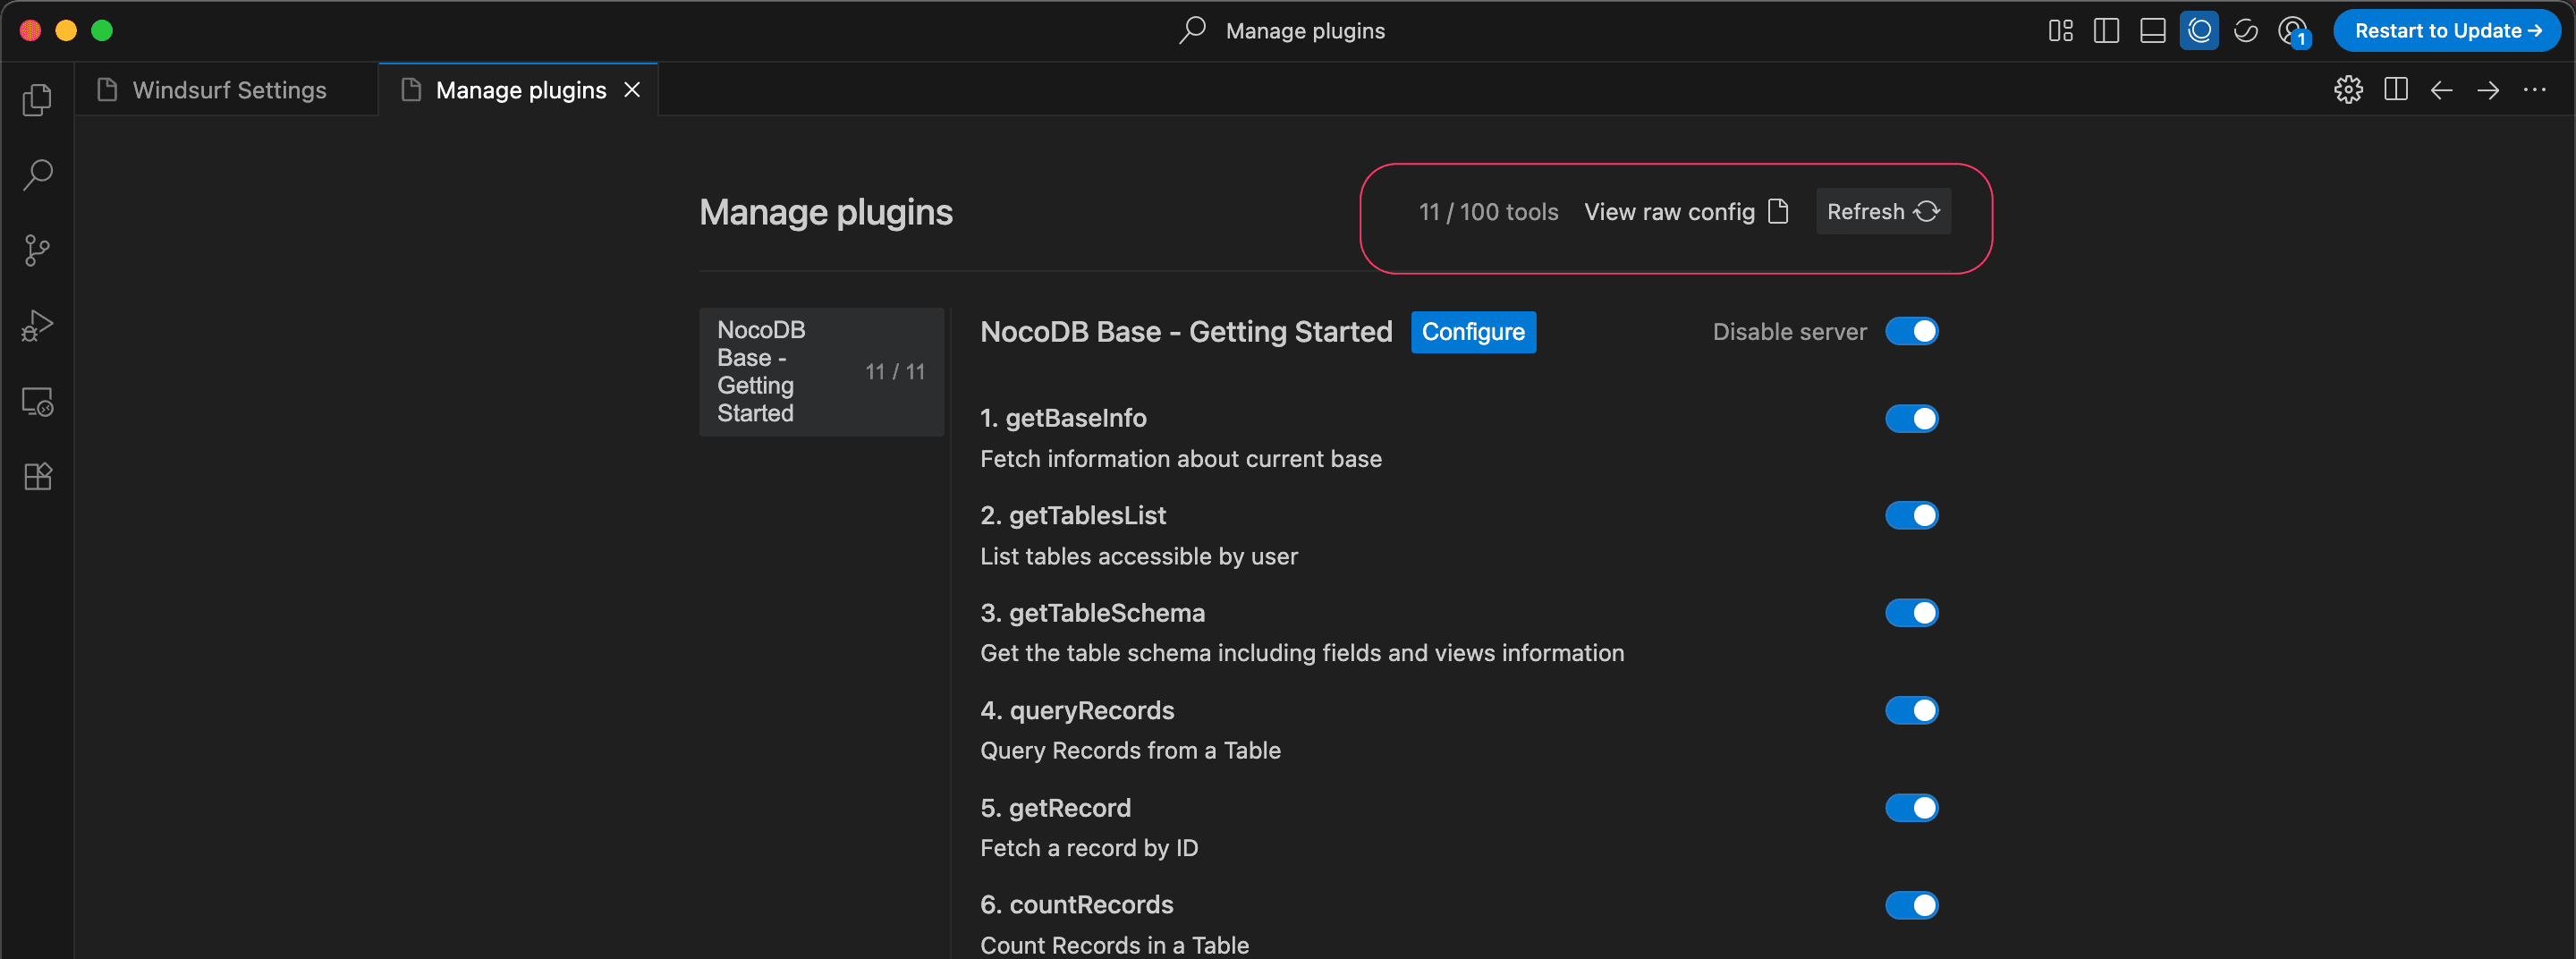
Plugins (MCP Server)> Click Manage Plugins - Paste the JSON block copied here. Save.
JSON Example
{
  "mcpServers": {
    "NocoDB MCP": {
      "command": "npx",
      "args": [
        "mcp-remote",
        "https://your-domain.com/mcp/<ncId>",
        "--header",
        "xc-mcp-token: <ncToken>"
      ]
    }
  }
}Web based LLM Clients (OAuth)
Connect NocoDB to web-based LLM applications using OAuth, enabling seamless database access directly from the browser without requiring desktop client setup. This approach grants granular permission controls and eliminates the need for manual JSON configuration.
Claude Web
OAuth-based integration allows Claude web users to access NocoDB databases through the connectors interface.
Setup Steps
- Click here to open Claude Web Settings in a new tab.
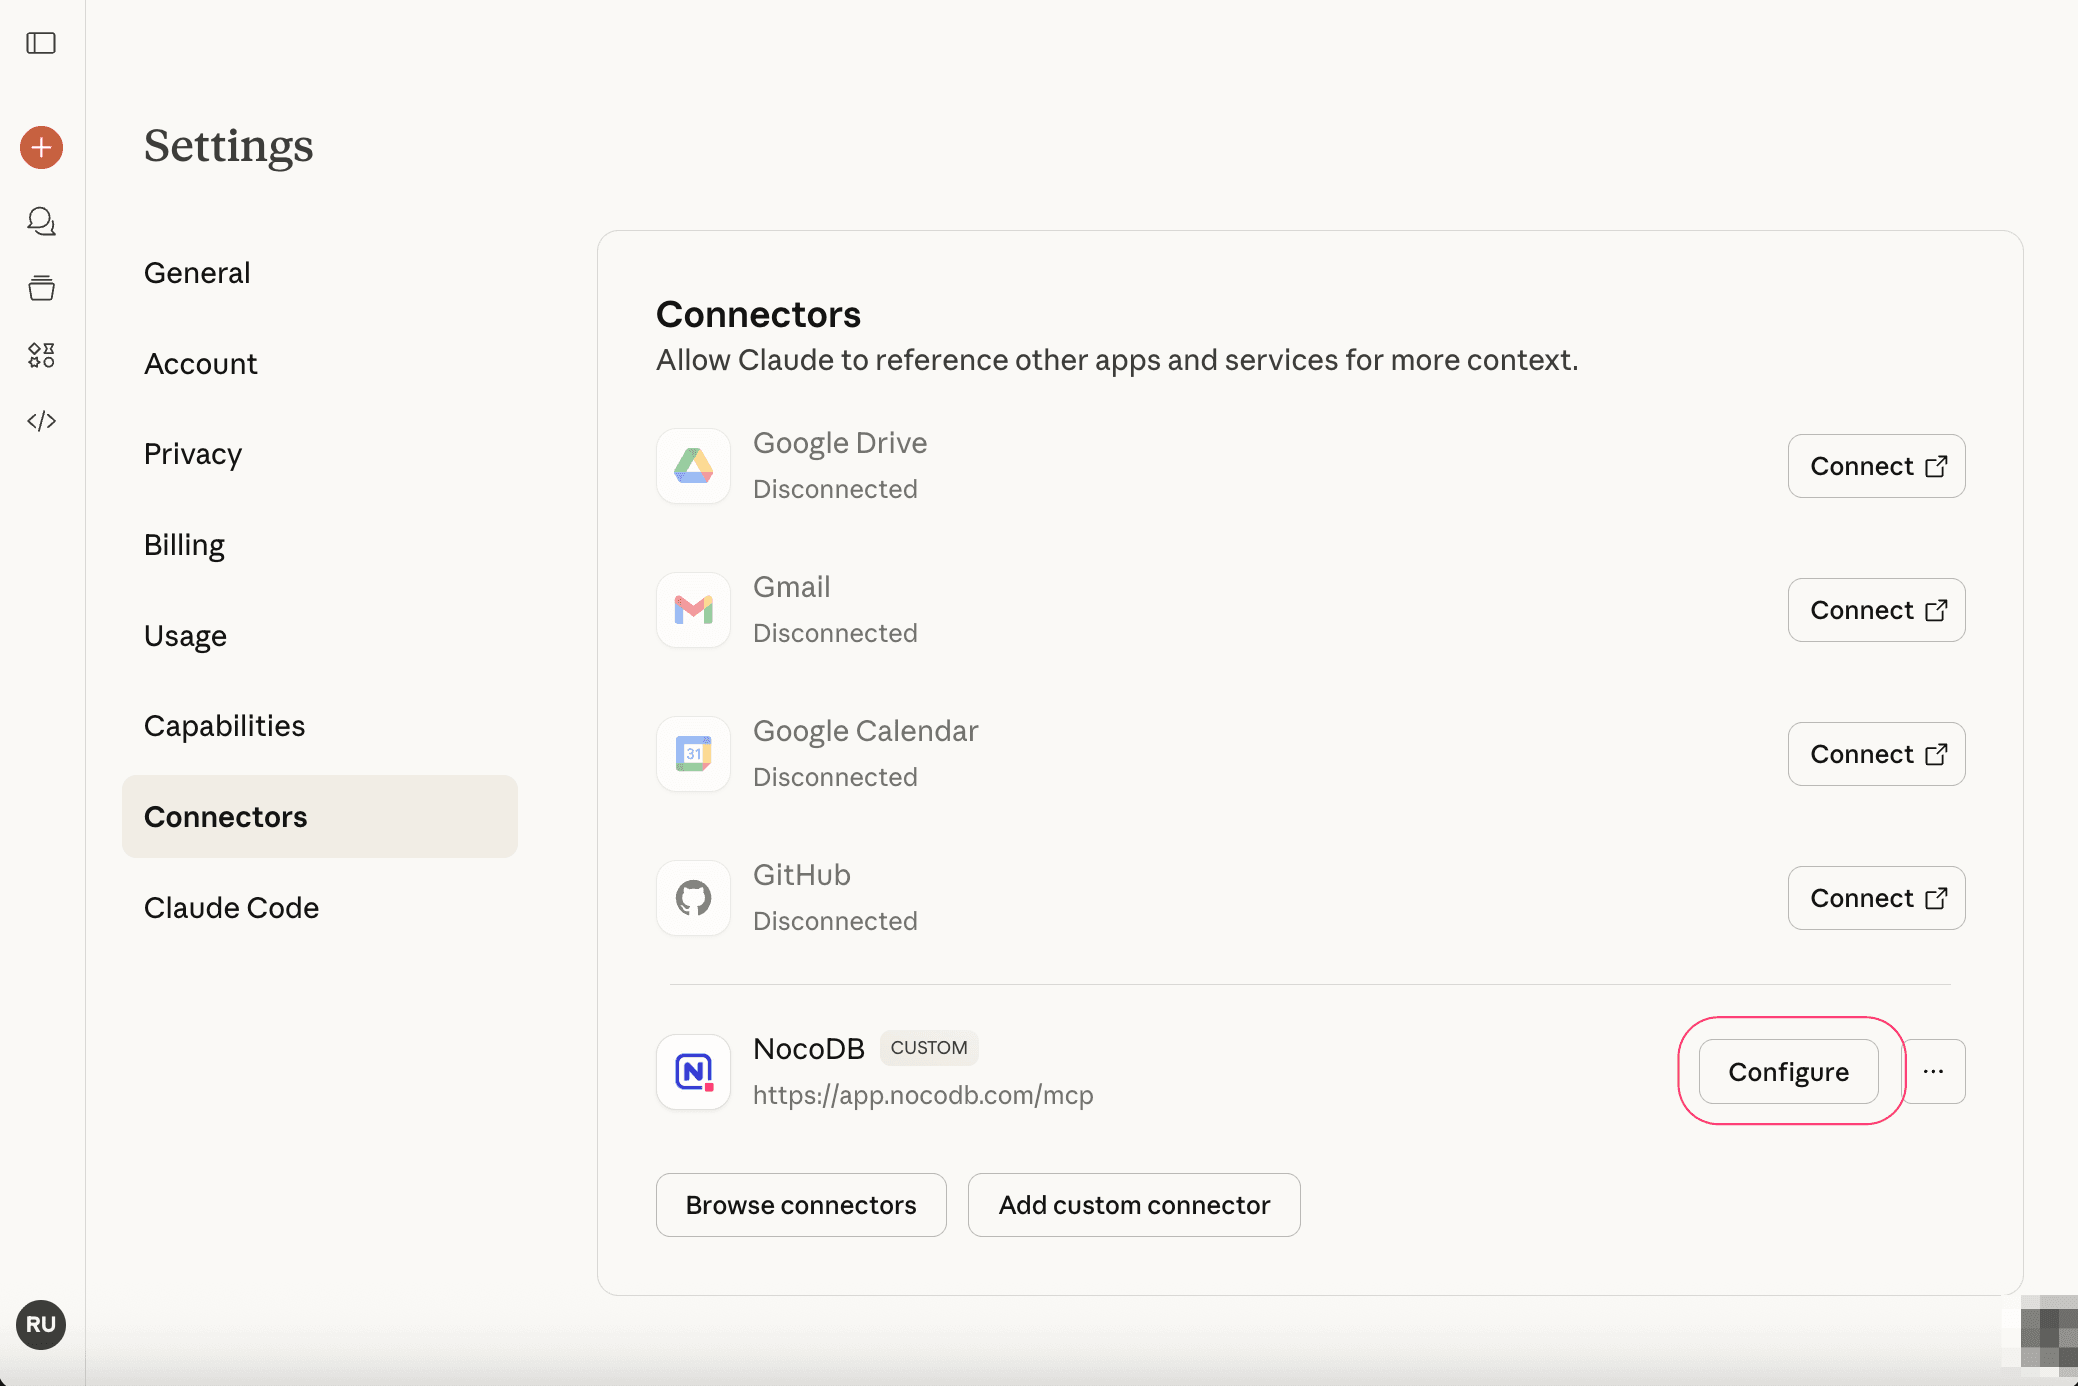
- Alternatively, navigate to Settings > Connectors from the Claude Web app.
- Click Add custom connector.
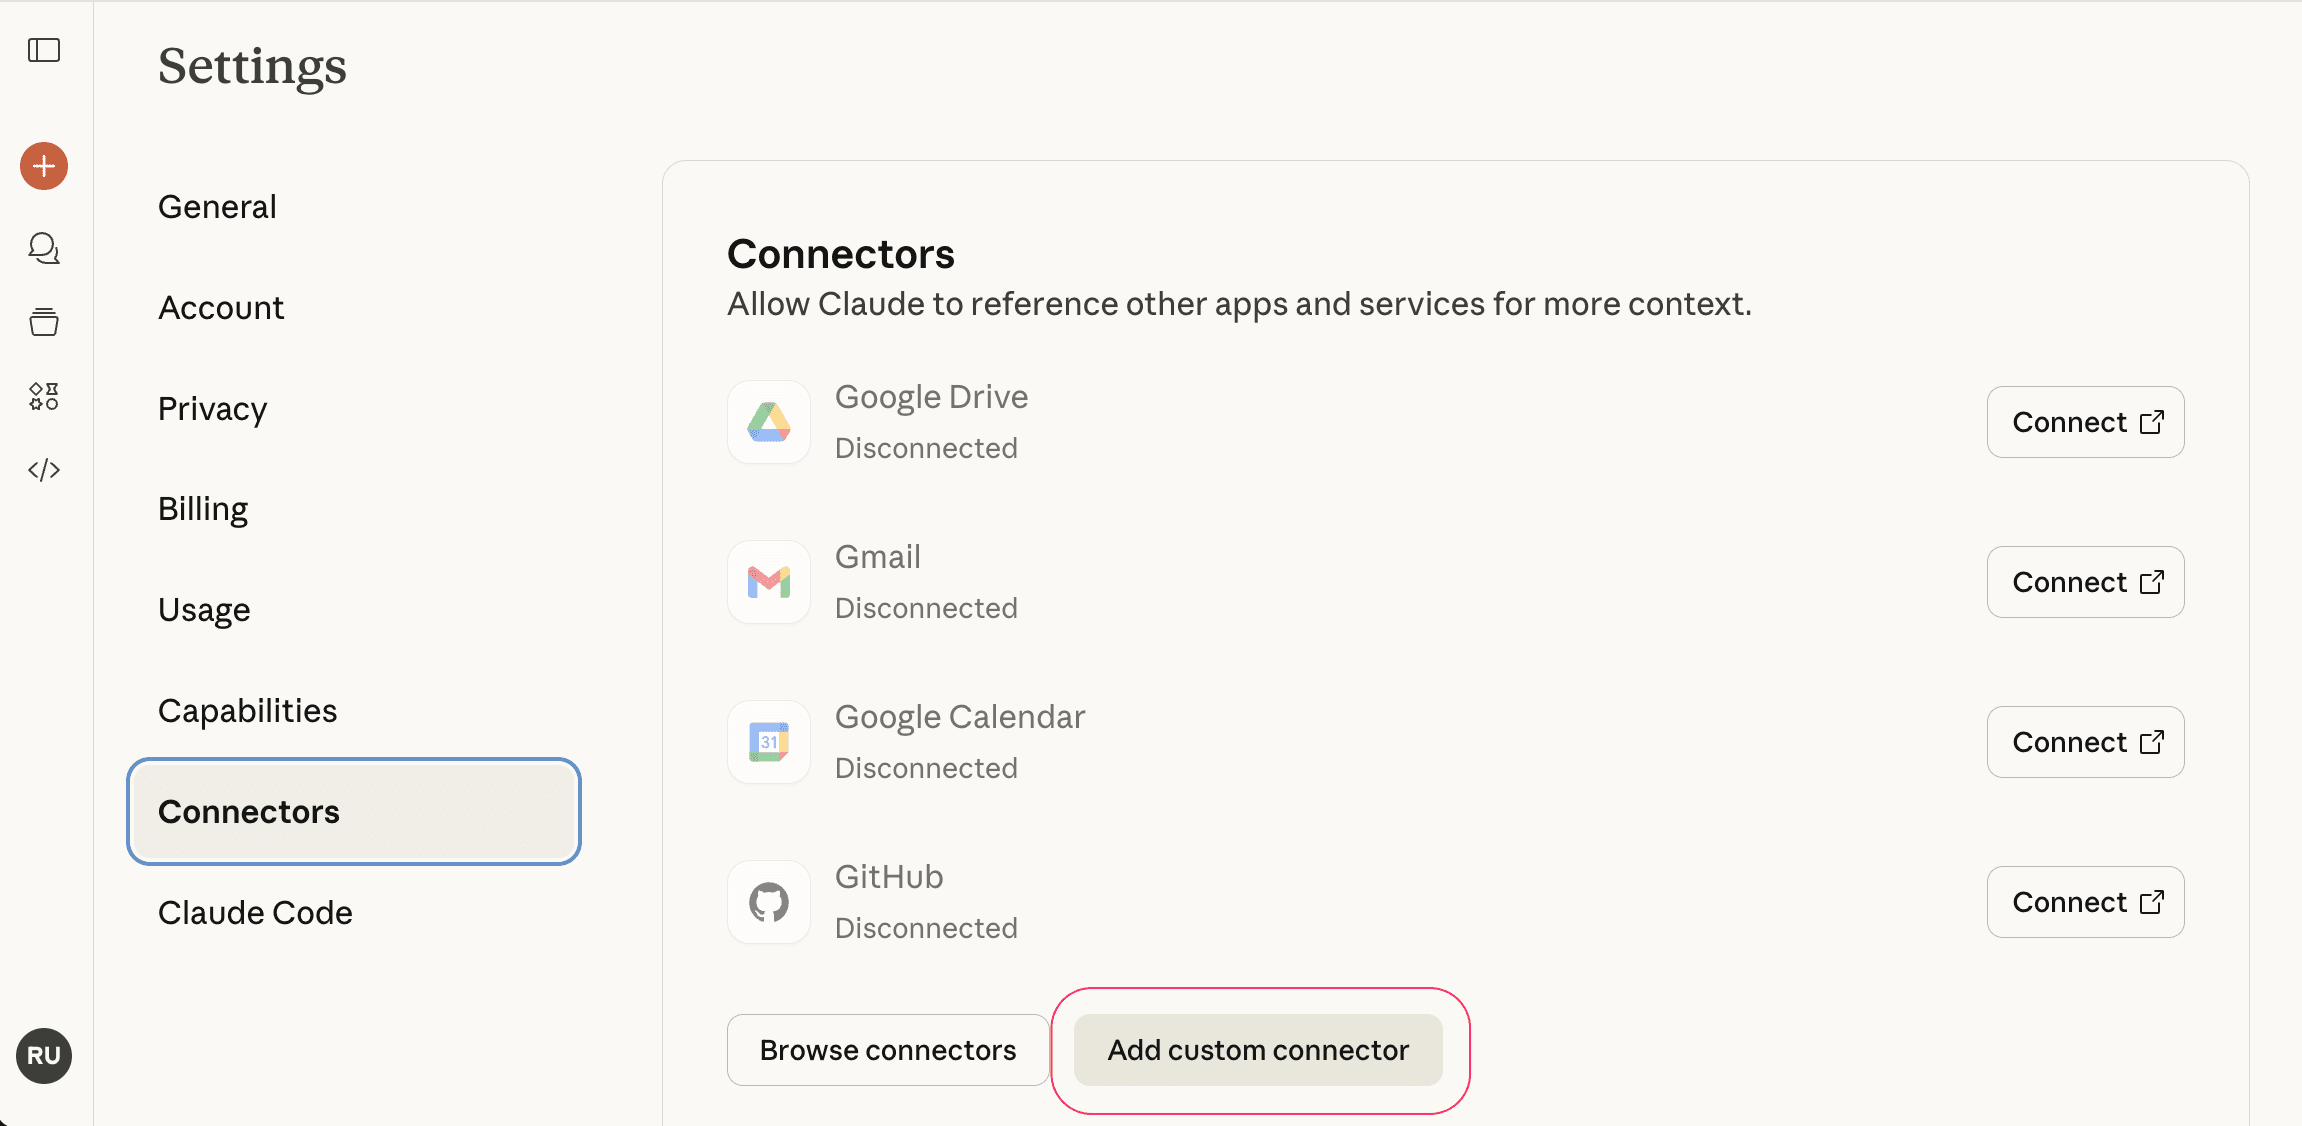
- In the "Add custom connector" dialog:
- Provide a connector name of your choice
- Enter the MCP endpoint URL:
https://app.nocodb.com/mcp - Click
Add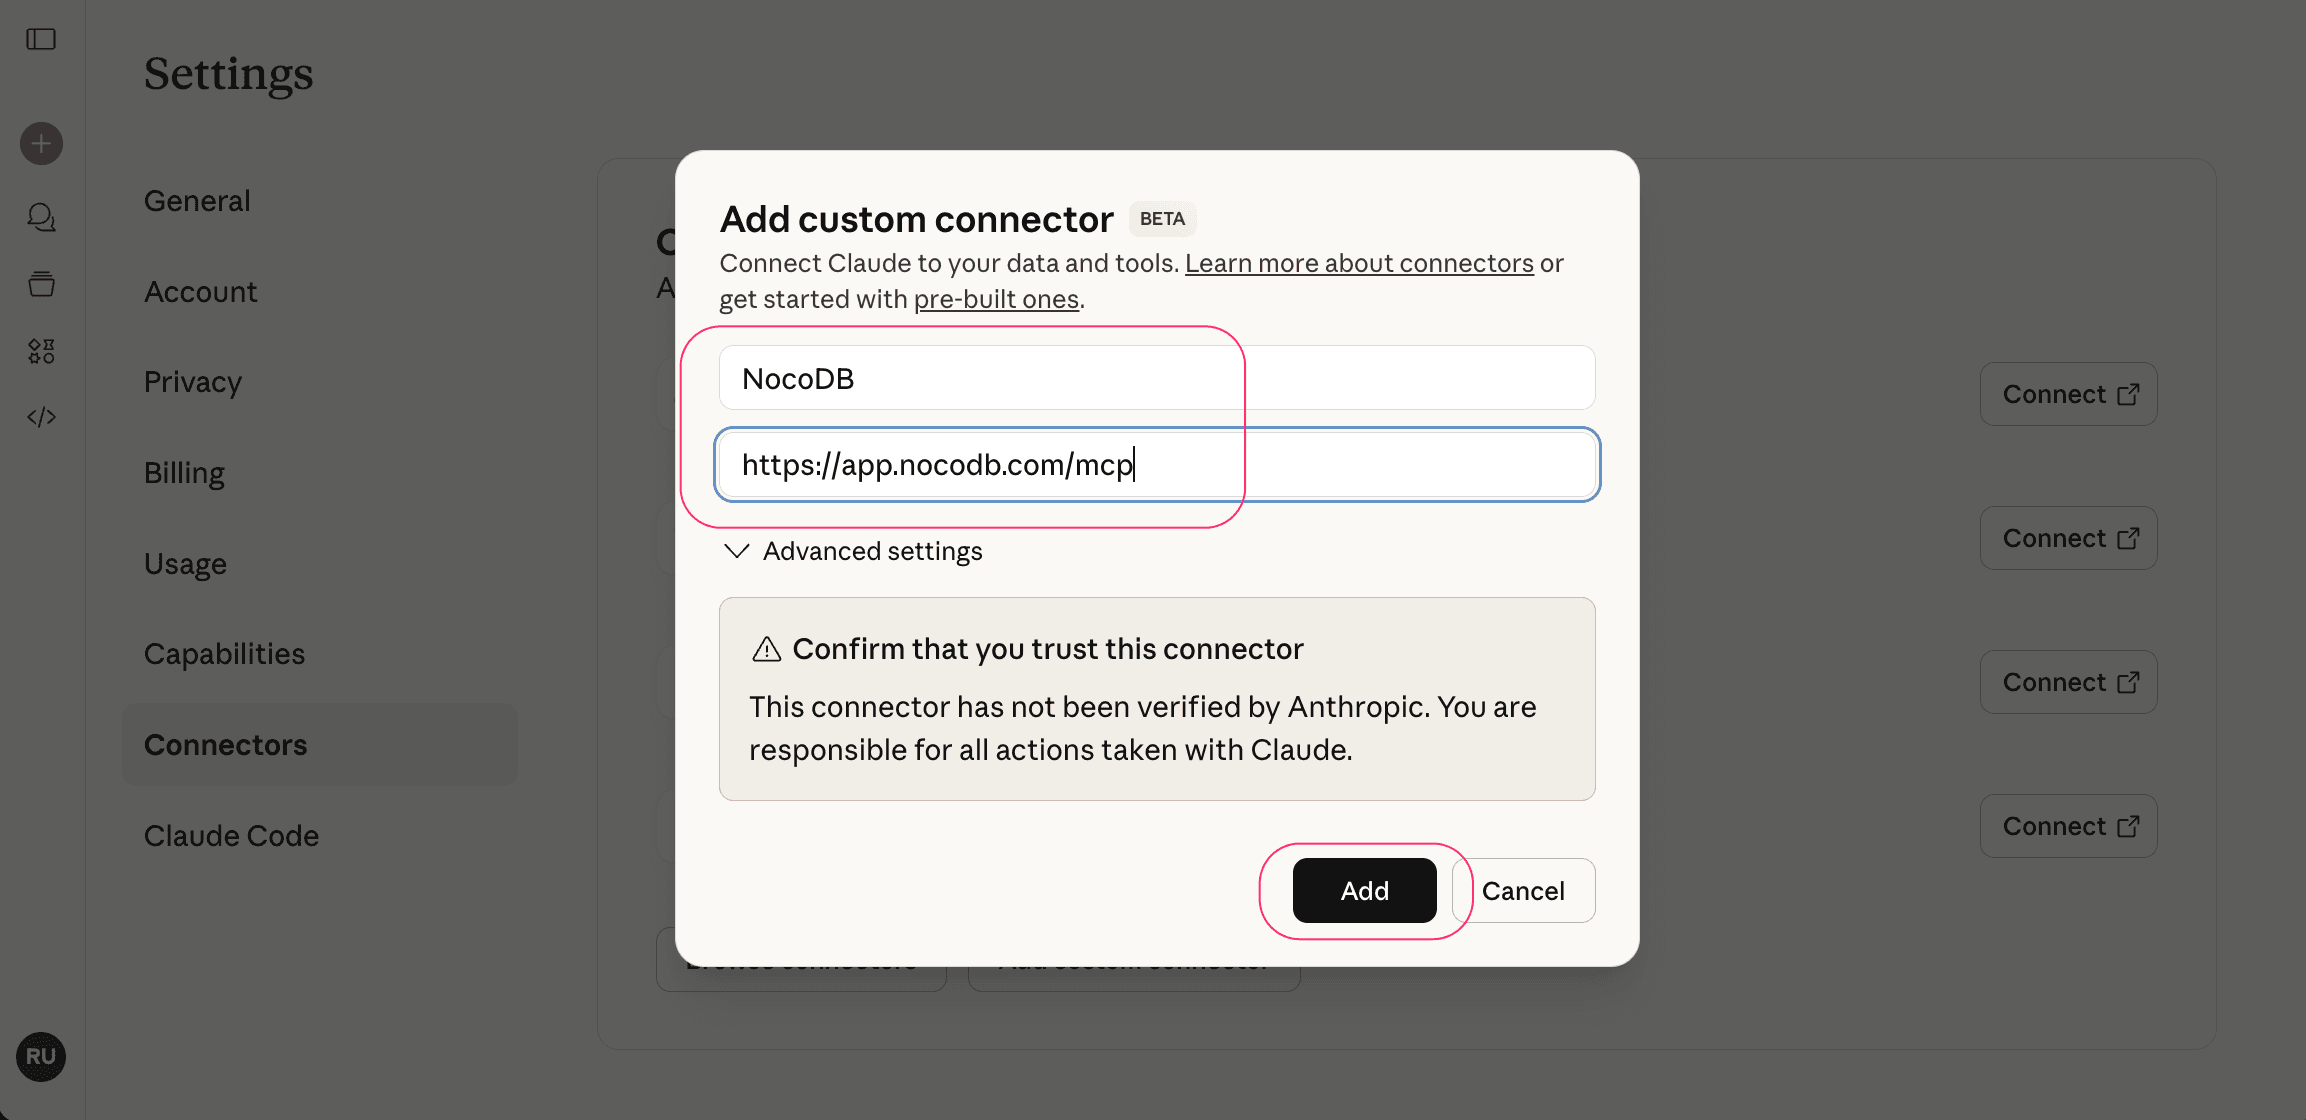
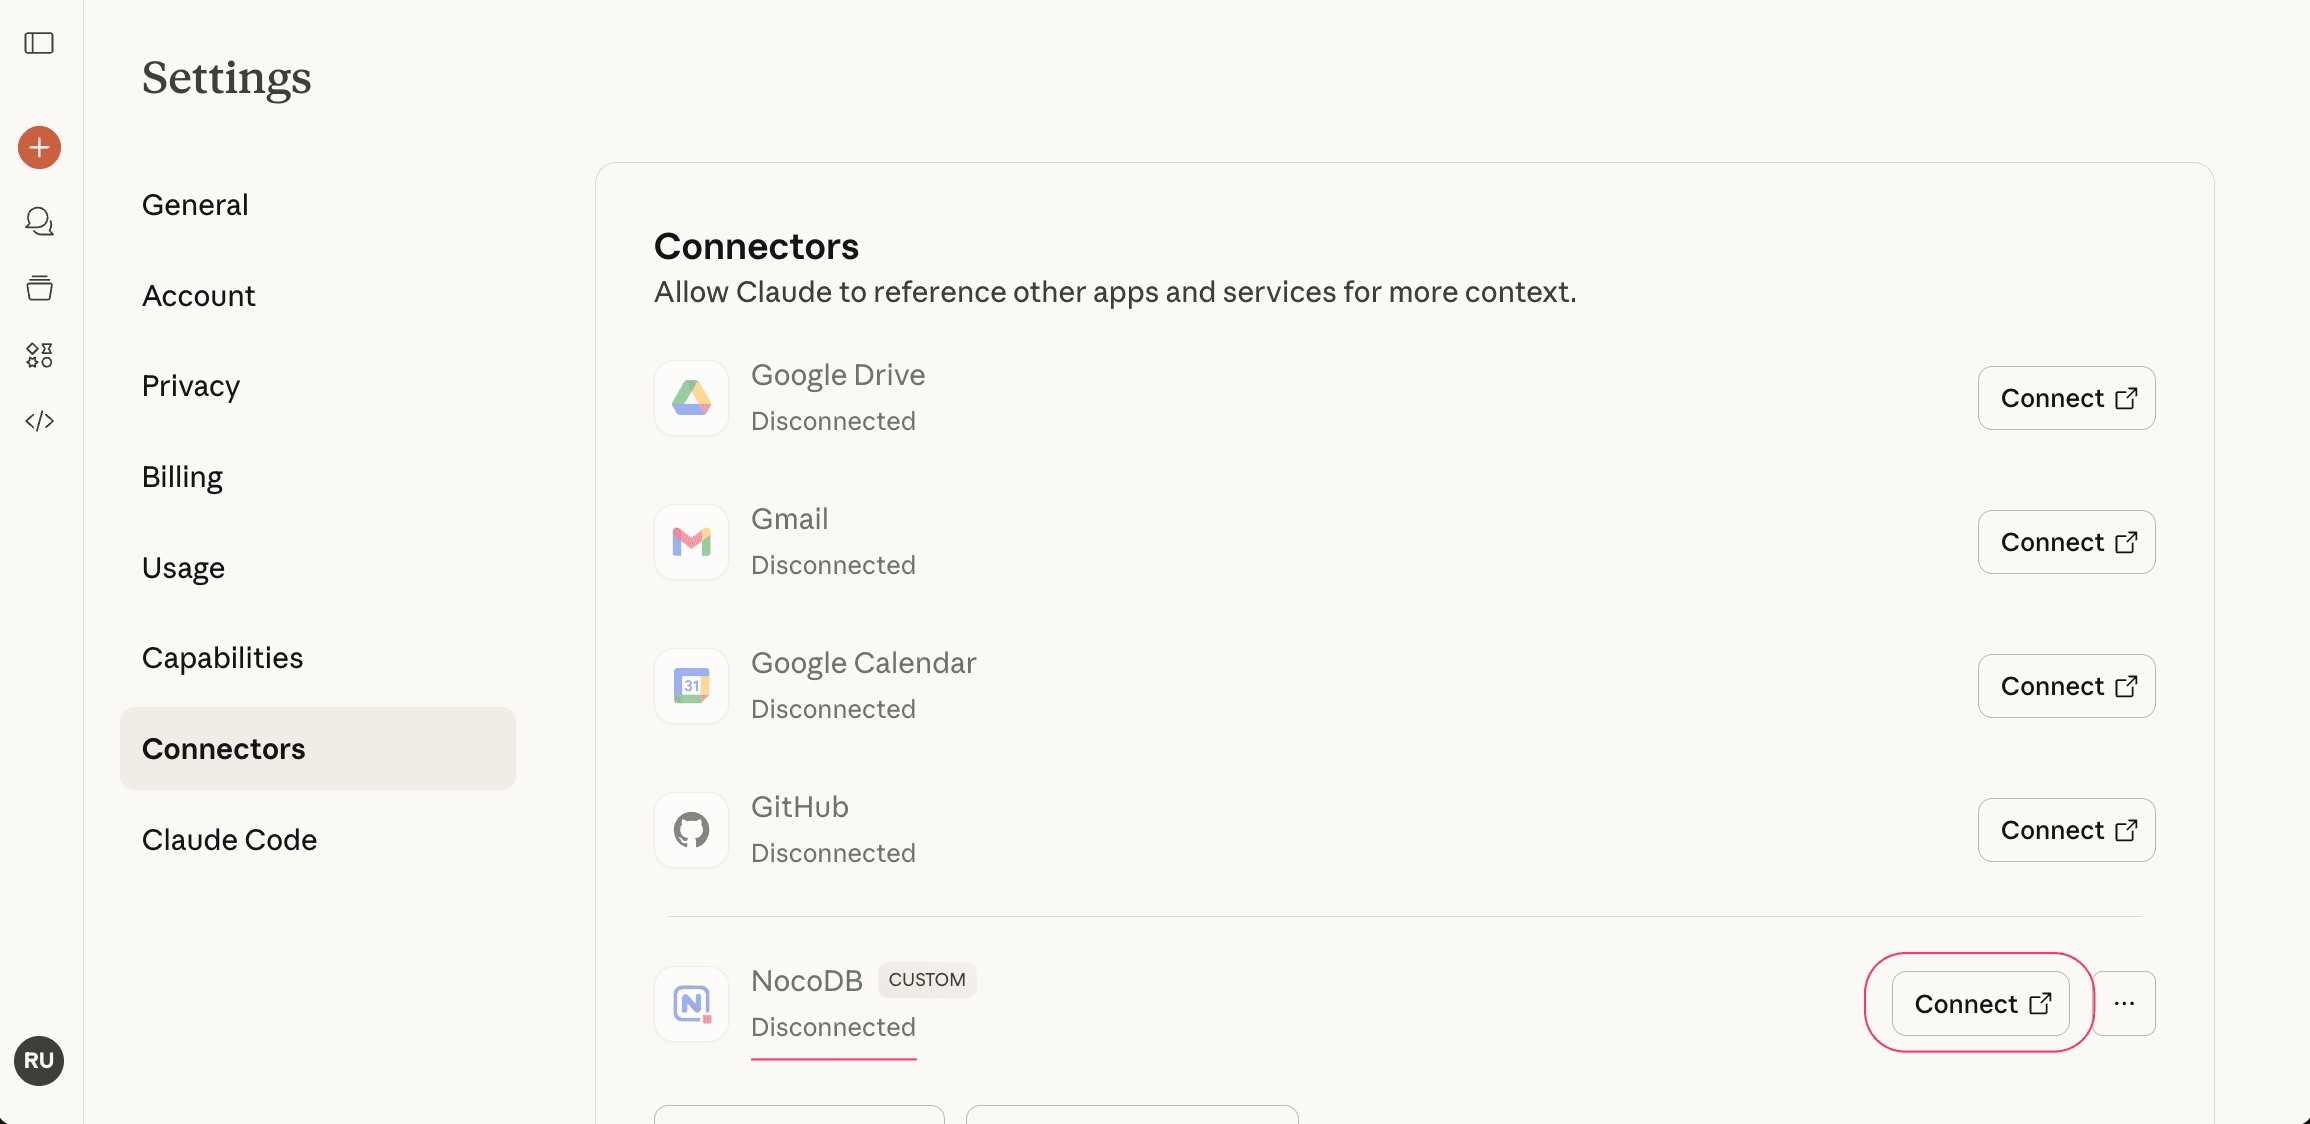
- NocoDB Connector will now be listed in "Disconnected" state. Click Connect to initiate the OAuth authorization flow (Opens in a new tab).
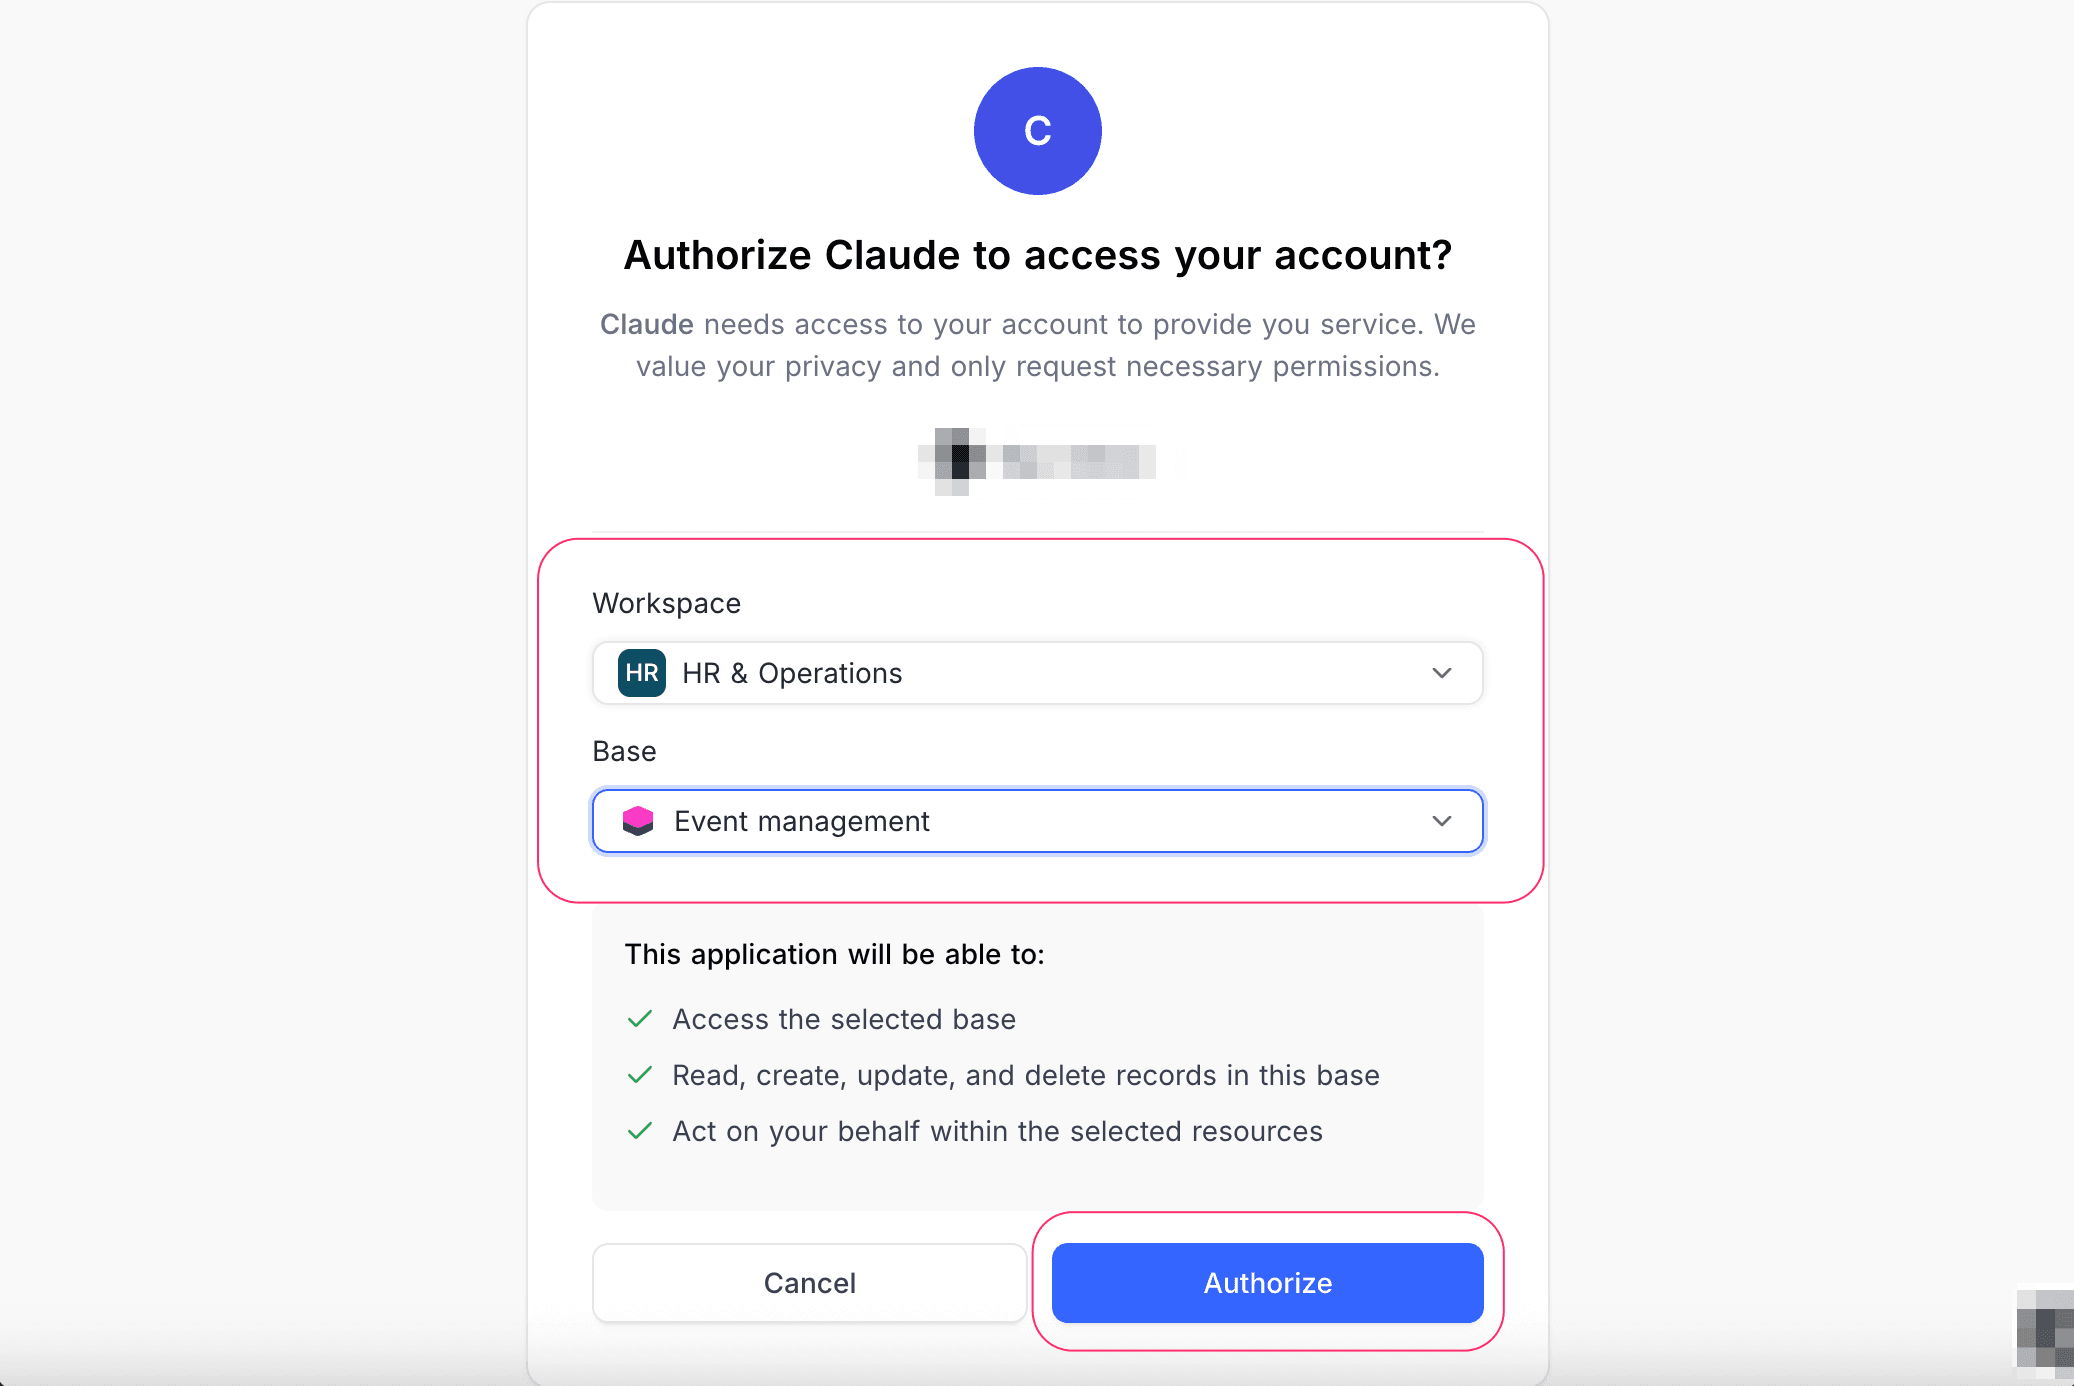
- Authorize Access
- You will be asked to log in to your NocoDB account (if not already logged in)
- Select the workspace and base you want to connect
- Confirm the permissions Claude will have
- Access the selected base
- Read / create / update / delete records in the selected base
- Act on your behalf within the selected resources
- Click Authorize to grant access
With this, the NocoDB connector will move to "Connected" state in Claude Web. You can now interact with your NocoDB data through Claude web application.
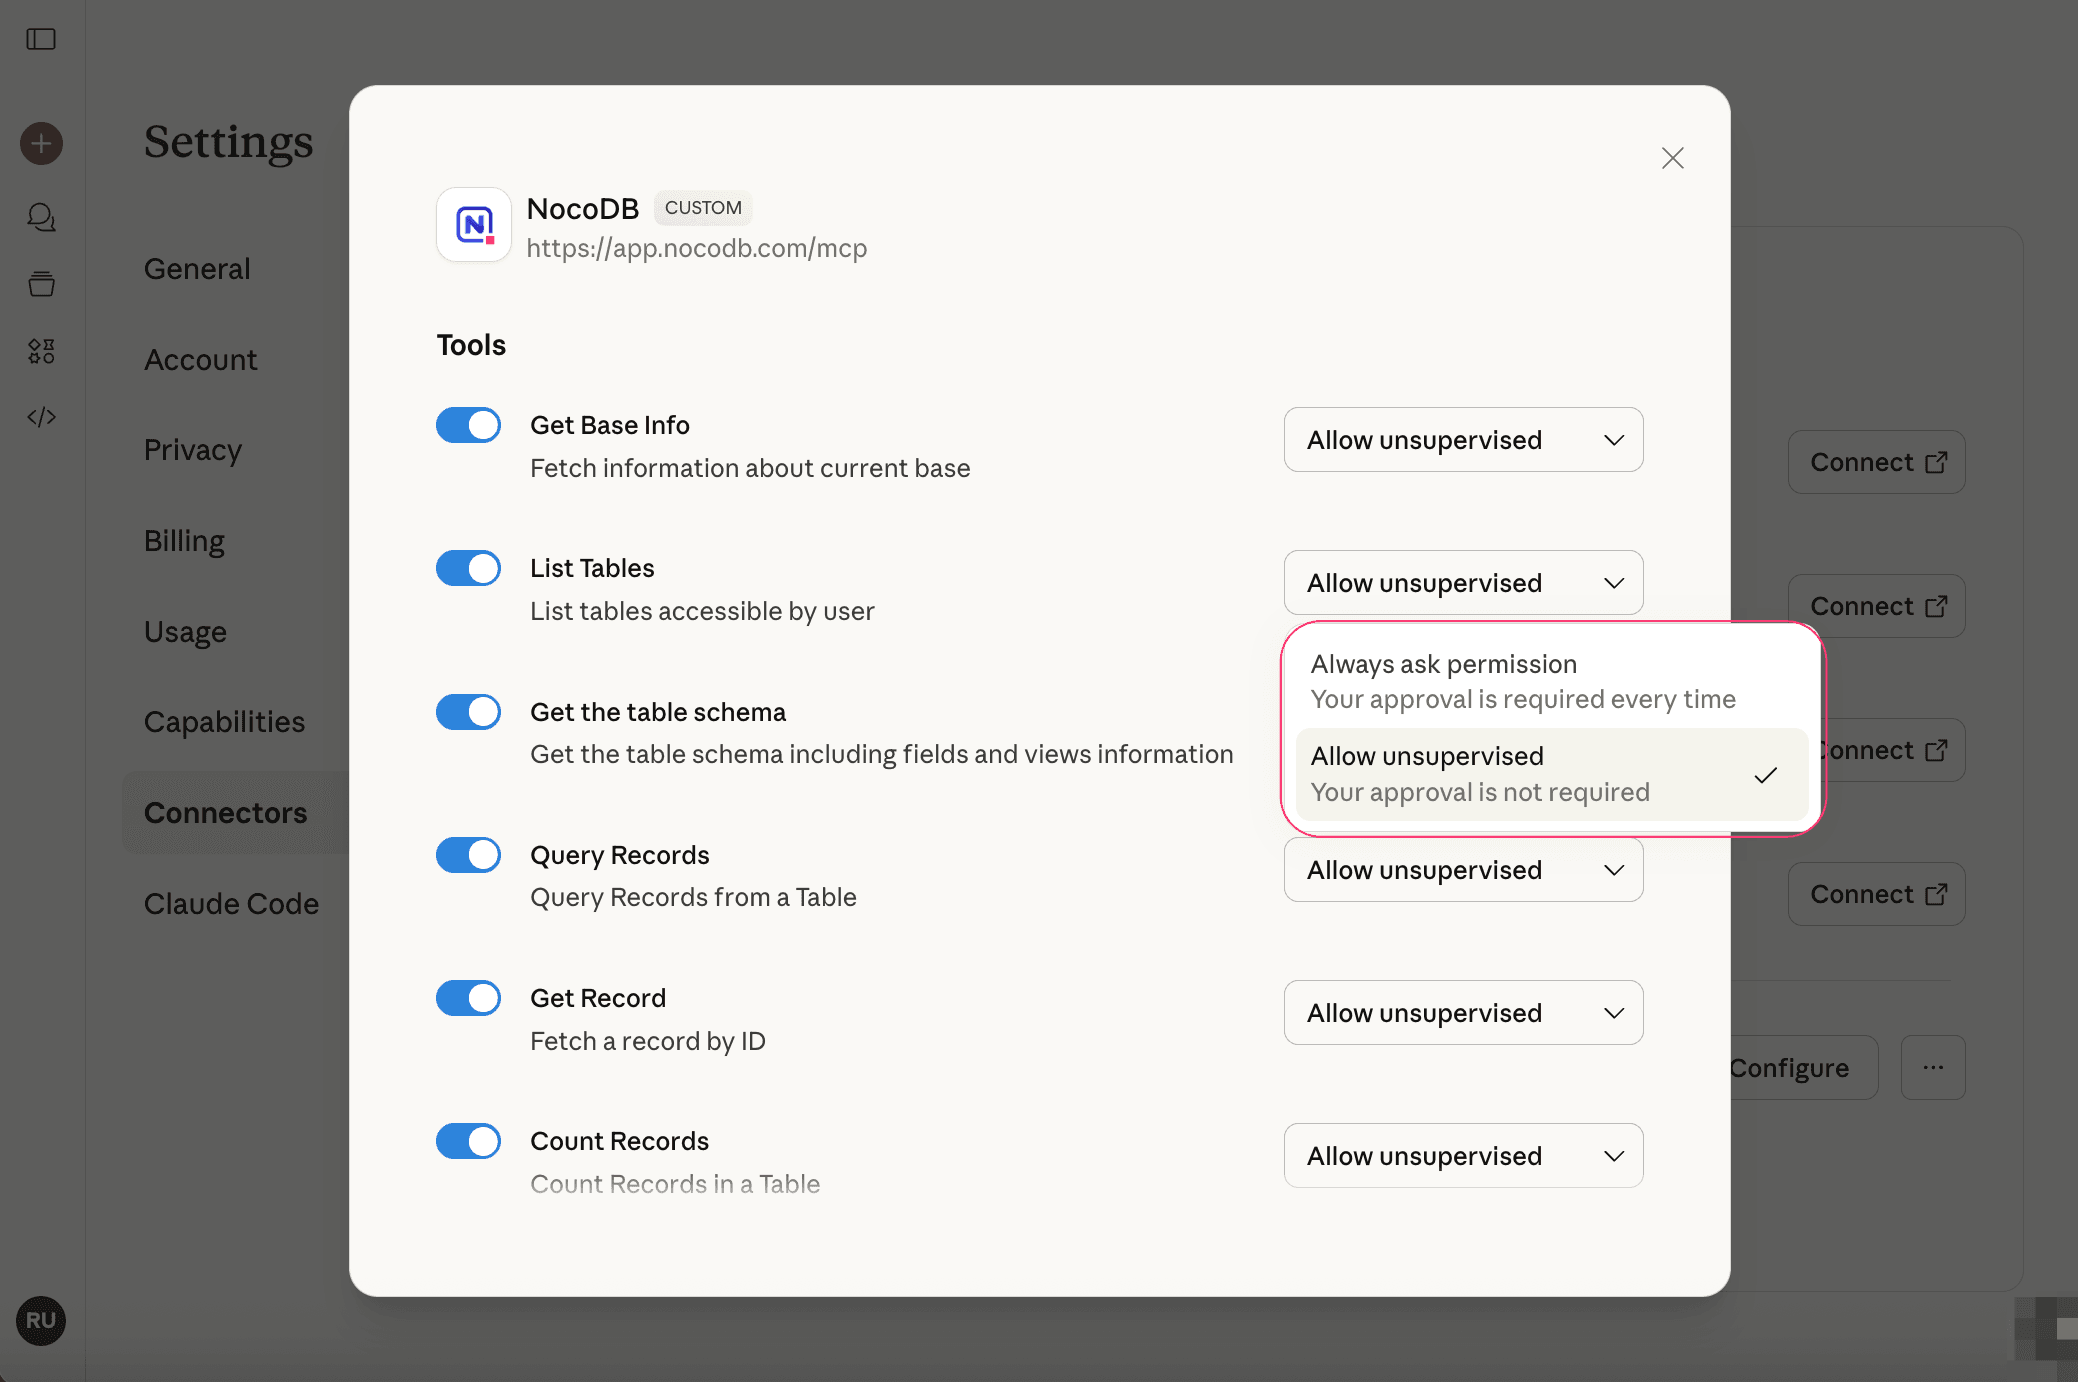
Configure Tool Permissions
By default, all tools are set to "Always ask permission" to ensure you have control over each operation Claude performs. You can modify these settings as needed.
Click here to open Claude Web Settings in a new tab. Click Configure on the NocoDB connector to manage tool permissions. Set each tool's permission level using the dropdown menu:
- Always ask permission — Your approval is required every time Claude uses this tool
- Allow unsupervised — Claude can use this tool without requesting approval
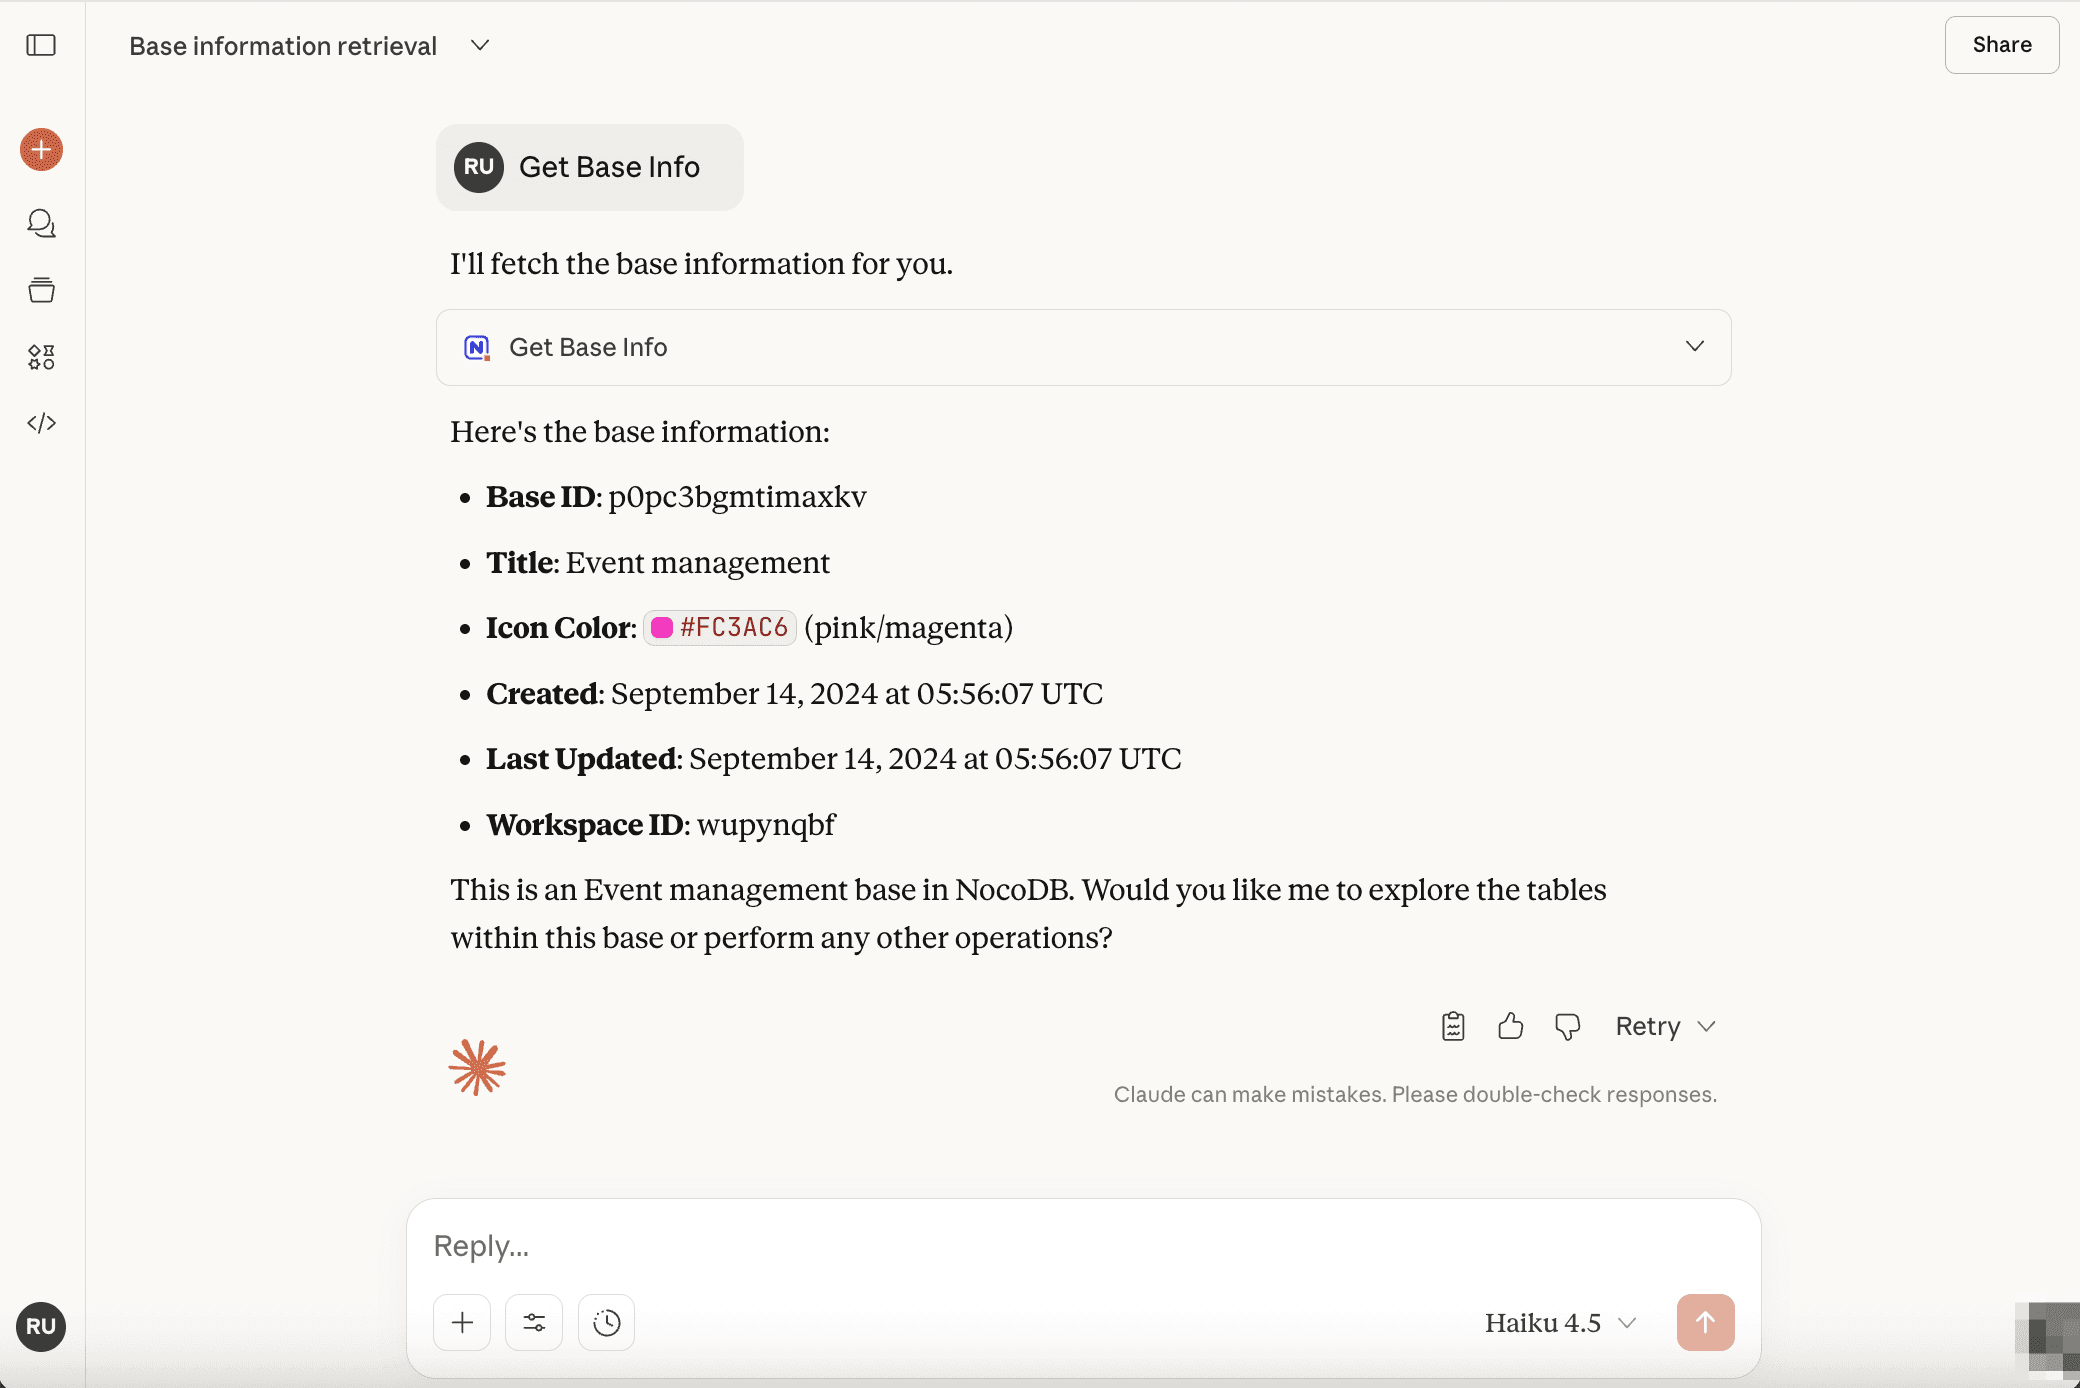
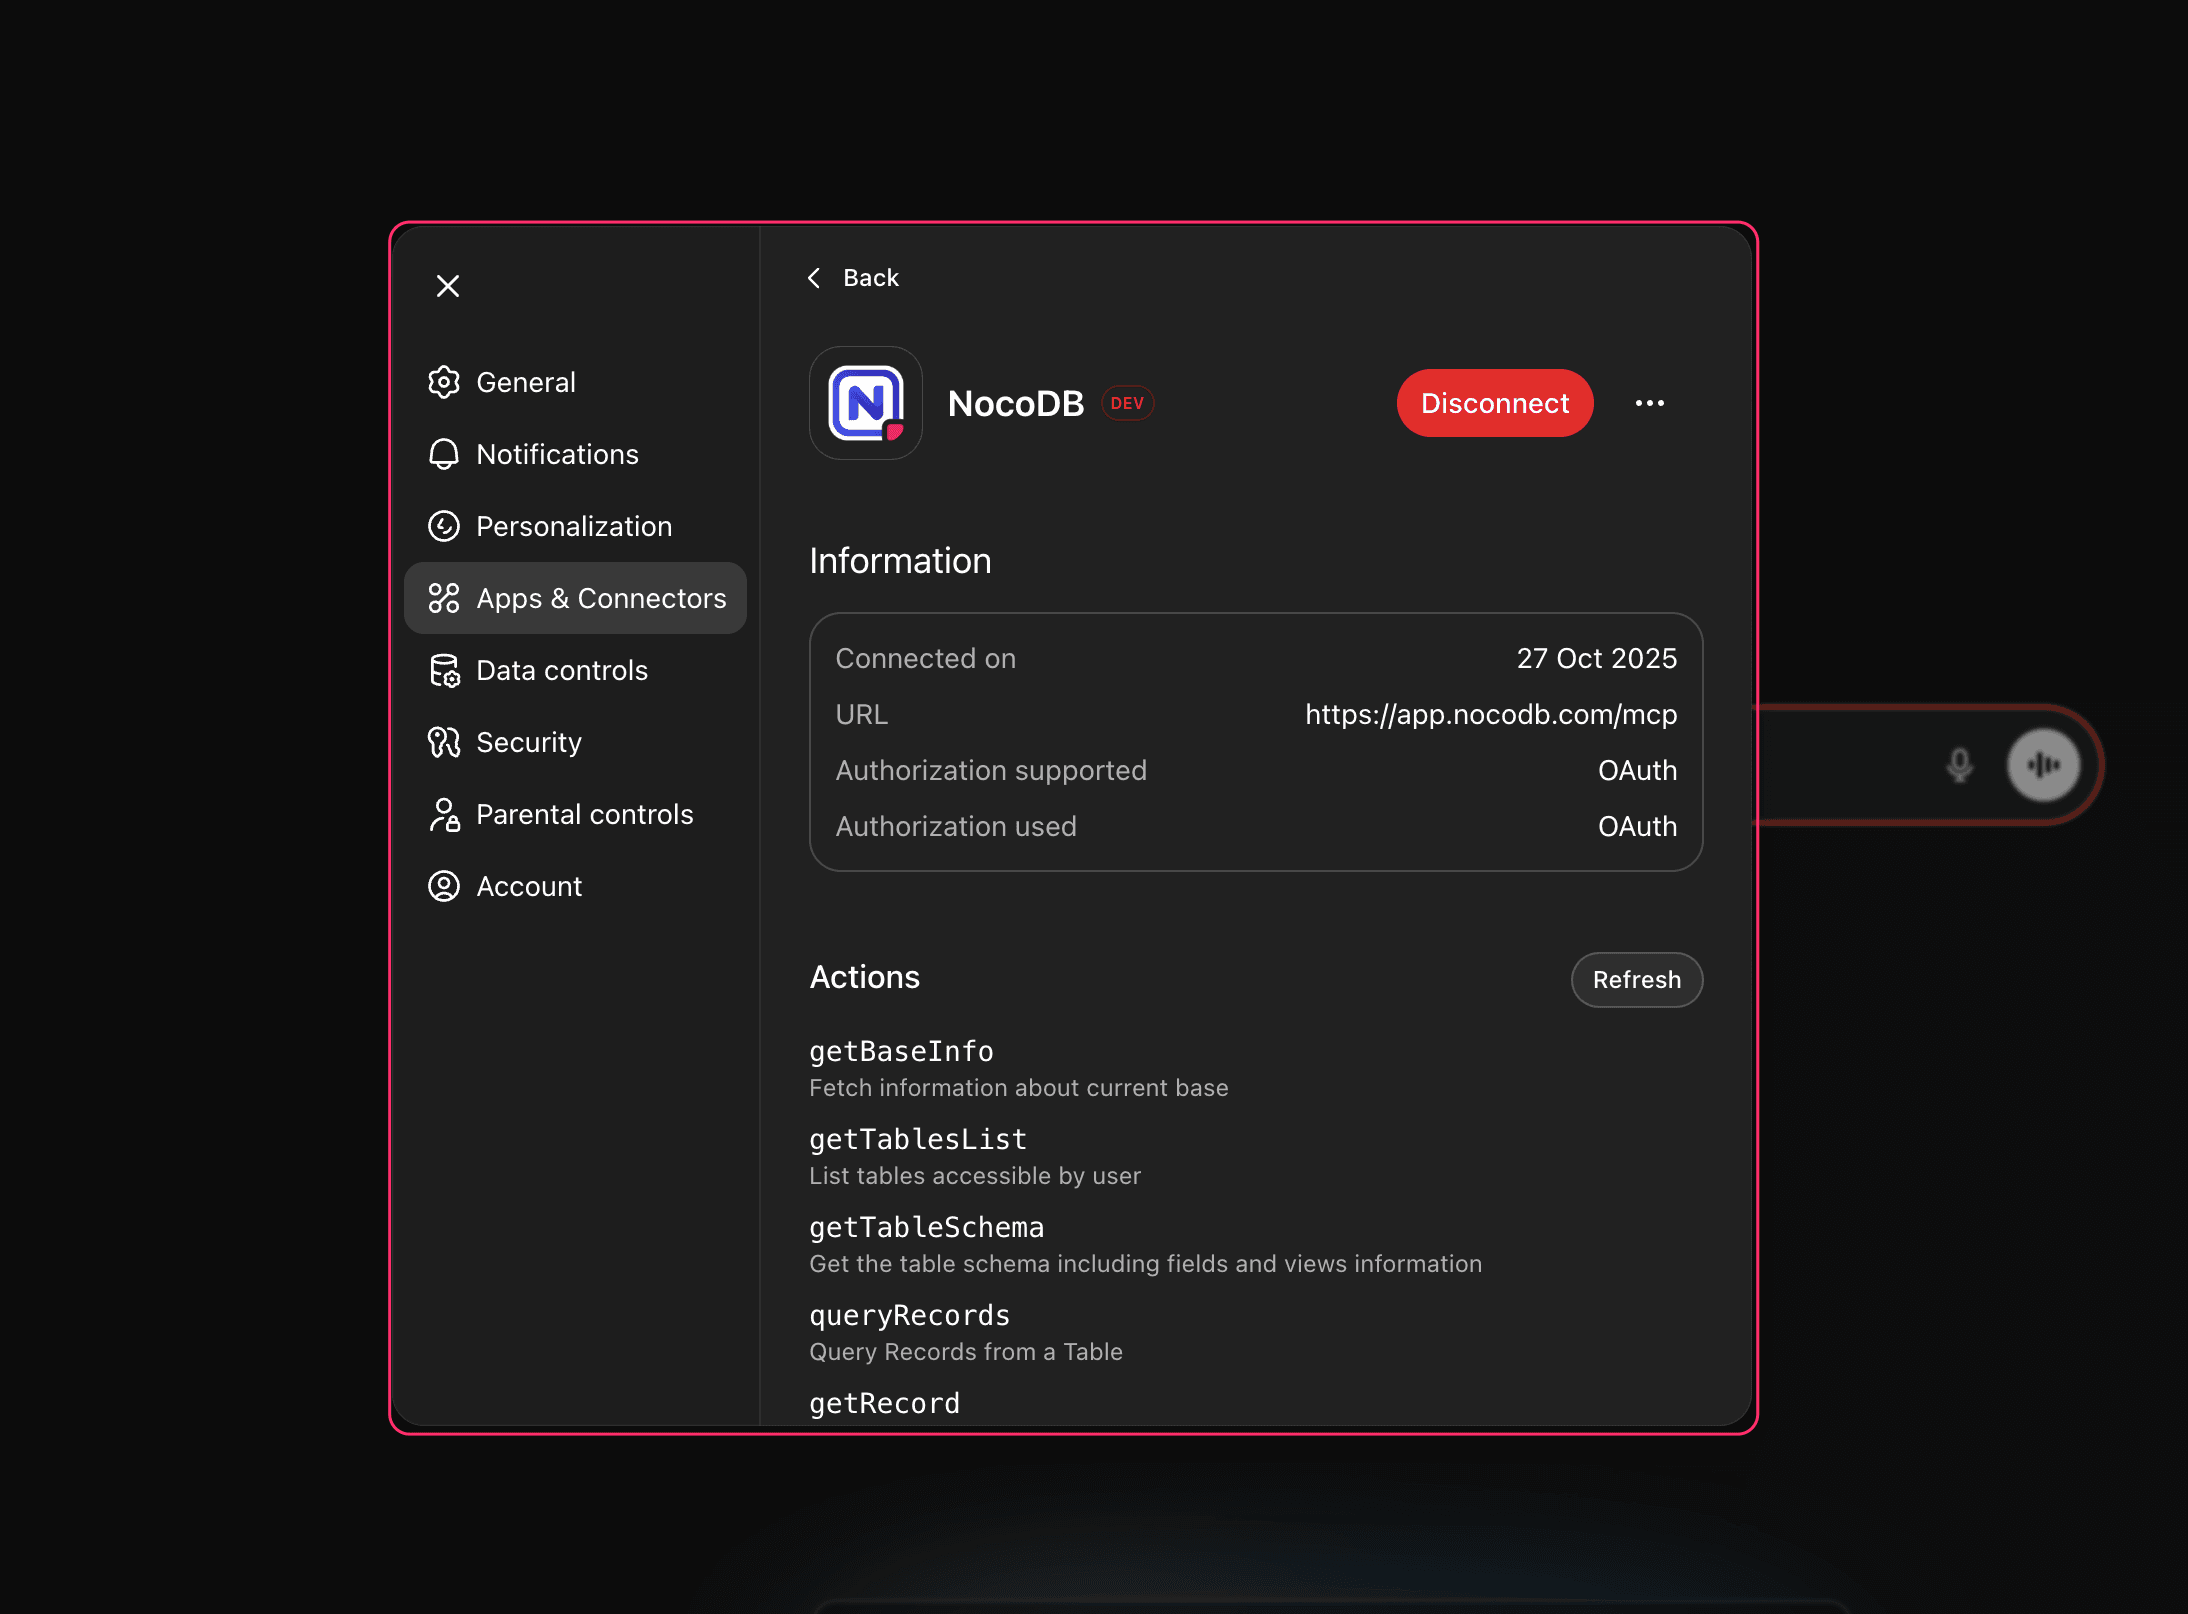
To retrieve Workspace & Base information that this connector has access to, use the "Get Base Info" tool.
Using NocoDB Tools in Claude Web
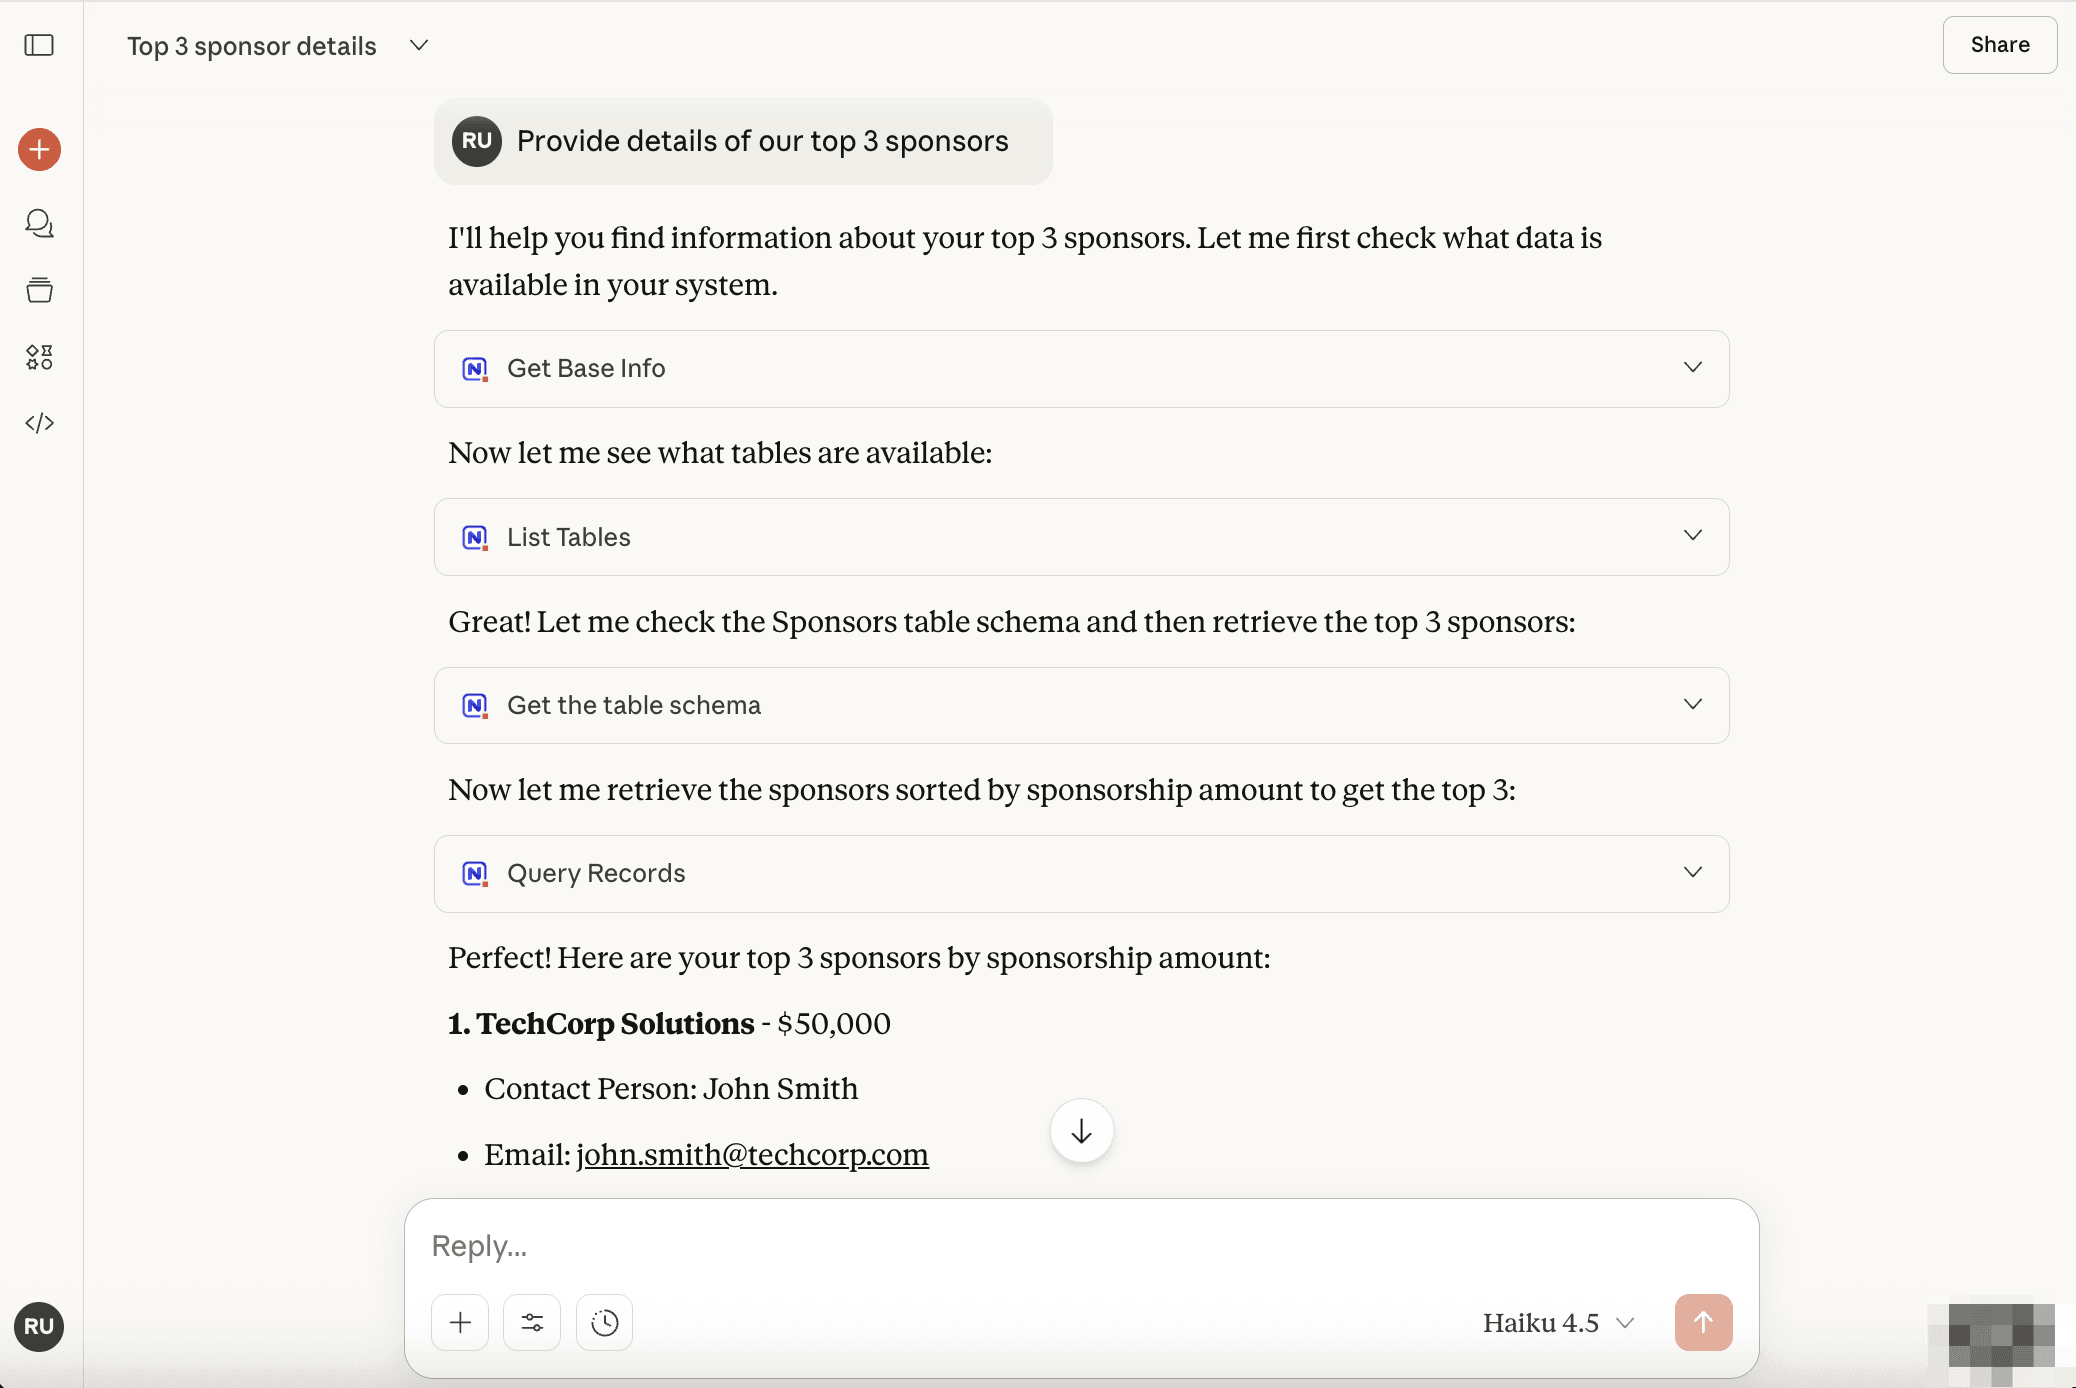
Once configured, you can interact with your NocoDB data conversationally. For example:
- "Show me all projects with deadlines this week"
- "Create a task named 'Review Documentation'"
- "Mark the status of Project X as completed and reassign to John"
- "Provide details of our top 3 sponsors"
Claude will execute these requests using the enabled NocoDB tools, reading from and writing to your database based on the permissions you've granted.
ChatGPT
OAuth-based integration enables OpenAI web users (ChatGPT) to securely connect with NocoDB databases through the MCP connector, directly from their browser environment. This provides the same granular access control and eliminates the need for manual configuration or desktop client setup.
Prerequisites
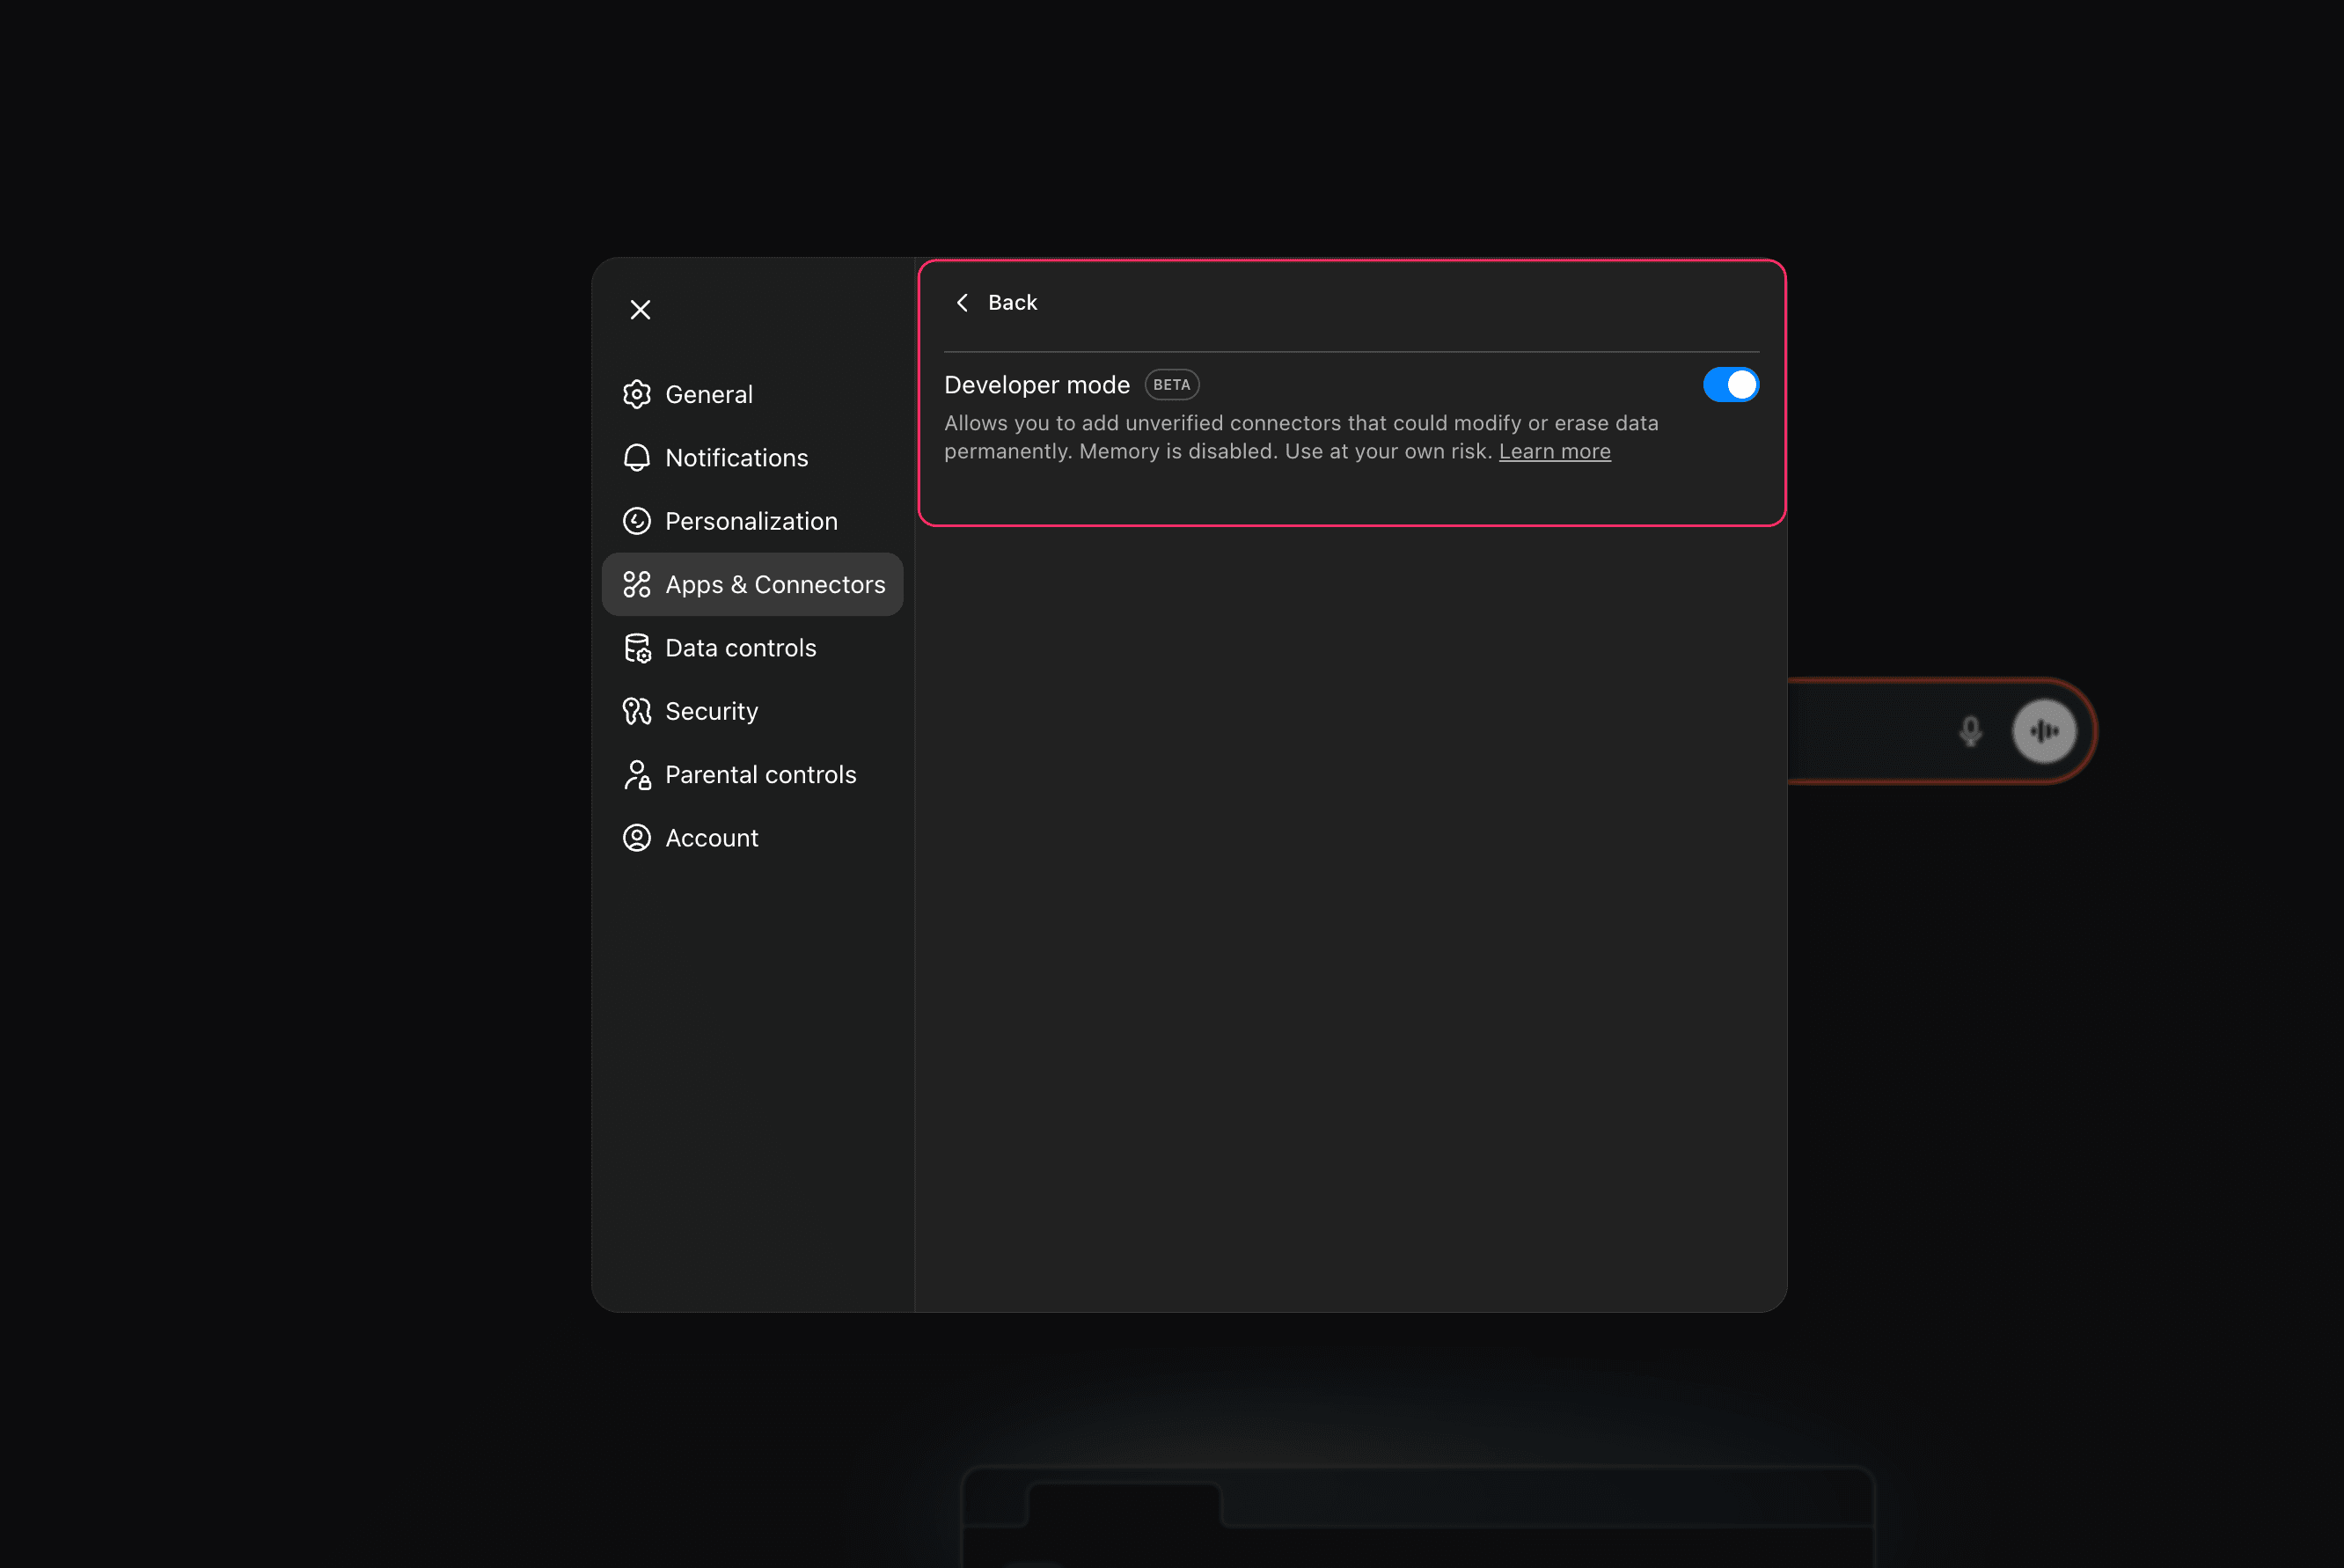
Enable Developer Mode in ChatGPT settings to allow custom connector additions.
- Open ChatGPT Settings in a new tab.
- Alternatively, click your Profile Icon → Settings → Settings → Apps & Connectors).
- Click Advanced Settings & enable Developer Mode.
Setup Steps
- Open ChatGPT Settings in a new tab.
- Alternatively, click your Profile Icon → Settings → Settings → Apps & Connectors).
- Click Create button in top right corner of the Connectors modal.
- In the "New connector" dialog:
- Provide a connector name of your choice. Optionally, add a description / icon.
- Enter the MCP Server URL:
https://app.nocodb.com/mcp - Check the box for I trust this application.
- Click
Create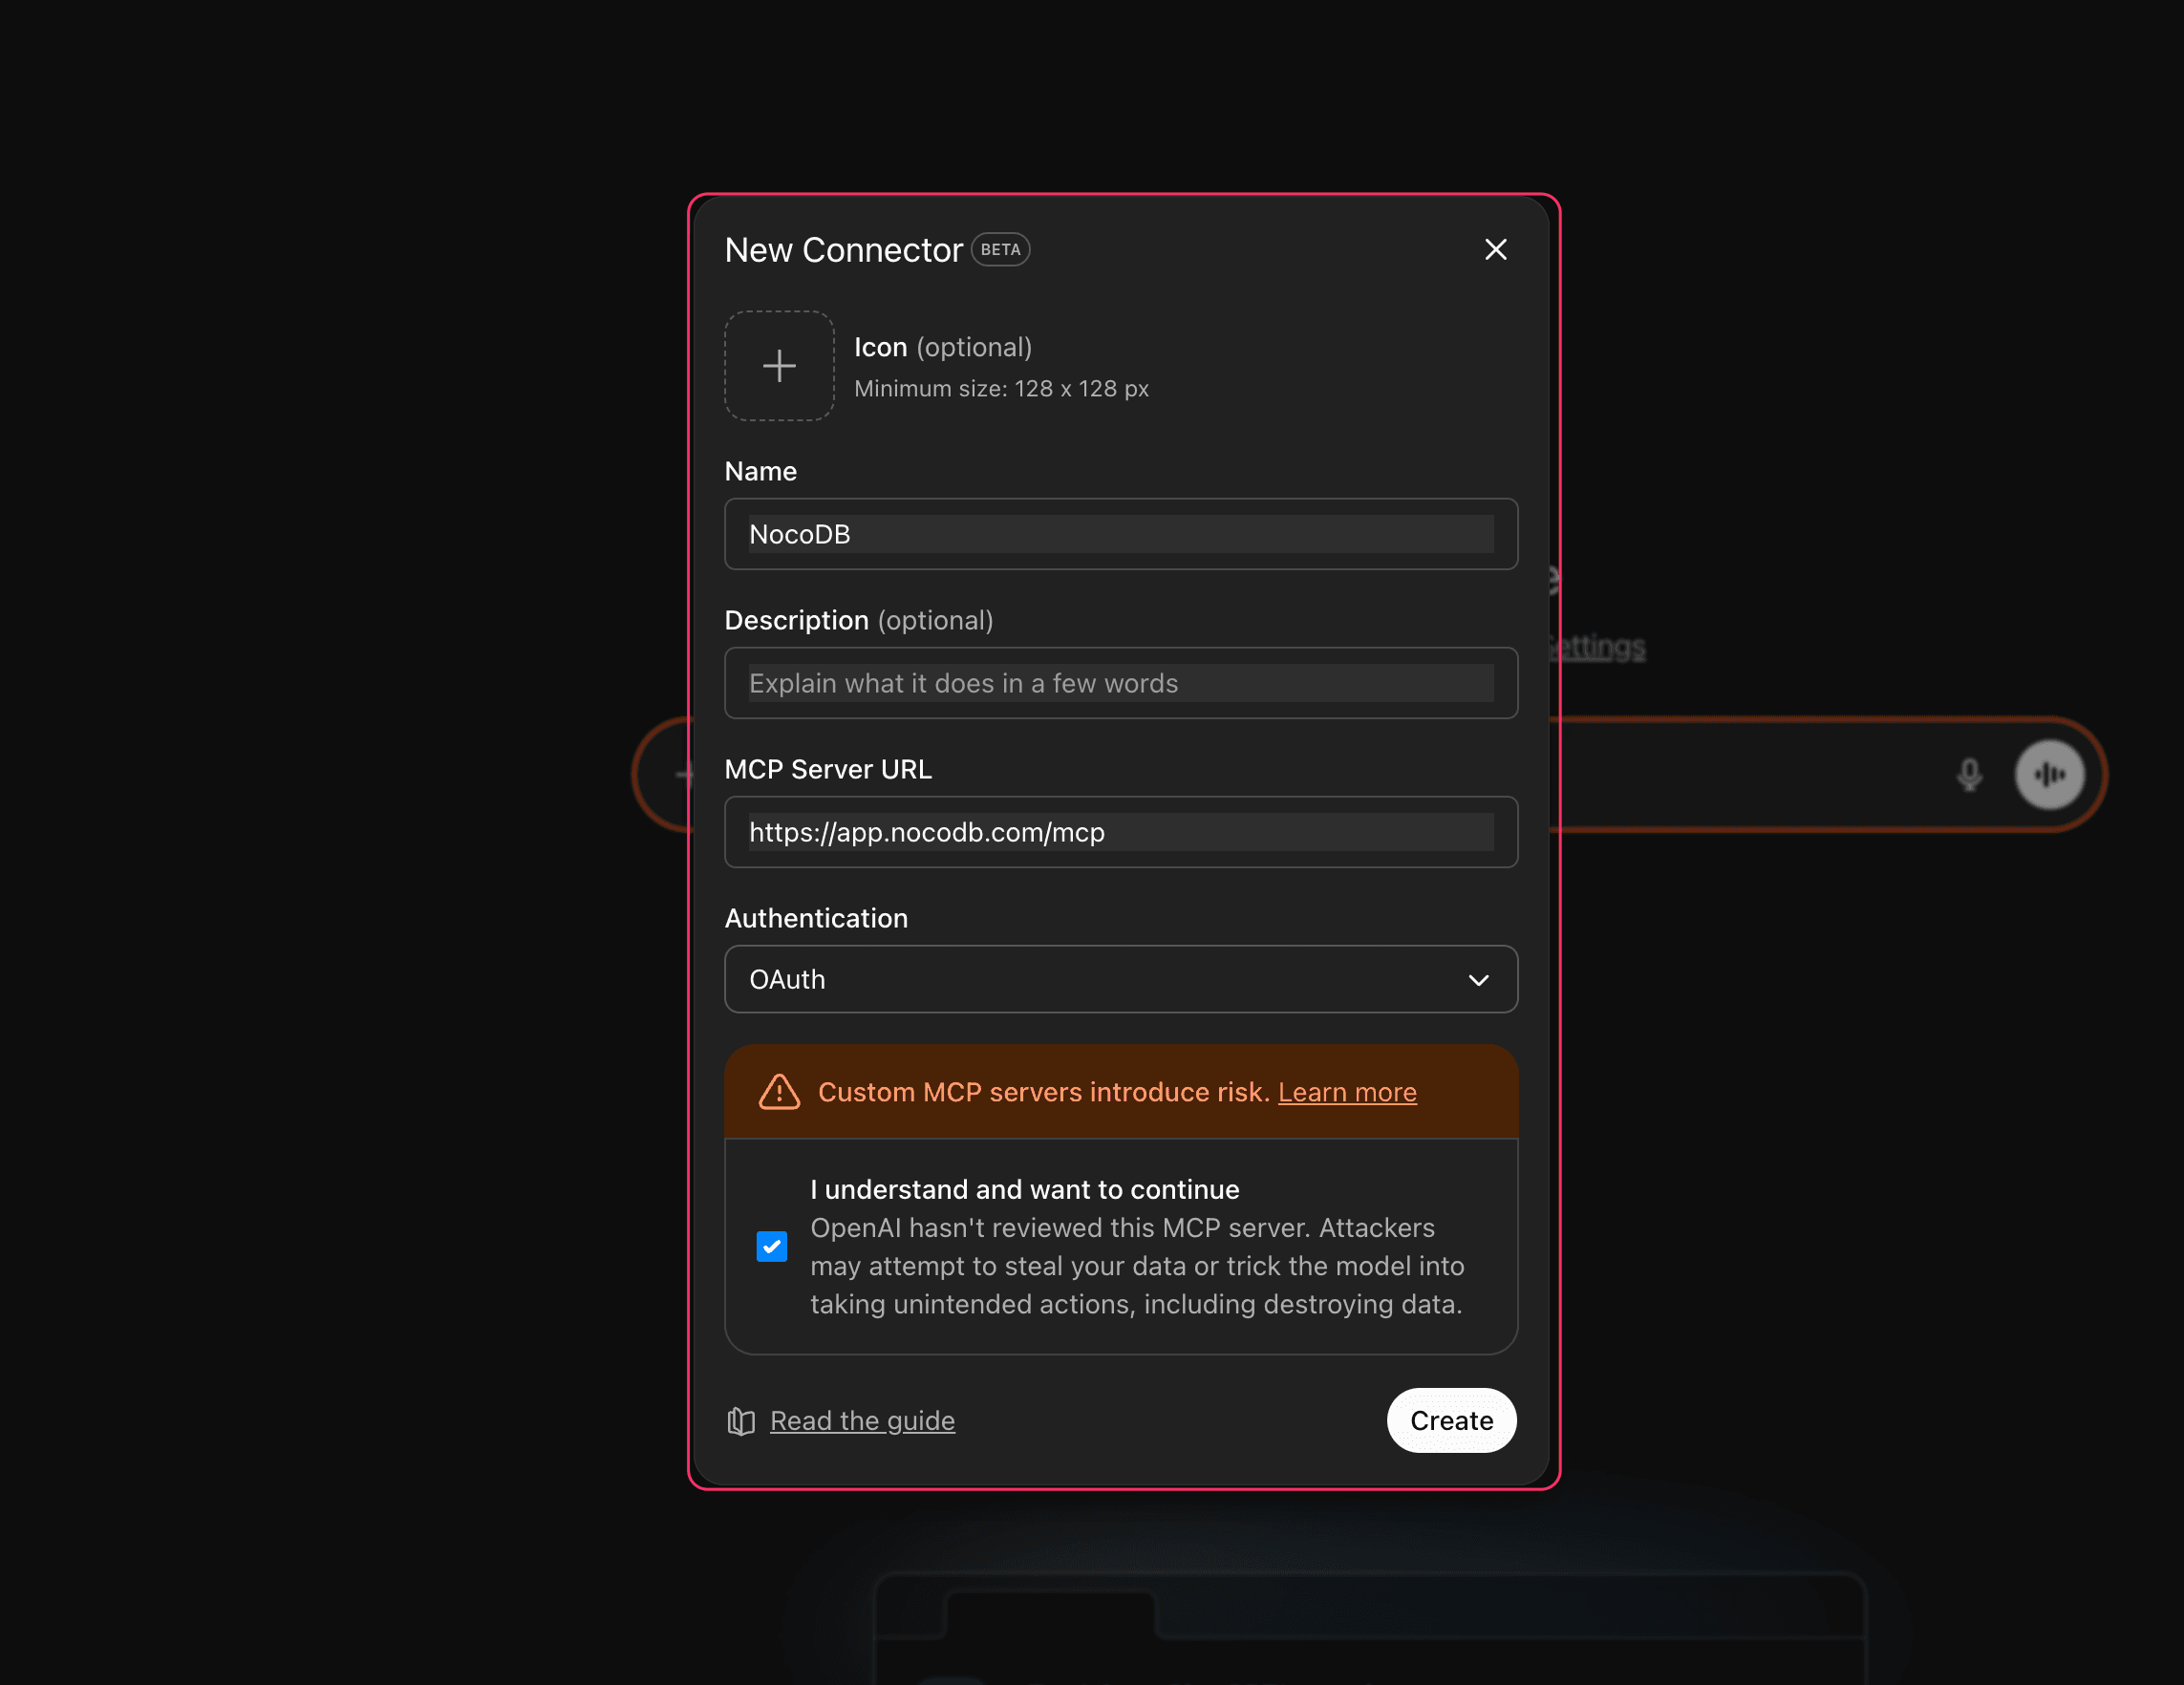
- Authorize Access:
- Log in to your NocoDB account if prompted
- Select the workspace and base you want to connect
- Review and confirm the permissions being requested:
- Access to the selected base
- Read / create / update / delete records
- Act on your behalf within the selected resources
- Click Authorize
Once authorization completes, you will see a confirmation message in ChatGPT Web indicating the NocoDB connector is now connected.
https://app.nocodb.com with your NocoDB instance URL.Using NocoDB Tools in OpenAI Web
On the ChatGPT interface, start a new conversation and
- Click the + icon to open the "Tools" menu, enable
Developer Modeif not already enabled. - Click
Moreto find and select the NocoDB connector you created. Toggle to enable it.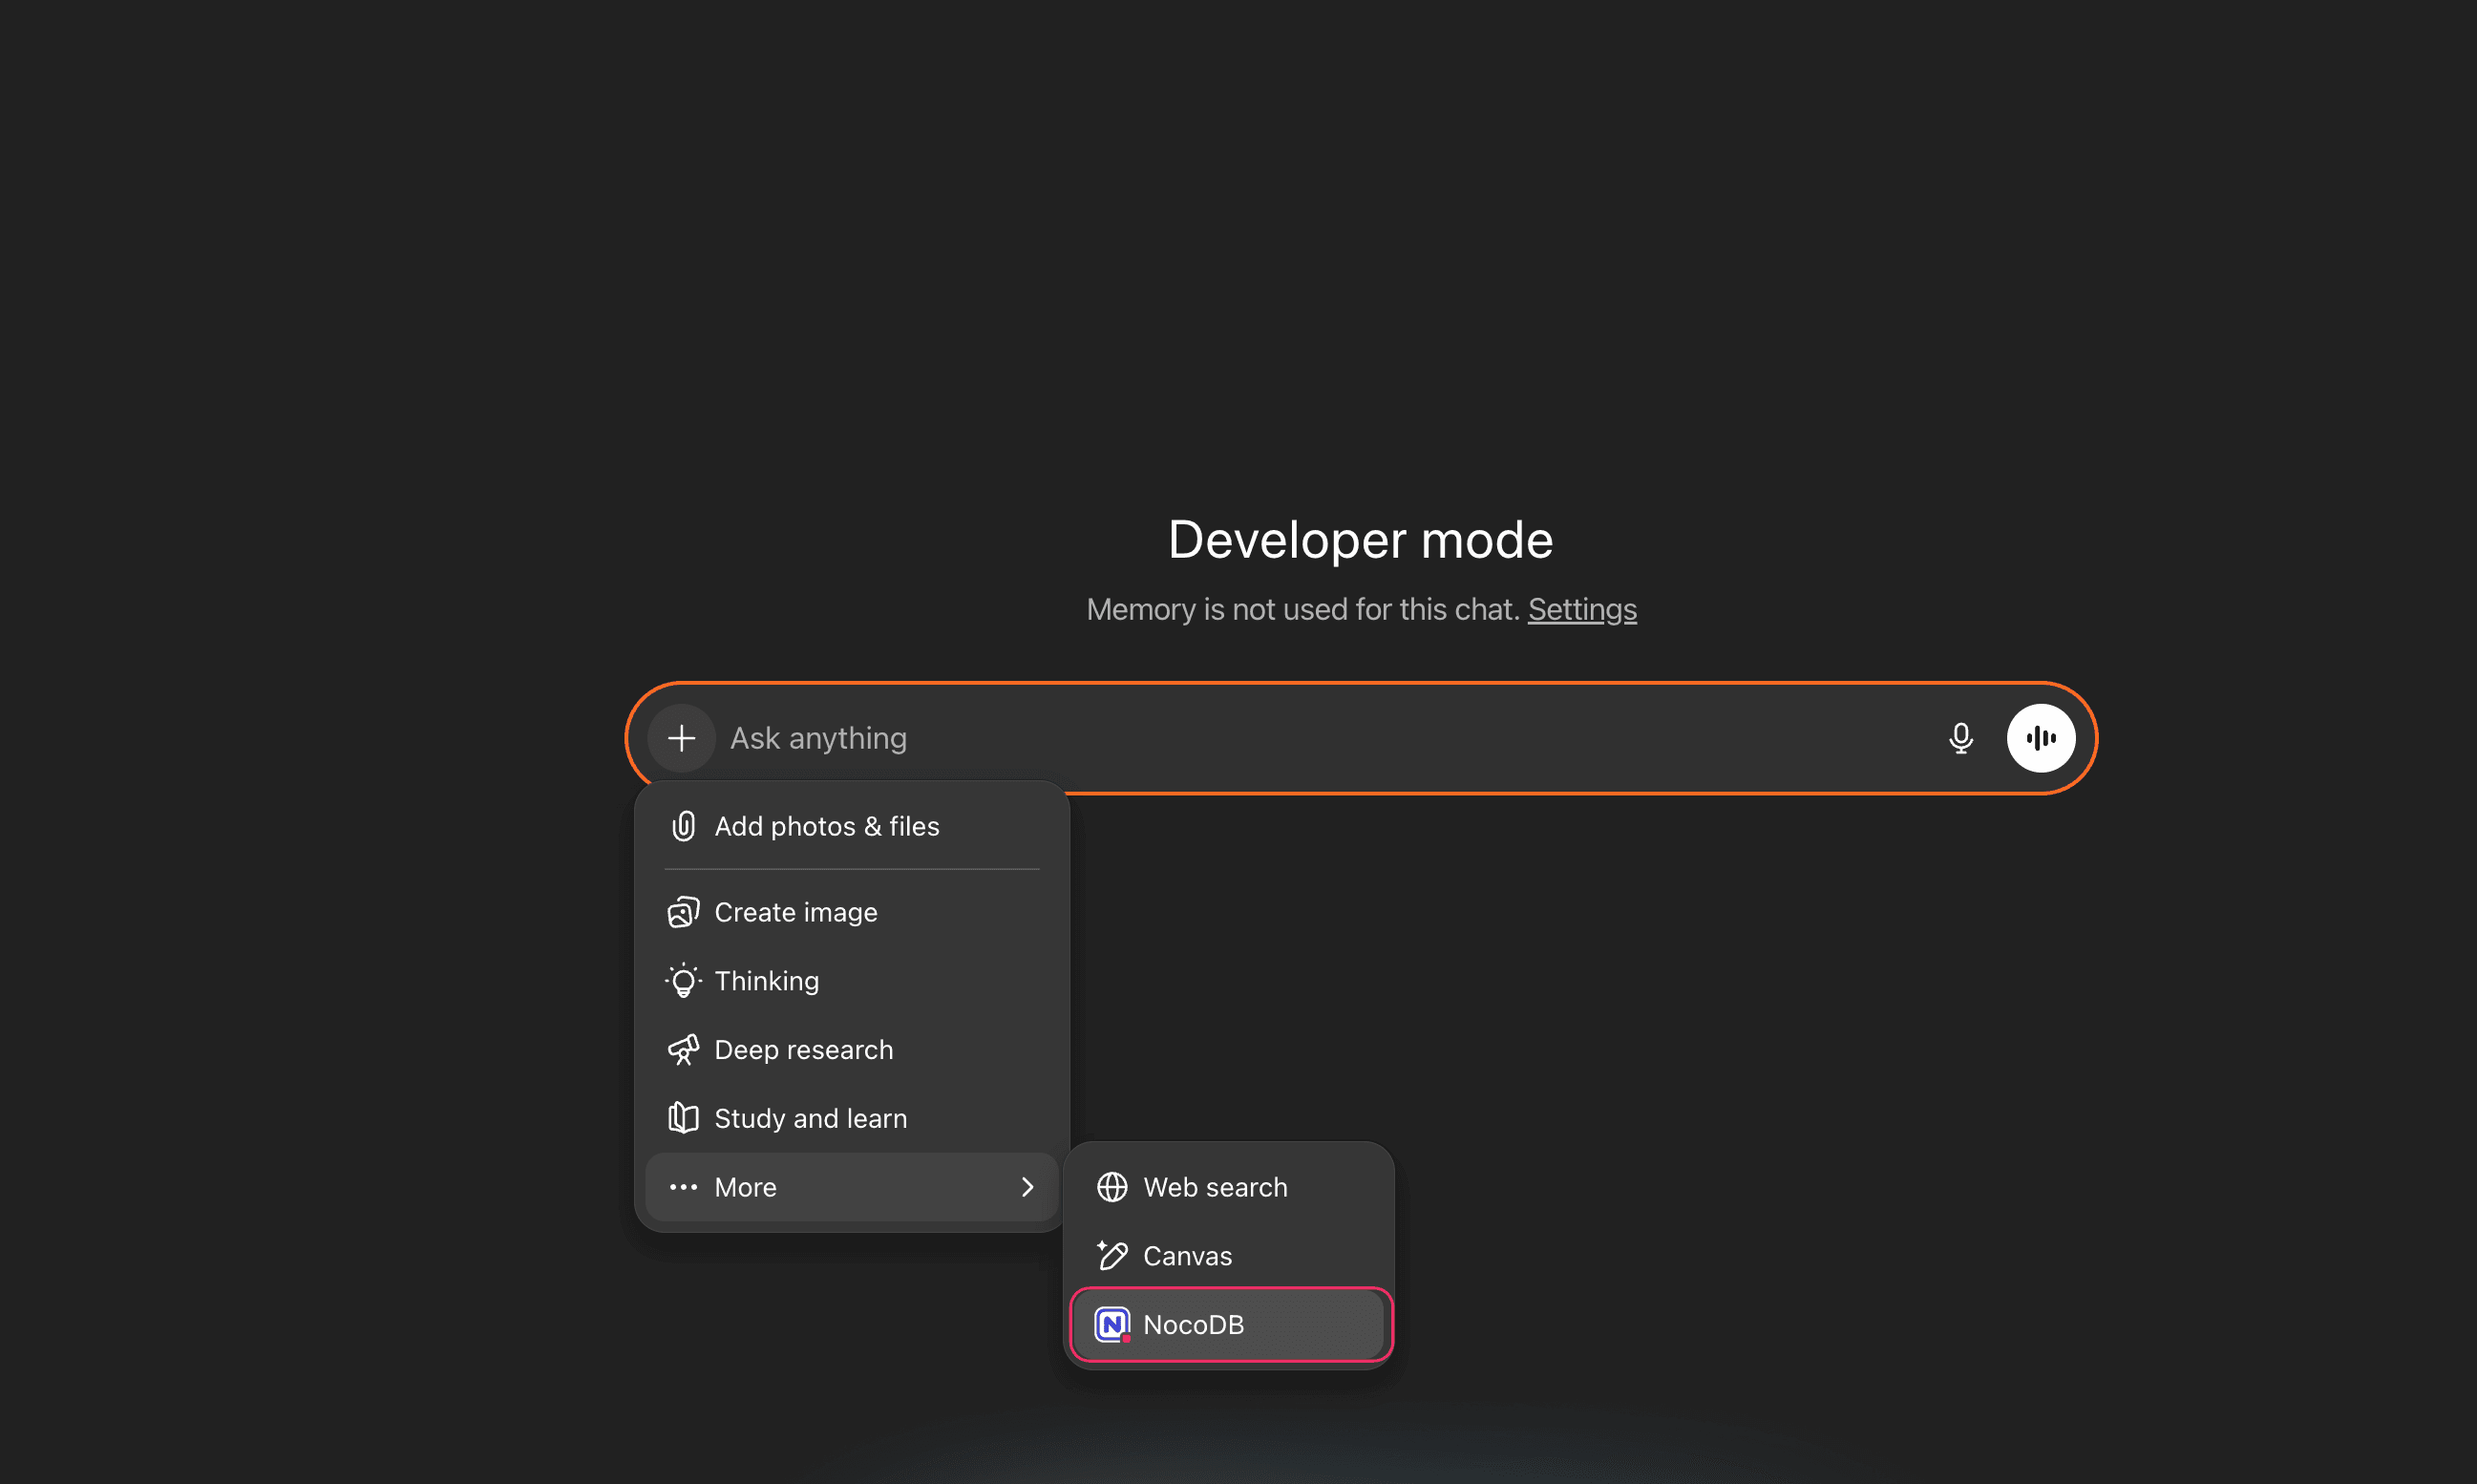
Once configured, you can query or update your NocoDB data conversationally. For example:
- “List all open support tickets assigned to me”
- “Add a new contact named ‘Alice Chen’ to the CRM base”
- “Update the status of Order #2456 to ‘Shipped’”
- “Summarize total revenue by month from the Sales base”
ChatGPT executes these actions using the connected NocoDB tools according to the permissions granted.