Create Workflow
Each workflow in NocoDB belongs to one project. To create a workflow, open the project. Then:
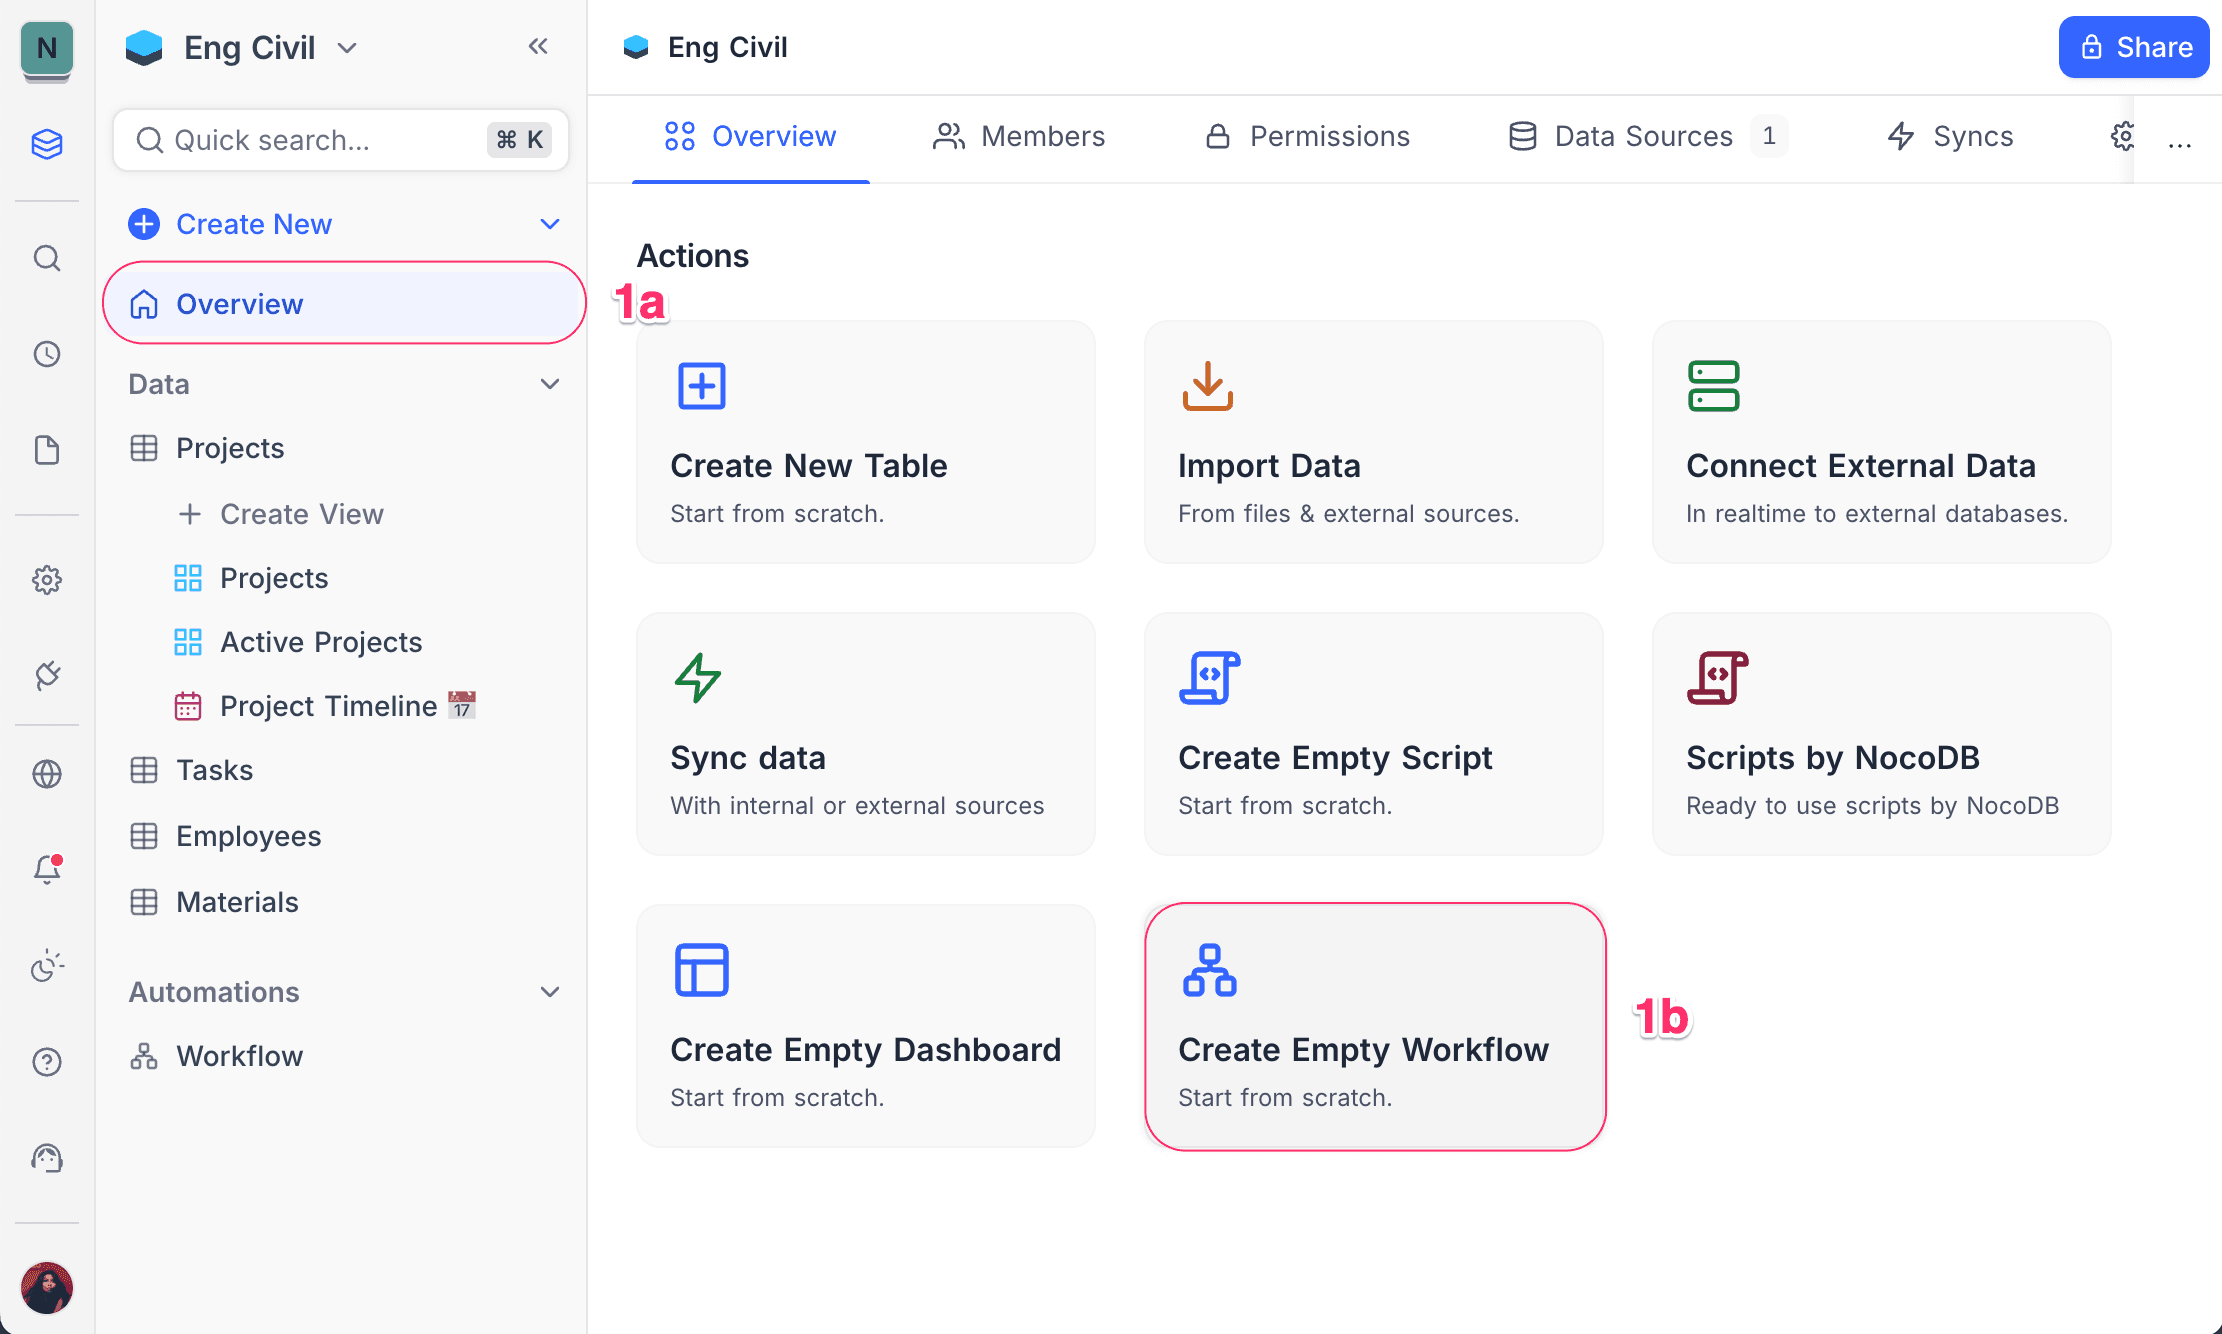
- On the project Overview page, click Create Empty Workflow.
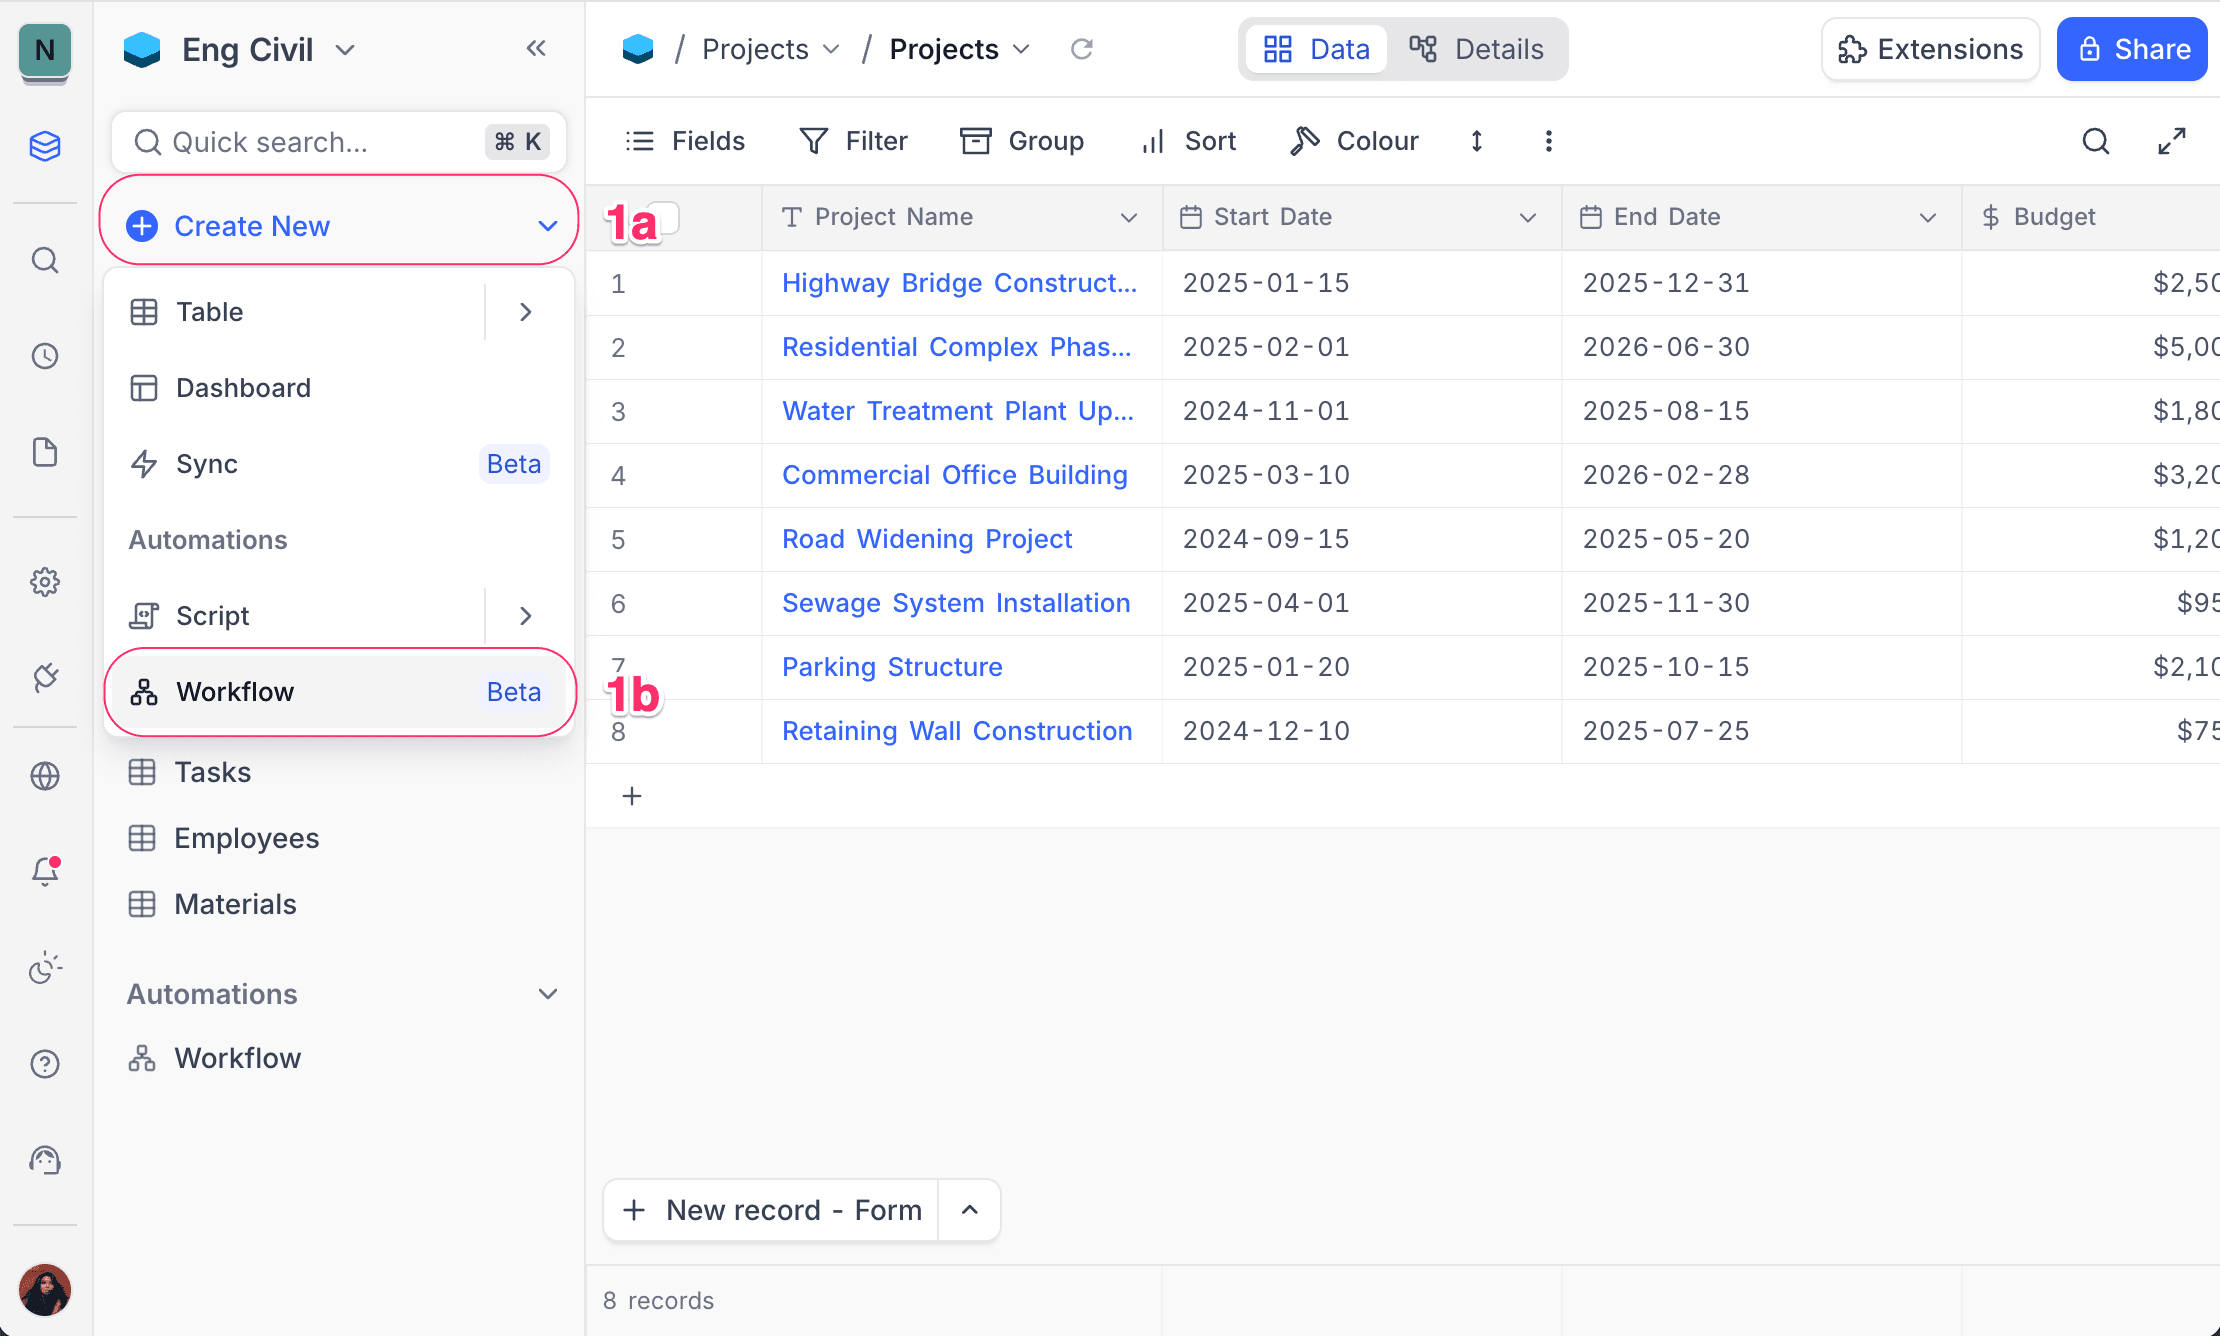
- Alternatively, click Create New in the left sidebar and select Workflow.
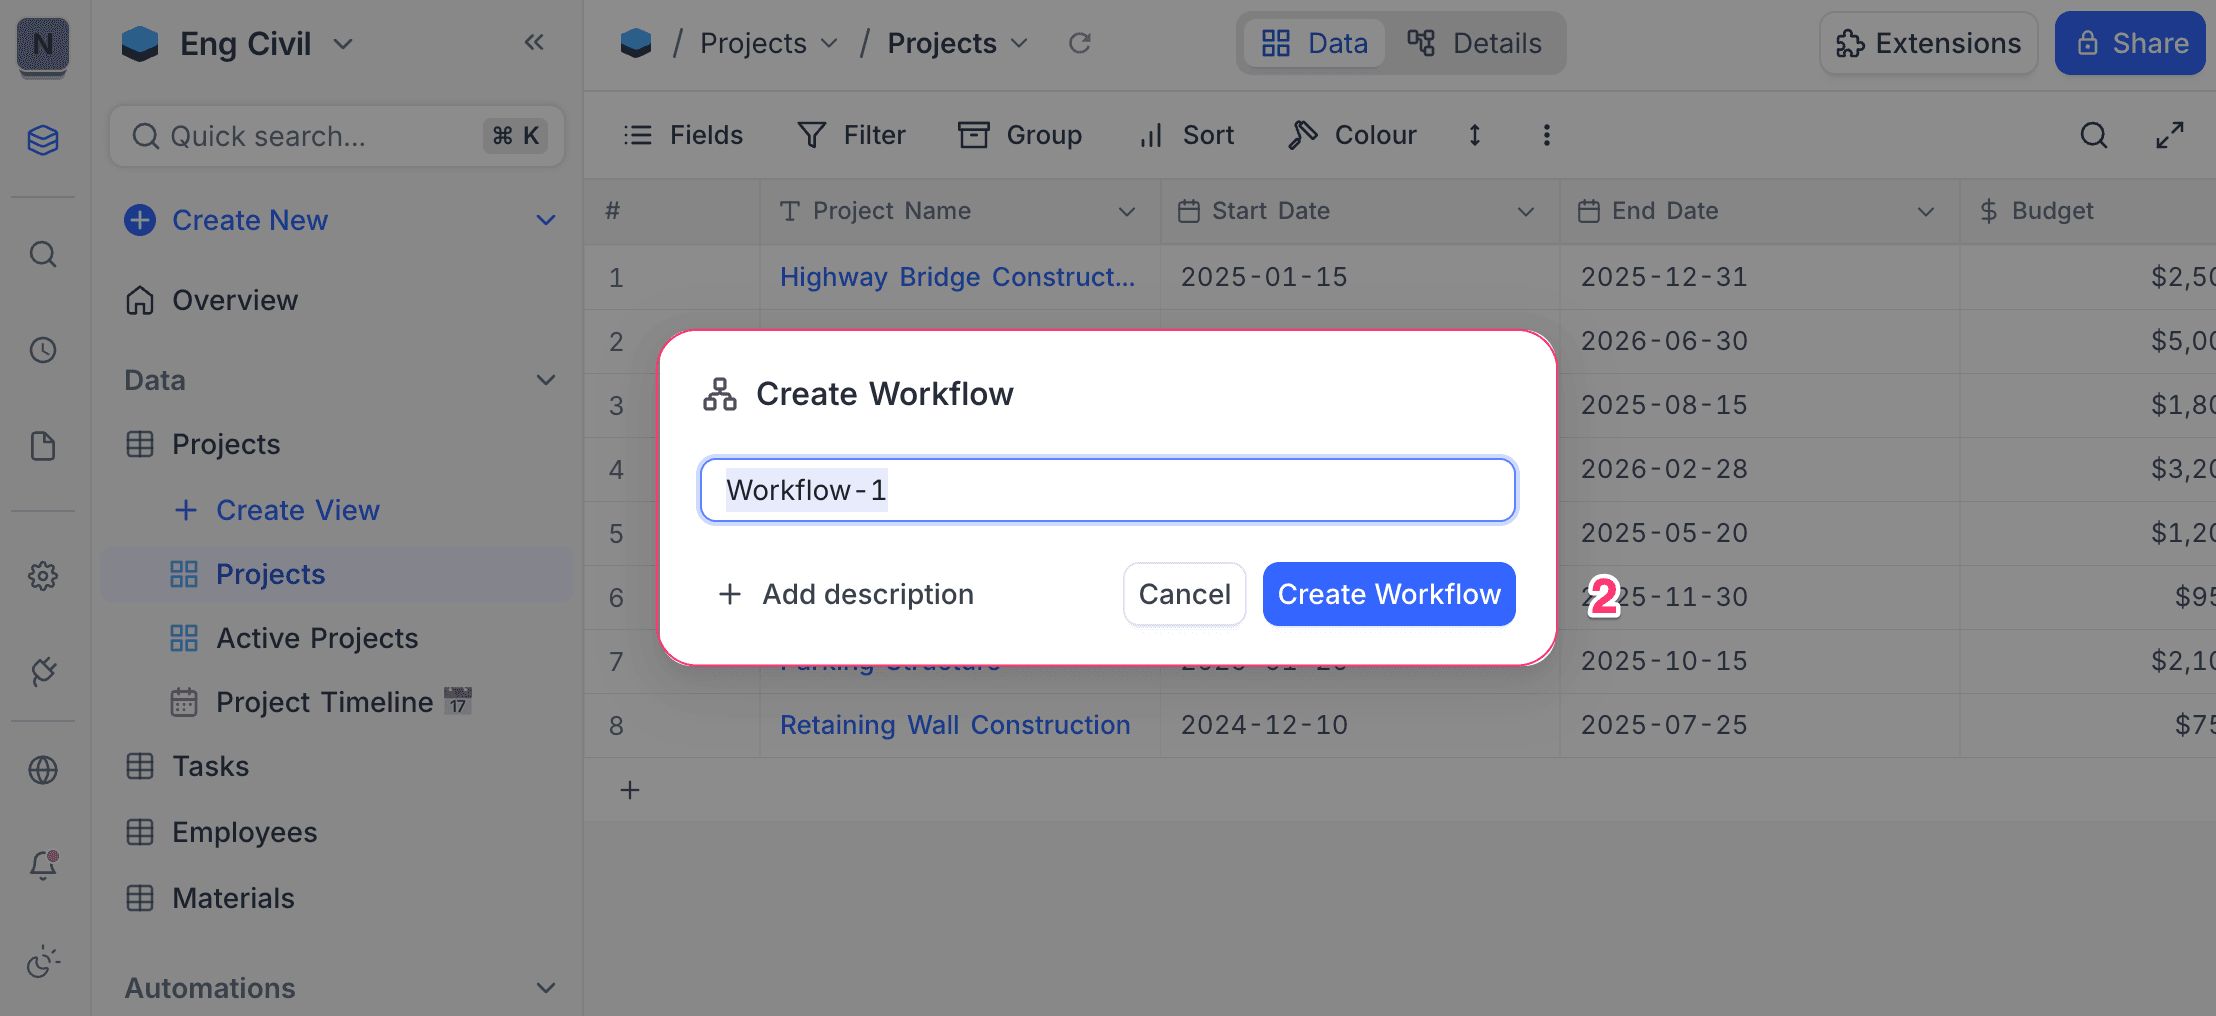
- Type a name for the workflow.
- Optionally, type a description to explain the purpose of the workflow.
- Click Create Workflow.
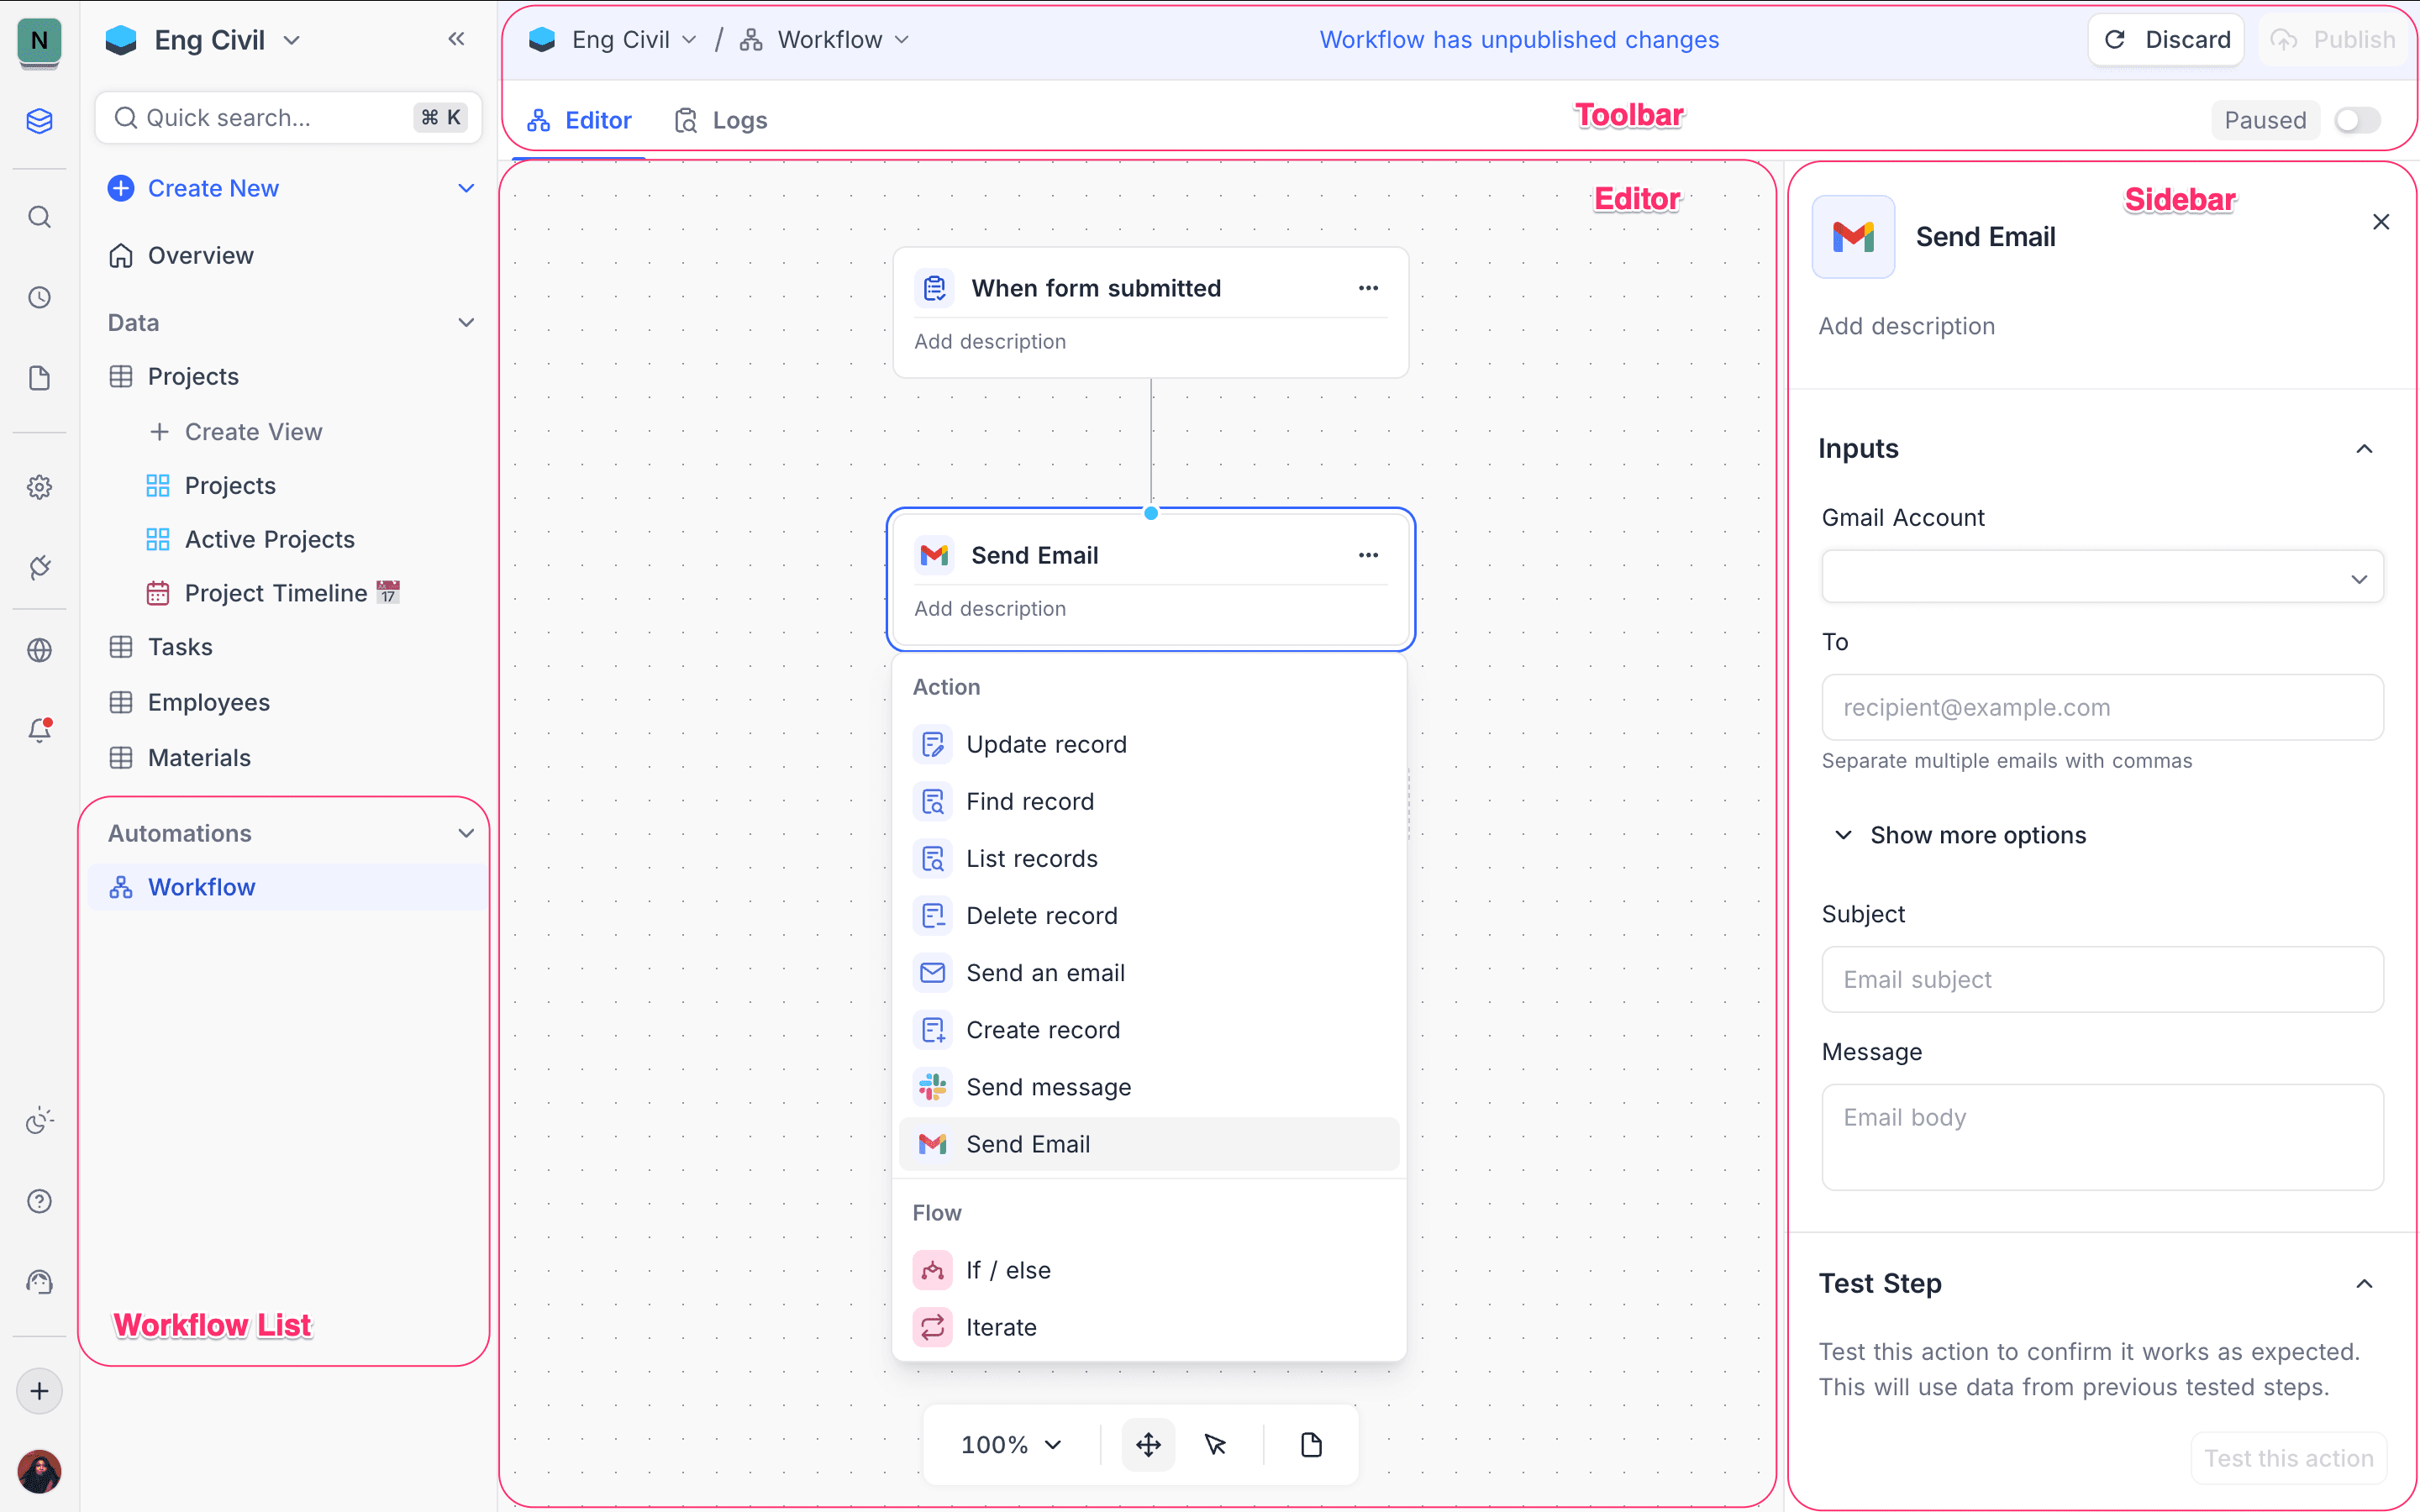
The workflow editor page opens. Configure the workflow on this page. The page has these parts:
- Workflow list : Shows all workflows in the project, in the left sidebar
- Toolbar : Gives access to workflow actions and settings
- Editor canvas : Design the workflow here. Add nodes and connect them.
- Sidebar : Configure the properties of the selected node
Copy a prompt, paste it into NocoAI in any base, and replace the words in [brackets] with your own.
- Build a workflow that emails [the requester] when a new [ticket] is created
- Build a workflow that creates a [Task] whenever a [Deal] moves to [Won]
- Build a workflow that updates [Status] to [Overdue] when [Due Date] passes
- Publish the [workflow name] workflow
Configuring workflow
The NocoDB Workflow builder is a visual interface. You design automation logic with connected nodes. To configure a workflow, do these steps:
-
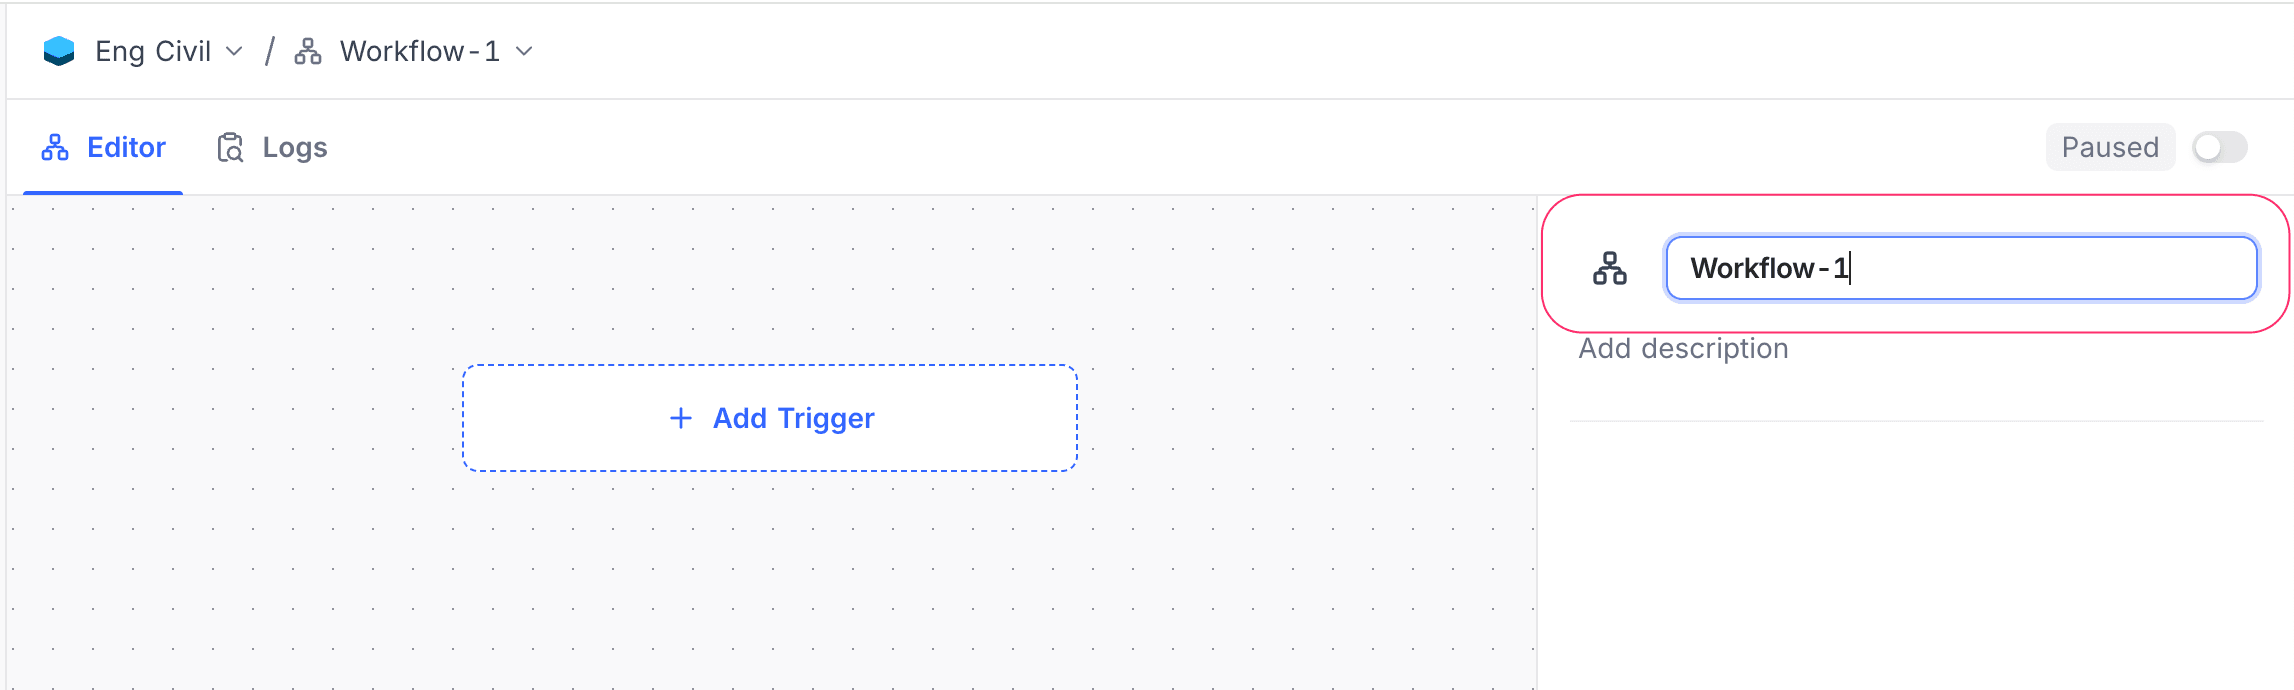
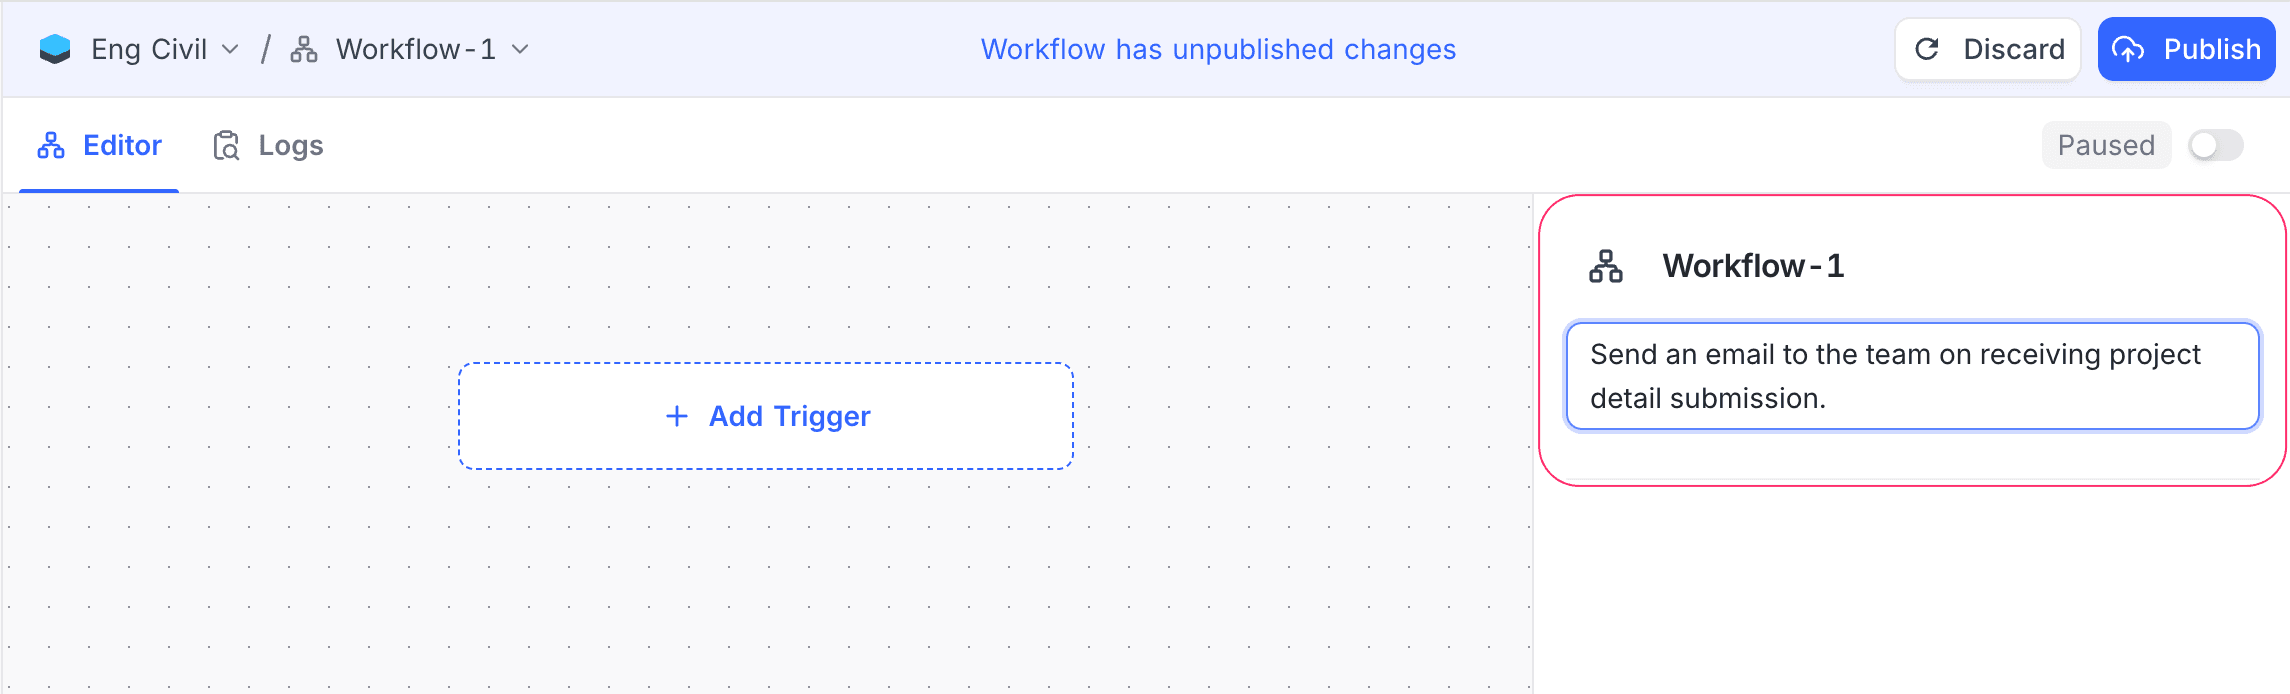
Name the workflow: Type a clear name that identifies the workflow. Optionally, add a description to explain its purpose.
-
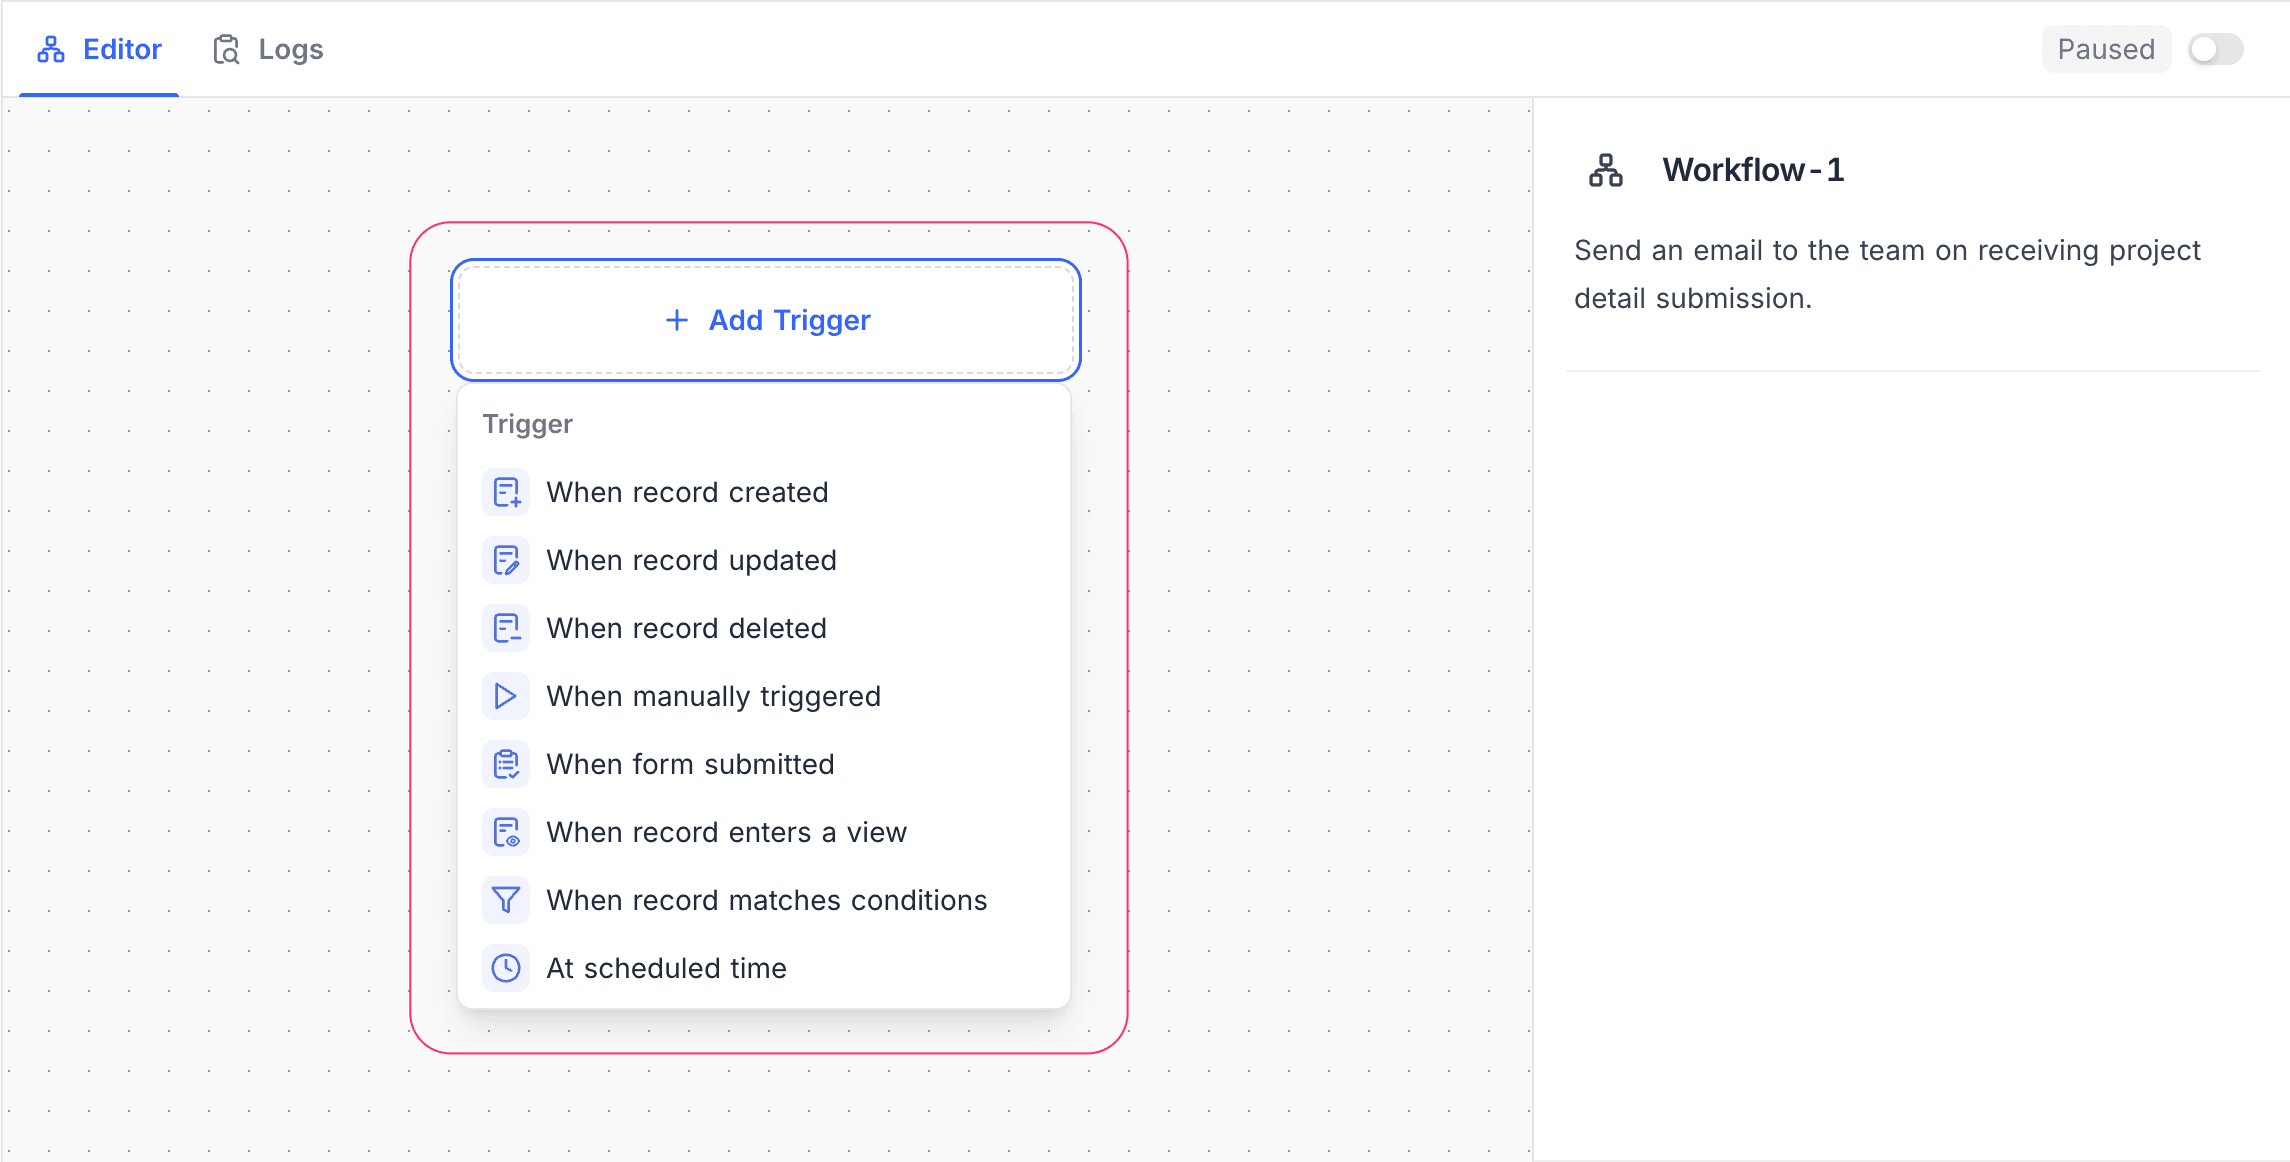
Select Trigger: Select how the workflow starts. Then configure the node settings (resource and conditions) as necessary. A workflow can have only one trigger node. The supported trigger types are:
- Record trigger: Runs when a record is created, updated, or deleted
- Manual trigger: Runs when a user triggers it manually
- Scheduled trigger: Runs at specified time intervals
-
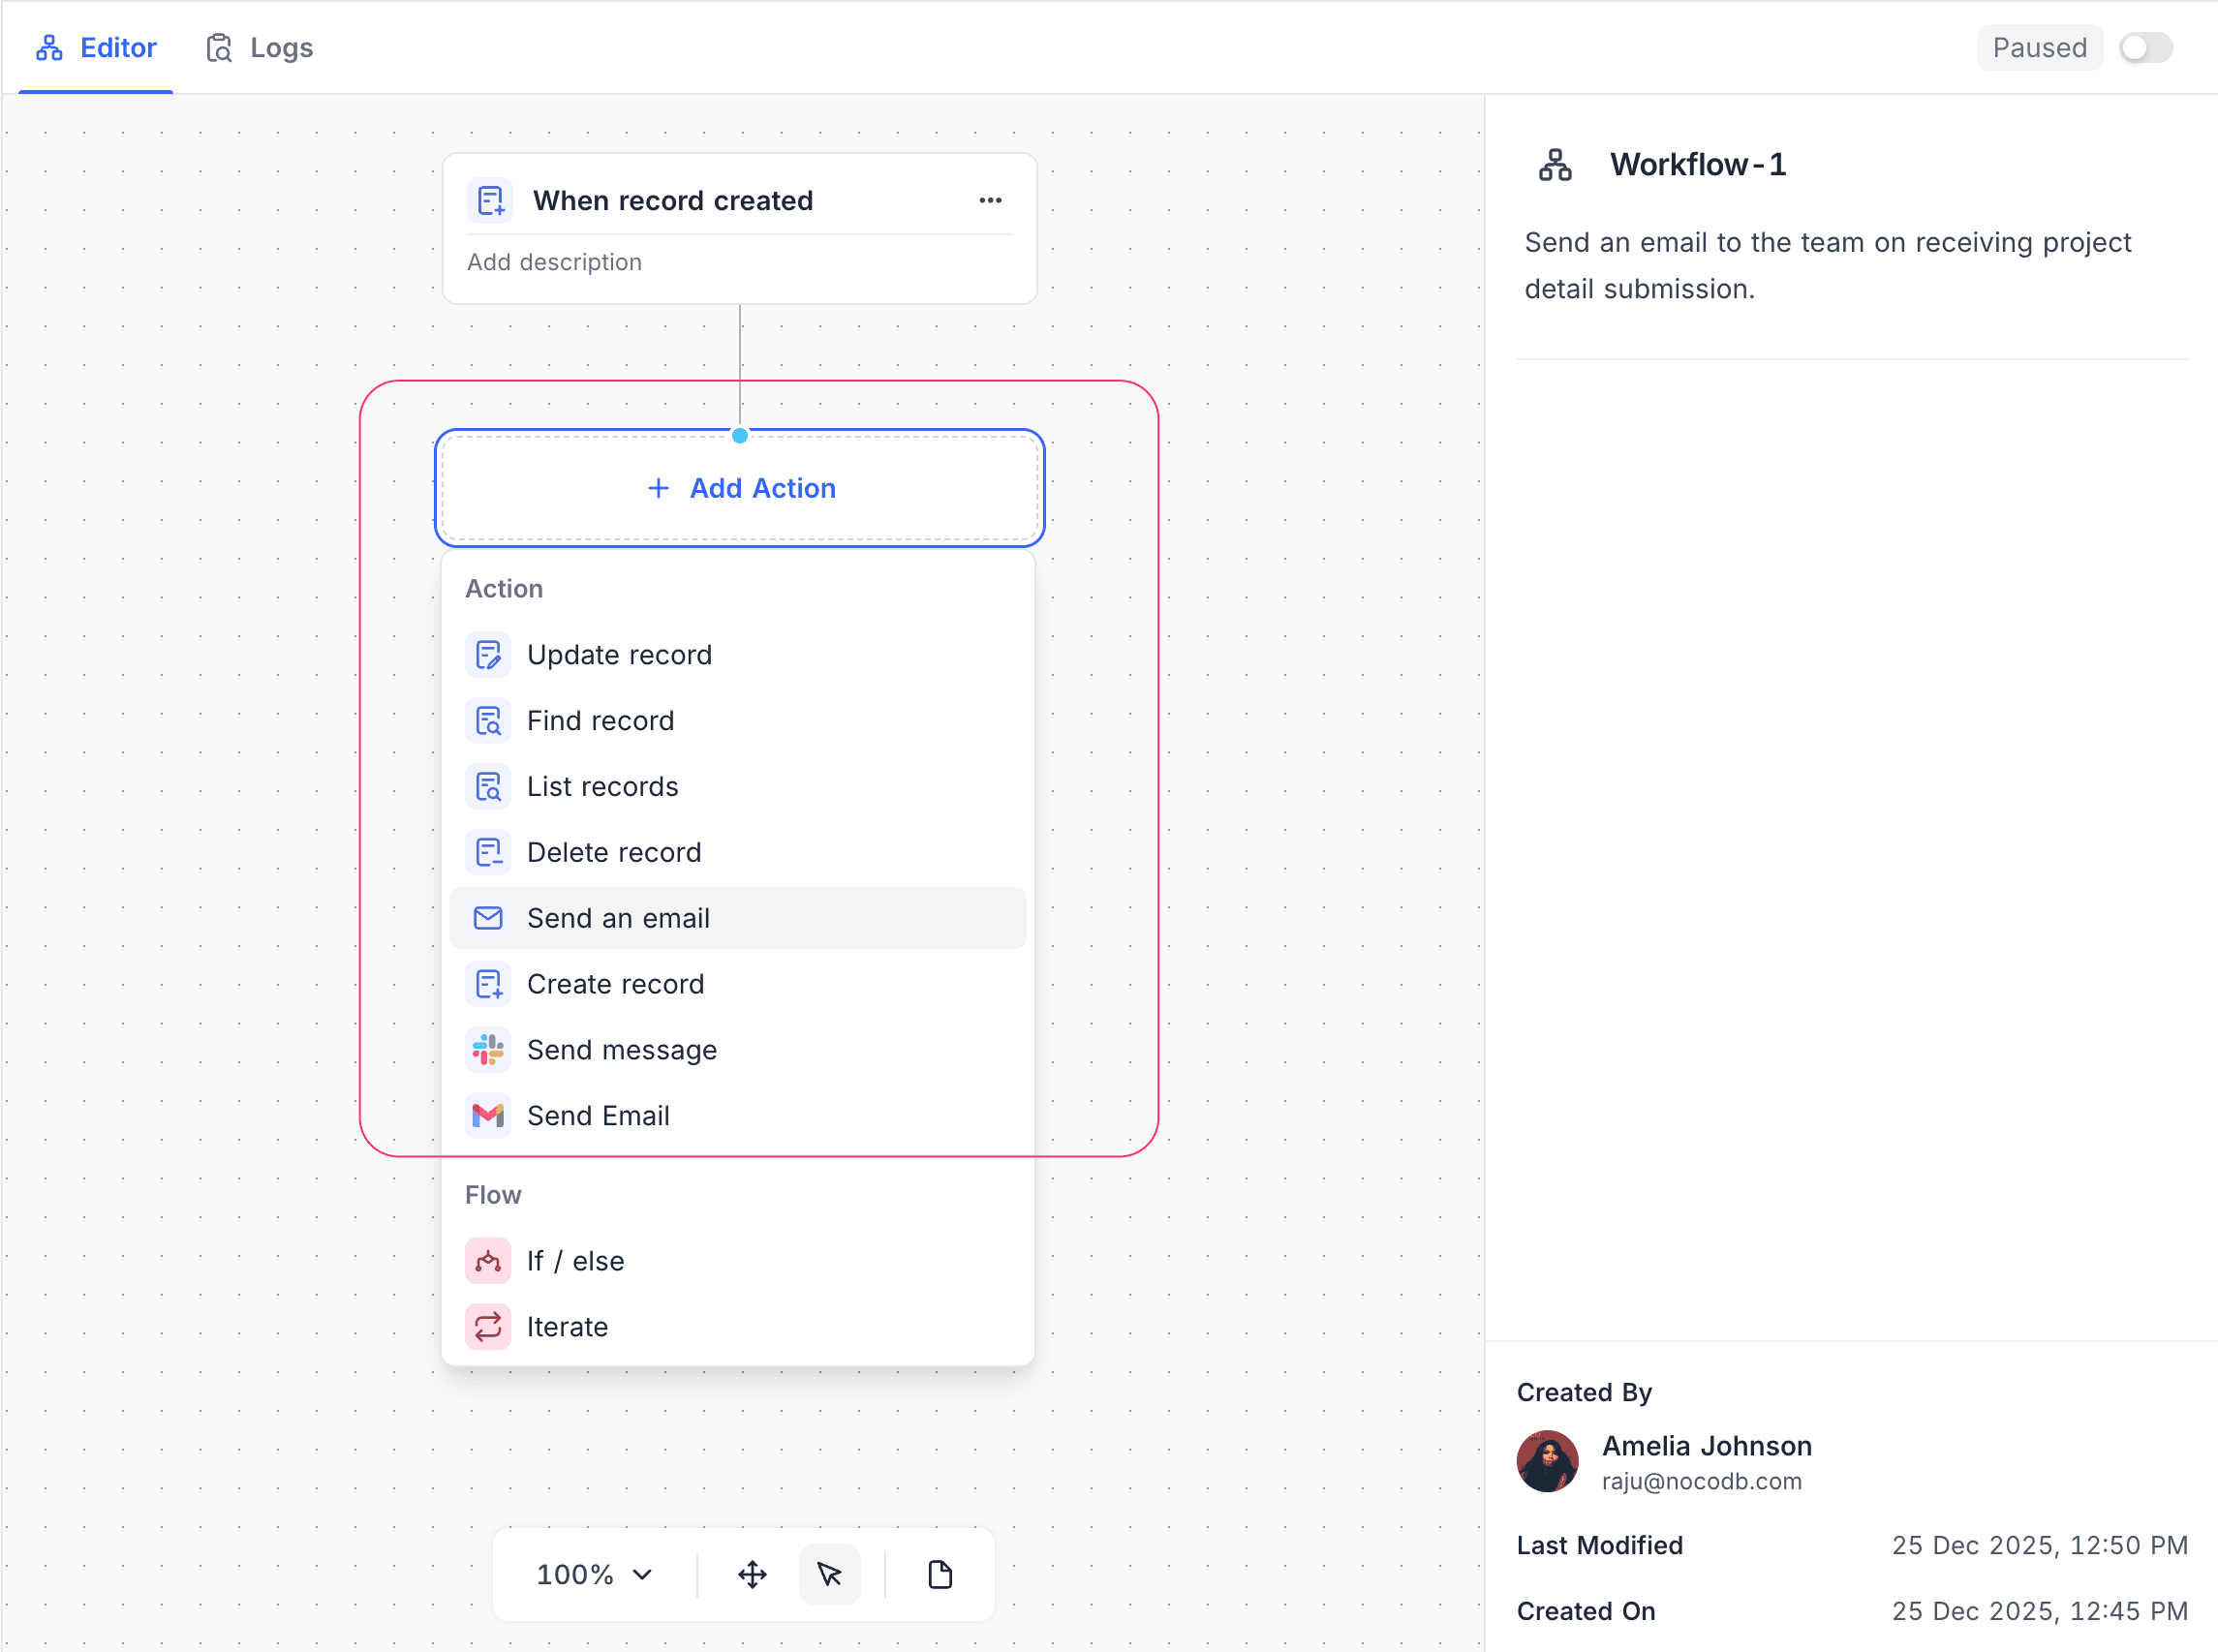
Add Action nodes: Define what occurs when the workflow is triggered. To do operations in sequence, connect many action nodes in a chain. Common action nodes are:
- Create / Update / Delete Record: Change data in a table
- Send Notification: Notify users through supported channels
-
Include Flow control nodes: [Optional] Add flow control nodes to control the execution logic, such as:
- If / else: Branch on a condition, based on field values or runtime data
- Iterate: Do actions for each item in a list
- Delay: Pause execution for a specified time
- Wait until: Pause execution until a condition is true
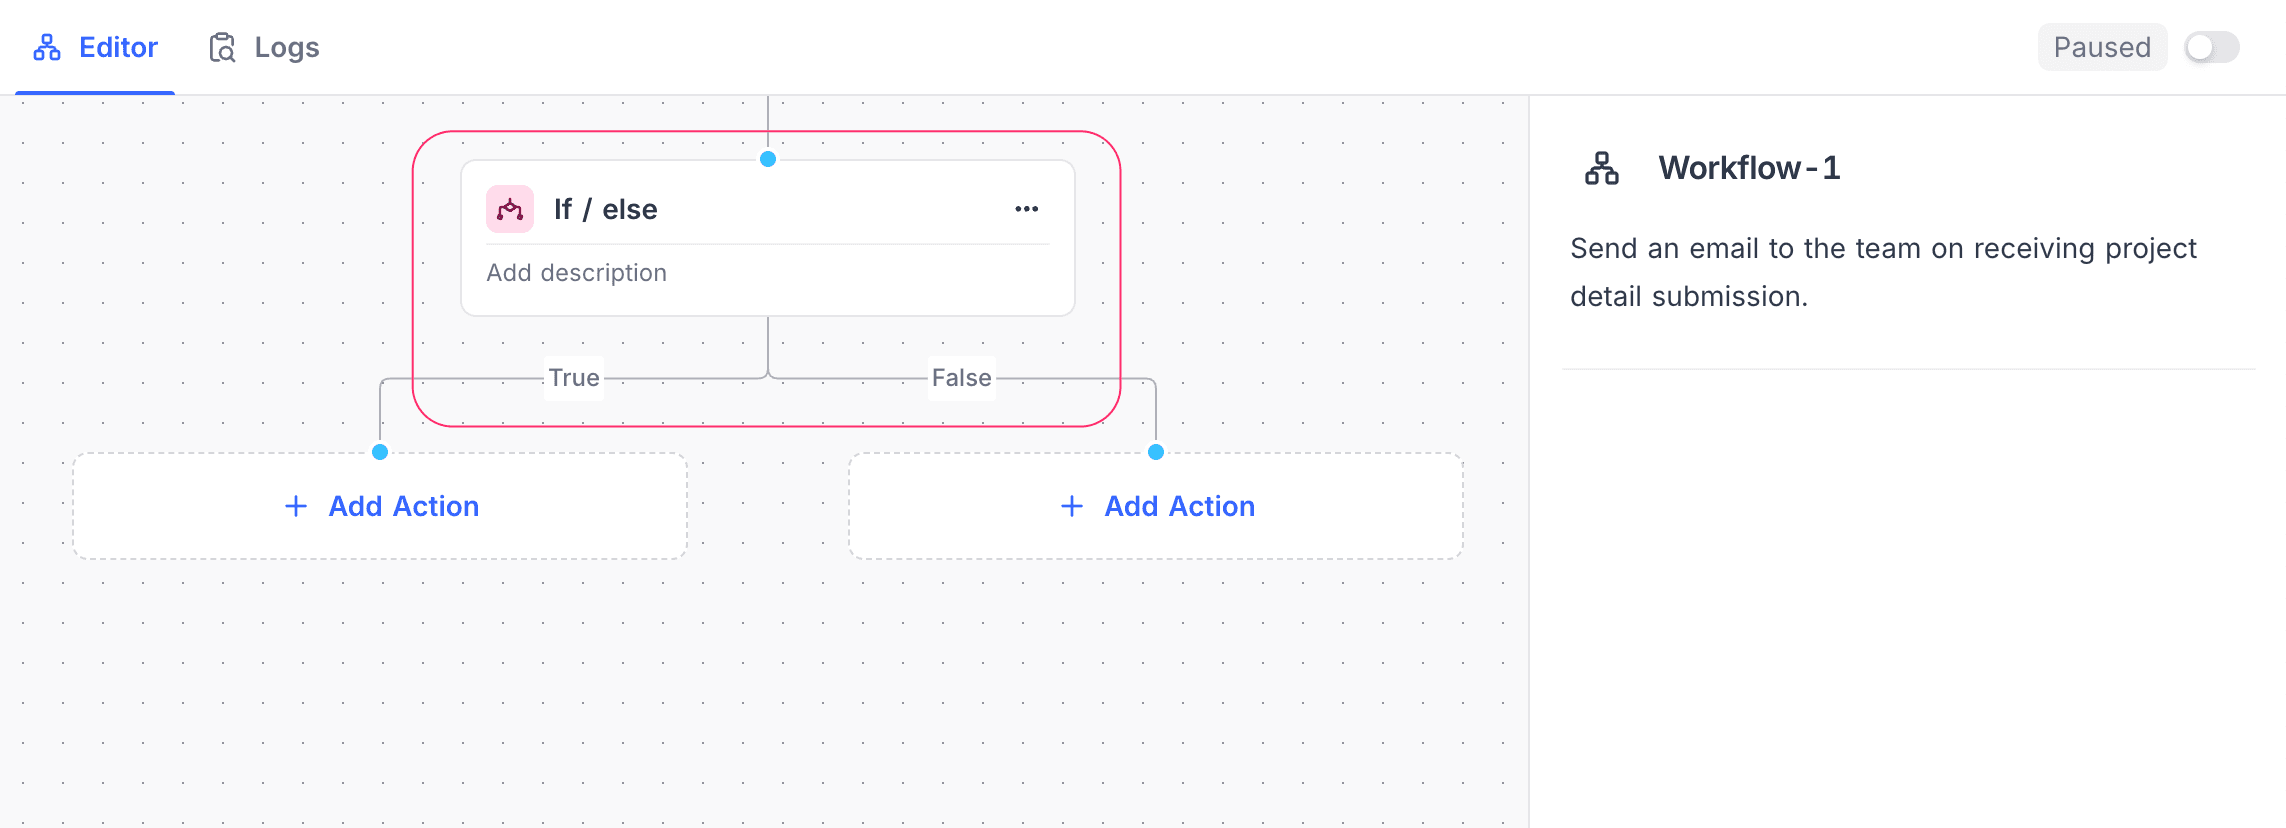
-
Test workflow: Use Test Step to test individual nodes. Make sure that each node has the correct configuration and works as expected.
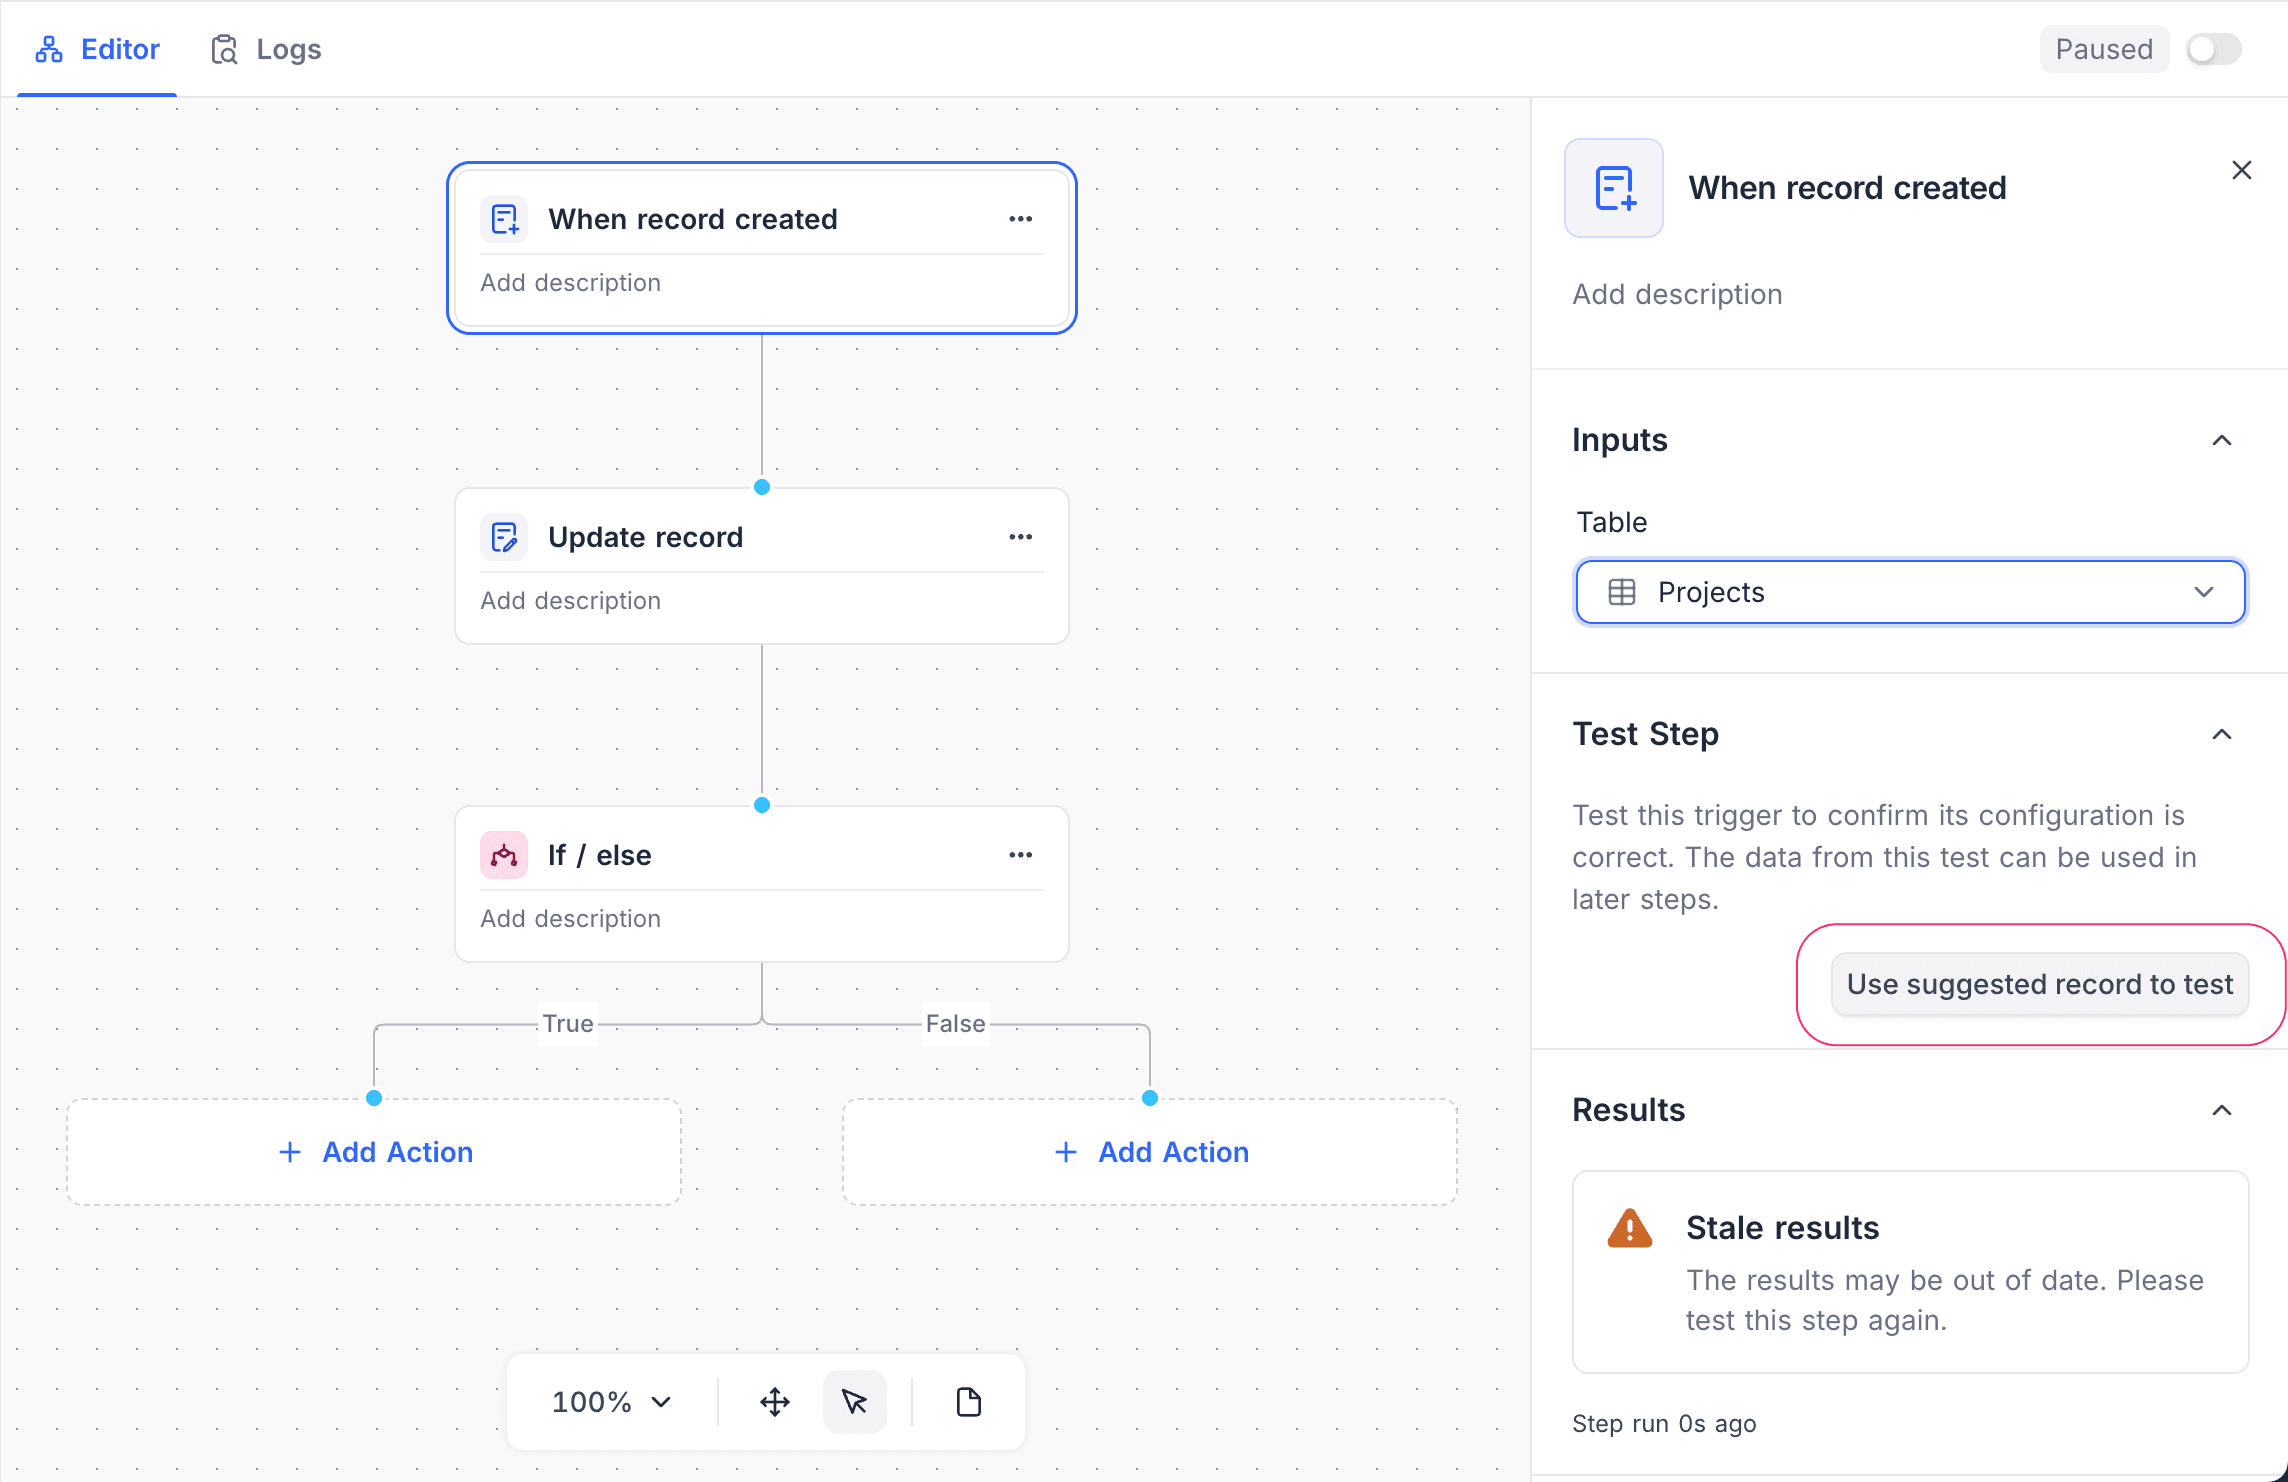
-
Publish workflow: When the configuration is correct, use the toggle button in the toolbar to enable the workflow. Then click Publish to save the changes. An enabled workflow runs automatically when it is triggered. Publish checks the configuration of every node again. If a node is not configured correctly, NocoDB does not publish the workflow and names the nodes to correct.
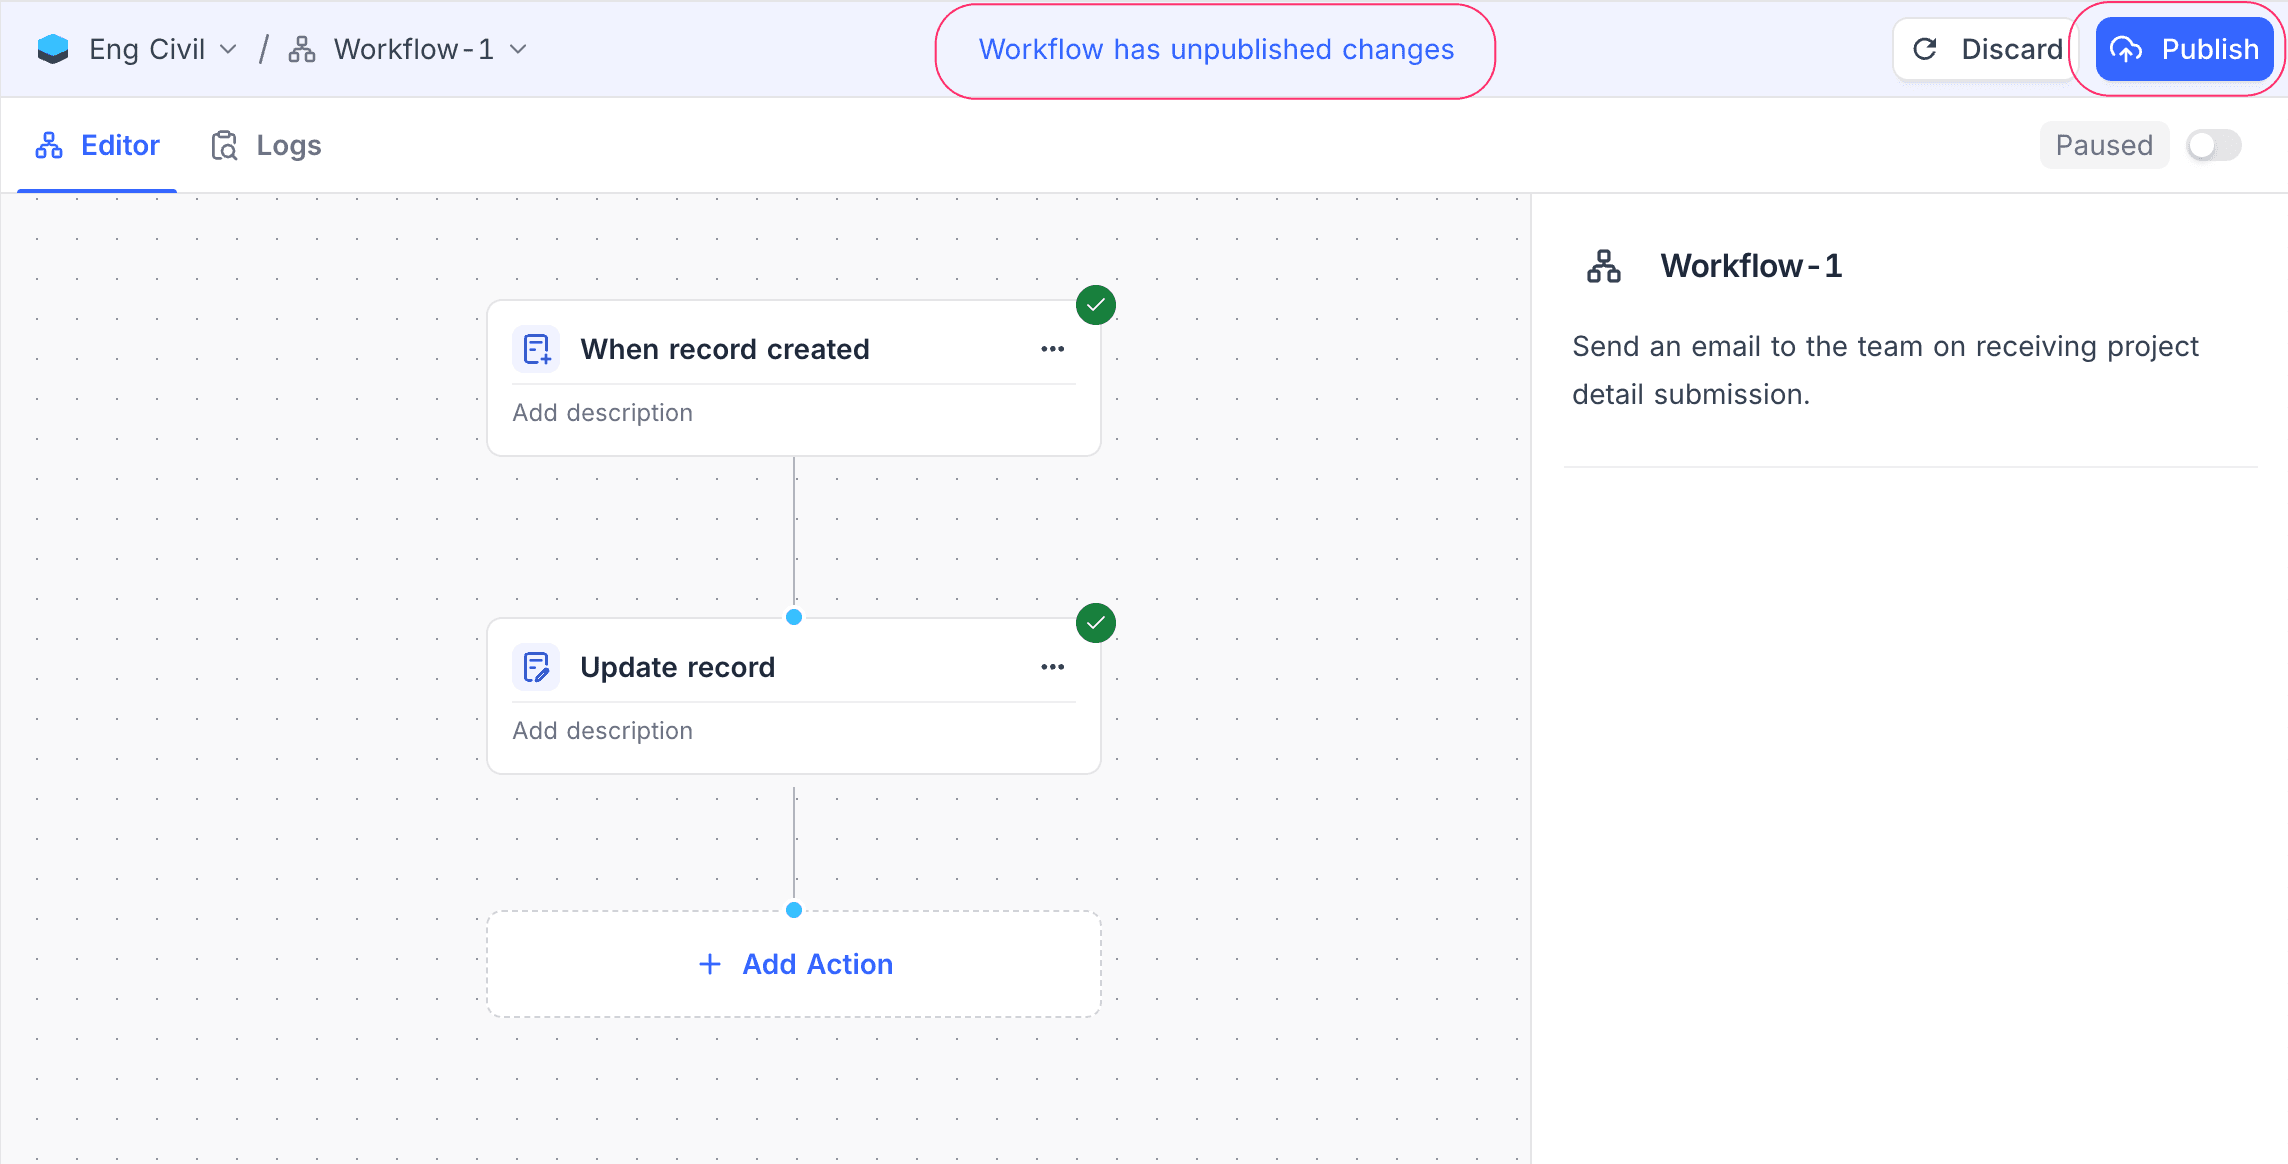
Automate from a table
To automate a table that you are working in, start the workflow from the table. NocoDB then sets the trigger on that table for you:
- In the topbar, click Automate.
- Click New workflow, then select what starts it, for example Record is updated or Clicks a button. NocoDB creates the workflow with that trigger and opens it in the editor.
- To use a trigger that is not in the list, such as a schedule or a webhook, select Other trigger….
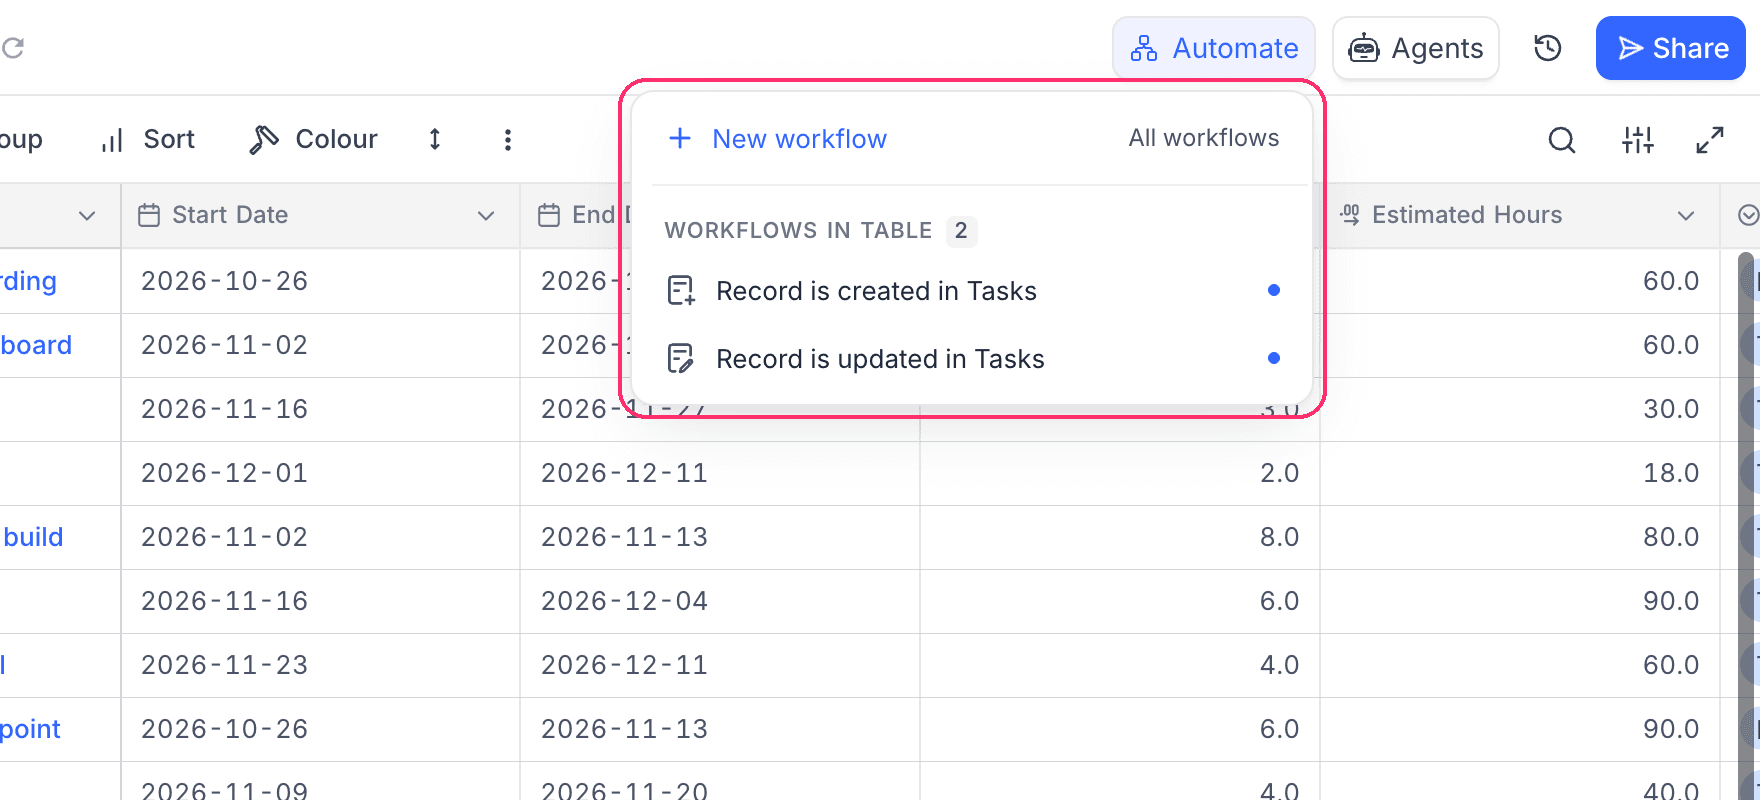
The same menu shows what already runs on the table: the workflows that a change to it starts, the workflows and scripts that its Button fields run, and the workflows that read or write it. A dot on a row marks a workflow that needs attention, for example one that is paused, has unpublished changes or failed its last run. Hover over the row to see which. All workflows lists every workflow and script in the project.
When you open a workflow or a script from this menu, click Back in the topbar to return to the table and view that you came from.
Use data from earlier steps
A node field can use the output of an earlier step. Click the field, then pick a value from the step list. NocoDB inserts the value as a chip. A step offers data only after you test it.
Some values have fields of their own, for example the record from a trigger. Click such a value to open its fields. To use the value itself instead of one field, select Insert on its row, or press Shift + Enter.
Transform an inserted value
A transform changes an inserted value before the node uses it, and you write no expression for it. Click the chip and select a transform. Transforms stack, and NocoDB offers only the ones that fit the type of the value.
| Category | Transforms |
|---|---|
| Text | Uppercase, Lowercase, Trim spaces |
| Number | Convert to number, Round, Round down, Round up, Absolute value |
| List | Count items, First item, Last item, Join with a separator |
| Date | Add time, by an amount of minutes, hours, days, weeks, months or years |
| Any value | Convert to text, Default if empty |
Count items reads Count characters when the value is text. To work on the expression itself, select Edit expression on the chip.
Availability
- Workflows are available on NocoDB Cloud (all plans) and on self-hosted deployments. The Community Edition includes 2 workflows per project. These workflows can use the record and manual triggers, the record action nodes, and the If and Iterate flow nodes.
- The Automate button in the topbar is not in the Community Edition.
- To use workflows, you must have the Creator role or a higher role in the project.
Last updated on